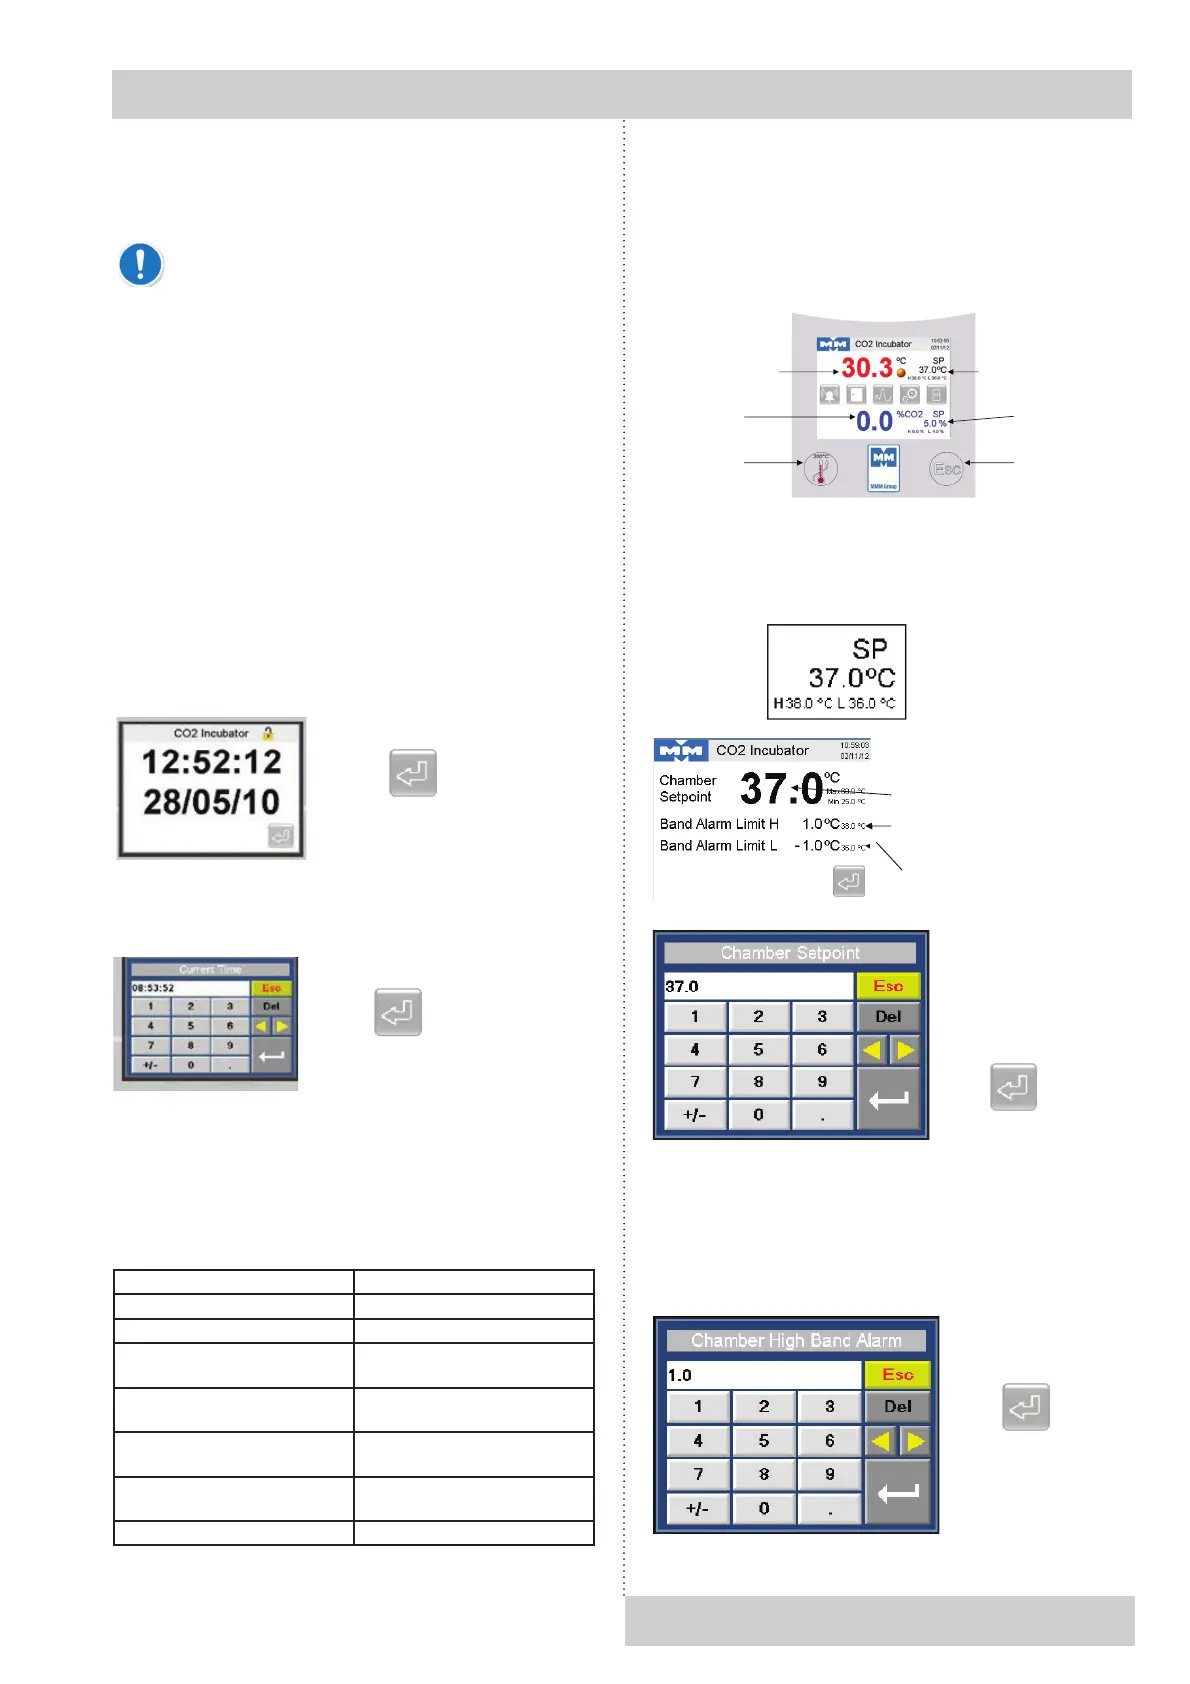
MAIN DISPLAY
The main screen shows chamber set points (SP) and
process values (PV). It also shows the status of any
alarm and has touch screen buttons for accessing further
functions.
5.4 CHANGING TEMPERATURE SET
POINTS AND HIGH / LOW ALARMS
To change the temperature set point, touch this area of the
main screen:
The high and low alarm limits are relative to the chamber set
point.
For instance if the set point is 37.0 °C and the high alarm
limit is + 1.0 °C then the alarm will trigger at 38.0 °C.
If the set point is changed to 36.5 °C then the high alarm will
trigger at 37.5 °C.
Instructions for use
CO
2
CELL Comfort 190_np_en 1301_mmm_V1.02 7
Plug the supplied power lead into the IEC connector on the
rear of the incubator.
Plug the other end of the IEC lead into the electrical supply.
In an emergency you may need to isolate
the incubator from the electrical supply by
disconnecting the mains supply plug. Make sure
that the mains supply plug is easily accessible.
5 GETTING STARTED
5.1 START UP
Insert the pre-formatted SD card (supplied) into the slot to
the right of the controller.
Turn on the unit using the power switch on the rear panel.
The controller will boot up and perform a self-check.
5.2 SETTING TIME AND DATE
After the controller has booted up, the time and date screen
will be shown. Time and date are shown in the format
hh:mm:ss and dd/mm/yy.
If the time and date are incorrect press the time display. This
screen will be shown:
5.3 FACTORY PRESETS
The following values are preset to allow you to work straight
away:
Parameter Value
Set Point, Temperature 37.0 °C
Set Point, CO
2
5.0 %
High temperature alarm +1.0 °C
relative to set point
Low temperature alarm -1.0 °C
relative to set point
High CO
2
alarm +1.0 °C
relative to set point
Low CO
2
alarm -1.0 °C
relative to set point
Door open alarm timer 30 seconds