Note: This guide does not replace the user manuals.Page 4-16
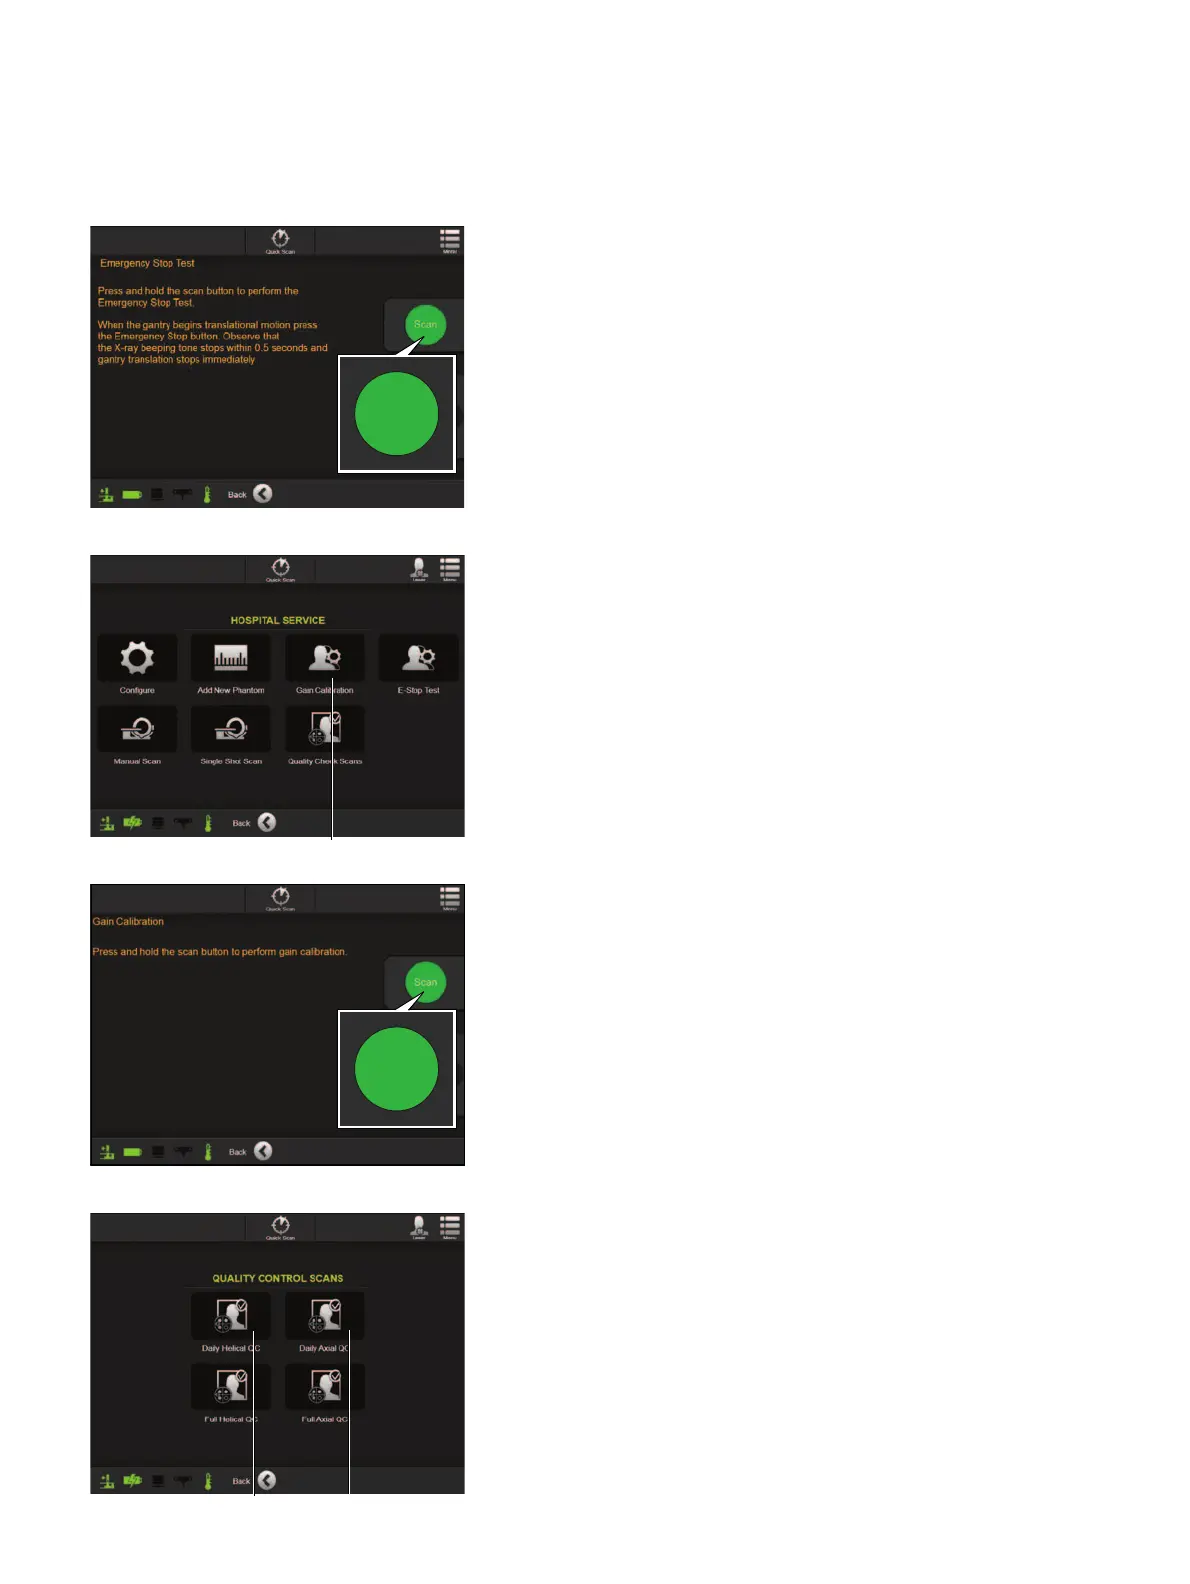
DAILY TASK 3 - GAIN CALIBRATION - STEP 1
• Allow up to 30 mins for
Airo
to reach its operating
temperature.
• Select
Hospital Service
from the
SERVICE
FUNCTIONS
screen.
• Enter password as prompted.
• Select
Gain Calibration
a from the
HOSPITAL
SERVICE
screen.
• Select
Next
to proceed when prompted.
NOTE: Ensure the field of view for
Airo
is clear.
DAILY TASK 2 - EMERGENCY STOP TEST -
STEP 2
• Remove the pendant and move to a safe area.
• Press and hold the
Scan
button and wait for the
gantry to move and beep tone to start.
• While holding the
Scan
button down, press the
E-
Stop
button on the pendant, ensuring the beeping
tone stops within 0.5 seconds and the gantry stops
immediately.
• Click
Next
to continue. Contact
Brainlab
if test fails.
DAILY TASK 3 - GAIN CALIBRATION - STEP 2
• Remove the pendant and go to a safe area, ensuring
the scanning area is also safe for X-ray exposure.
• Select and hold the
Scan
button.
• Select
Next
if the Gain Calibration is successful.
If not successful, evaluate the area and remove any
objects that might interfere with the scan and repeat
scan.
DAILY TASK 4 - QUALITY CHECK SCAN
• Select
Quality Check Scans
from the
HOSPITAL
SERVICE
screen.
• Select
Daily Helical QC
a and/or
Daily Axial QC
s (depending on clinical use).
• Position the phantom on the table top and align the
lasers as prompted (use Carbon X-tra only).
• Ensuring perfect alignment, click
Next
to continue.
• Remove the pendant and move to a safe area.
• Press and hold the
Scan
button until the yellow light
on the pendant goes out.
• Select
Next
and repeat as prompted for the
opposite scan direction if the scan is successful.
Scan
Scan
 Loading...