a. Units can utilize one of three different BMS system protocols; LonWorks
®
FTT-10, BACnet
®
MS/TP, and BACnet
®
TCP/IP. Please refer to the BMS
Manual 74-530 for installation instructions and the Controls Manual 74-510 for additional information.
Modine Manufacturing Company
1500 DeKoven Avenue
Racine, WI 53403
Phone: 1.800.828.4328 (HEAT)
www.modinehvac.com
© Modine Manufacturing Company 2020
74-511.0
Schedule (optional)
Changing Setpoints
6
a. Enter the main menu by pressing
and scroll down to line ‘G. Service’ and press . This menu allows access to several parameters for advanced
setup or control. This includes BMS Setup, Control Settings such as temperature lockouts or stage delays, and Manual Control of controller inputs/outputs.
b. Refer to the latest revision of the Controls Manual 74-510 for additional information.
Service
7
BMS Setup
8
a. The manufacturer menu provides access to parameters not typically required to be changed in the eld. These parameters include unit conguration,
controller input/output conguration, and reboot sequences. Please contact Modine Technical Service for assistance if required.
Advanced Information
9
Viewing / Clearing Alarms
10
5
a. If the unit is sending an alarm signal, the alarm icon on the display module will ash continuously:
i. Press to display the active system alarms. If there are multiple alarms, they may be viewed by pressing
or
.
ii. Details of the unit’s running conditions when the alarm occurred may be viewed by pressing after reaching the end of the alarm list.
iii. Pressing and holding the button will clear the ashing icon and all active alarms, and indicate there are no active alarms in the system.
iv.
The alarm log can be viewed by pressing . Press to return to the main screen. If an alarm persists, the alarm light will ash again.
a. Enter the main menu by pressing
and scroll down to line B. Setpoint and press
.
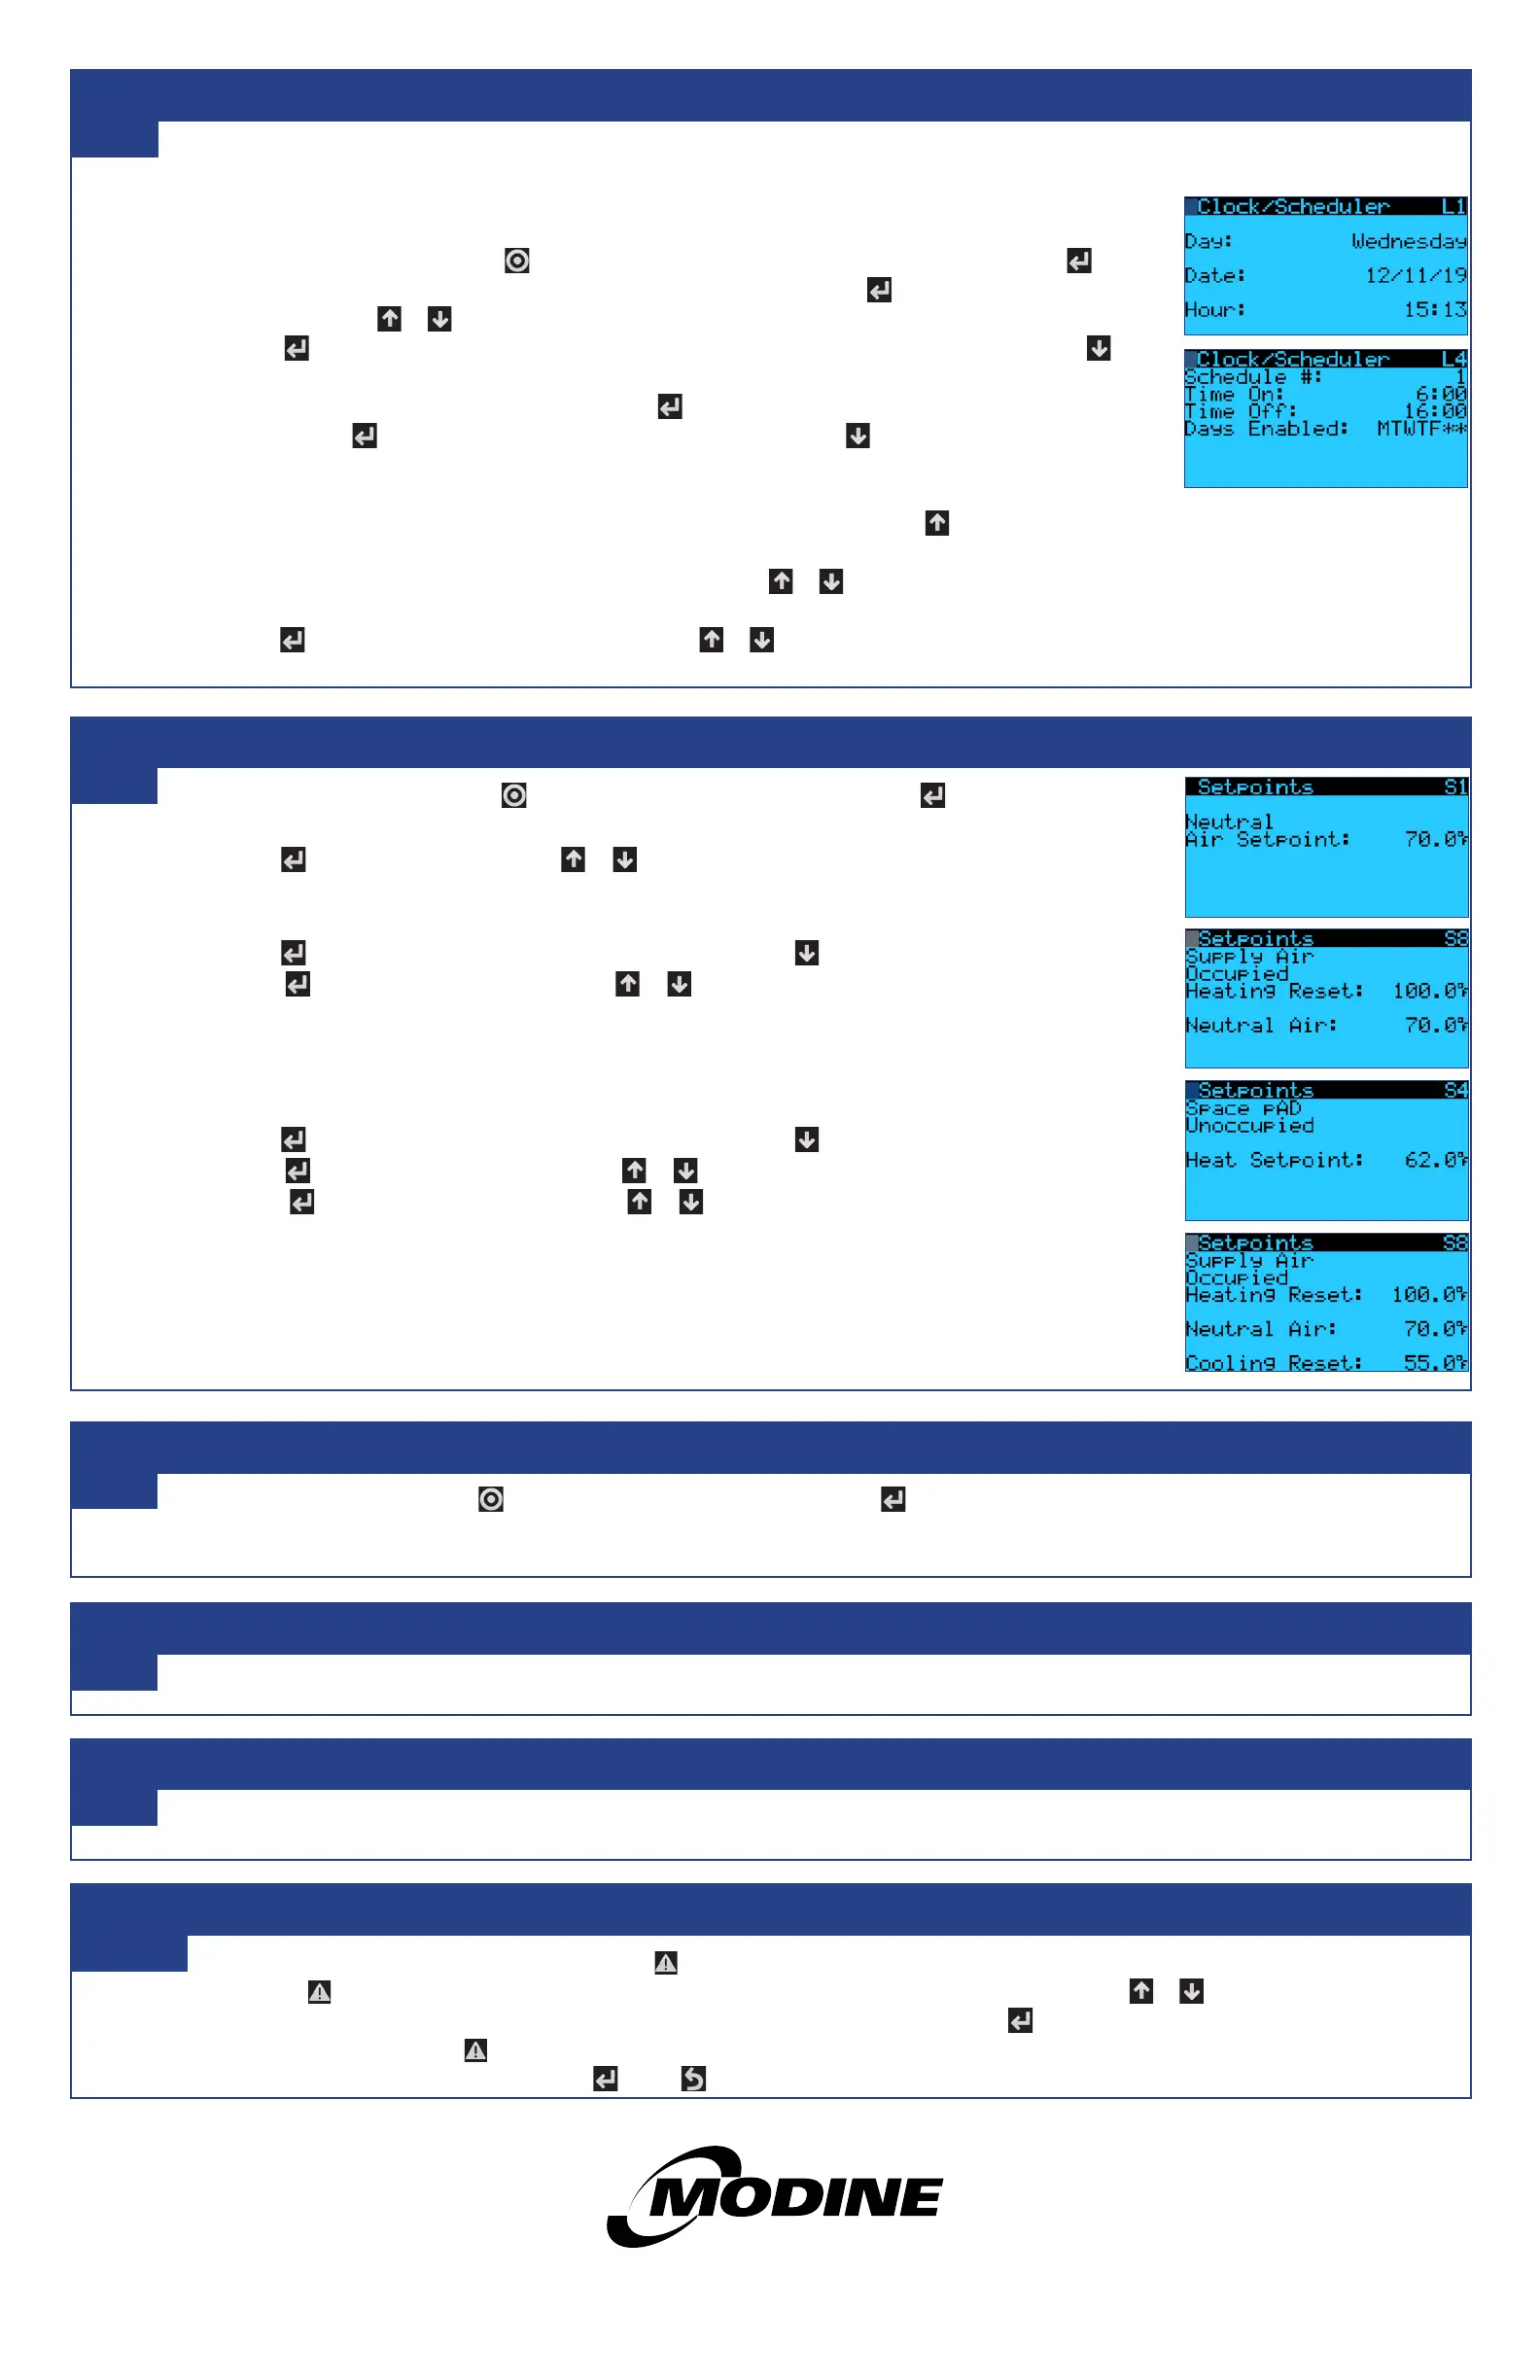
b. Occupied Setpoints without Space pAD
i. Press
to highlight ‘Neutral Air’. Use
or
to adjust the setting as needed. This setting will reect the
temperature of the Supply Air entering the space.
c. Occupied Setpoints with Space pAD
i. Press
until cursor is at the upper left corner of the screen. Use
to scroll to the ‘pAD Thermostat’ page.
ii. Press
to highlight the ‘Temperature’. Use
or
to adjust the setting as needed. This setting will
reect the space cooling setpoint. The space heating setpoint is determined by a default heating/cooling
band of 4°F. (For example, if the temperature is set at 74°F, the heating setpoint will automatically be set to
70°F.) Refer to publication 74-511 for additional adjustments.
d. Unoccupied Setpoints (requires Space pAD)
i. Press
until cursor is at the upper left corner of the screen. Use
to scroll to the ‘pAD Thermostat’ page.
ii. Press
to highlight ‘Unoccupied Cool’. Use
or
to adjust the setting as needed.
iii. Press
to highlight ‘Unoccupied Heat’. Use
or
to adjust the setting as needed.
e. Additional Setpoints for Cooling (requires a unit with cooling option)
The controller setup includes many other settings that are dependent on the unit conguration. Refer to the
latest revision of the Controls Manual 74-510 for additional information.
Note: The occupied and unoccupied settings can be changed from the Space pAD as well.
Units can be setup to operate on a schedule, although not required. The following explains custom schedule setup.
a. Customizing the 7-Day Schedule
i. For units running without BMS communication, the controller has a preset 7-day schedule dened by the internal
timeclock. The unit will run in occupied mode from 6:00am to 4:00pm, Monday through Friday, with no holidays.
ii. Enter the main menu by pressing
and scroll to line ‘C. Clock/Scheduler’ (shown at right) and press .
iii. The rst screen displays the current date and time. If this is not correct press
to highlight the eld that needs to
be changed. Use
or
to adjust the number as needed.
iv. Press
to move through adjustable setpoints until cursor is at the upper left corner of the screen. Use to
scroll to the next page.
v. Select the amount of schedules desires by pressing
to highlight ‘Number of Schedules’ eld and adjust the
number. Press
until cursor is at the upper left corner of the screen. Use
to scroll to the next page.
vi. The screen to the right will be the rst programmable schedule.
vii. Highlight the elds and adjust as needed to schedule the time and days of desired unit operation. To move to the
next time period, highlight the ‘Schedule #’ eld and adjust this number by pressing .
b. Customizing Holiday Schedules
i. Scroll to the ‘Holidays’ screen in the ‘Clock/Scheduler’ menu. Use
or
to adjust the number of holidays as
needed up to 16.
ii. Press
to move the cursor to each date range and use
or
to adjust the number as needed. If not all four
holiday ranges are required, the unused ranges can be left as ‘0/0-0/0’.
 Loading...