EasyManua.ls Logo

Moen 3320 User Manual

Moen 3320
8 pages
To Next Page IconTo Next Page
Page #1 background imageLoading...
Page #1 background image
Installation Guide
Guía de Instalación
Guide d’installation
Plumbers putty
Masilla de plomero
Mastic de plombier
HELPFUL TOOLS
For safety and ease of faucet replacement, Moen recommends the
use of these helpful tools.
HERRAMIENTAS ÚTILES
Para que el cambio de la llave sea fácil y seguro, Moen le recomienda
usar estas útiles herramientas.
OUTILS UTILES
Par mesure de sécurité et pour faciliter l’installation, Moen suggère
l’utilisation des outils suivants.
Please Contact Moen First
For Installation Help, Missing or Replacement Parts
(USA)
1-800-BUY-MOEN (1-800-289-6636)
Mon - Fri 8:00 AM to 7:00 PM, Eastern
Sat. 9:00 AM to 3:00 PM Eastern
WWW.MOEN.COM
(Canada)
1-800-465-6130
Mon - Fri 7:30 AM to 8:00 PM, Eastern
WWW.MOEN.CA
Automatic Compensating Valves:
Posi-Temp® and CFG®: For use with Showerheads rated at 5.7 L/min
(1.5 gpm) or higher
ExactTemp® and ioDigital™: For use with Showerheads rated at 9.5 L/
min (2.5 gpm) or higher
Moentrol®: For use with Showerheads rated at 4.9 L/min (1.3 gpm)
or higher
Por favor, contáctese primero con Moen
Para obtener ayuda de instalación, piezasfaltantes o de recambio
01-800-718-4345
Lunes a viernes de 8:00 a 20:00 hs. (Costa Este)
Sáb. 8:00 a 18:30 hs. (Costa Este)
WWW.MOEN.MX
Válvulas de compensación automática:
Posi-Temp® y CFG®: para usarse con rosetas de 5.7 L/min (1.5 gpm)
o más
ExactTemp® y ioDigital™: para usarse con rosetas de 9.5 L/min (2.5
gpm) o más
Moentrol®: para usarse con rosetas de 4.9 L/min (1.3 gpm) o más
Veuillez d’abord contacter Moen
en cas de problèmes avec l’installation, ou pour obtenir toute pièce
manquante ou de rechange
1-800-465-6130
Du lundi au vendredi : de 7 h 30 à 20 h, HE
WWW.MOEN.CA
Soupapes de compensation automatique
Posi-Temp® et CFG®: À utiliser avec des pommes de douche dont le
débit nominal est de 5,7 L/min (1,5 gpm) ou plus
ExactTemp® et ioDigital
MC
: À utiliser avec des pommes de douche
dont le débit nominal est de 9,5 L/min (2,5 gpm) ou plus
Moentrol® : À utiliser avec des pommes de douche dont le débit
nominal est de 4,9 L/min (1,3 gpm) ou plus
INS282C - 5/14
MOENTROL® WITH BUILT IN TWO AND THREE FUNCTION
TRANSFER VALVE INSTALLATION INSTRUCTIONS
MODELS 3320, 3330, 3350
INSTRUCCIONES PARA LA INSTALACION DE LA VALVULA
MEZCLADORA MOENTROL® EN EL DOS Y DE TRES FUNCIONES
MODELOS 3320, 3330, 3350
MOENTROL® MUNI D’UN ROBINET COUPLEUR DANS LE DEUX
ET À TROIS FONCTIONS  DIRECTIVES D’INSTALLATION
MODÈLES 3320, 3330, 3350
Question and Answer IconNeed help?

Do you have a question about the Moen 3320 and is the answer not in the manual?

Moen 3320 Specifications

General IconGeneral
BrandMoen
Model3320
CategoryControl Unit
LanguageEnglish

Summary

Installation Guide

Moentrol Valve Installation Instructions

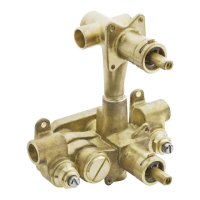
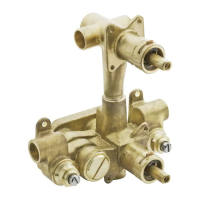
Step-by-step instructions for installing Moentrol valves with 2 and 3 function transfer capabilities.

Helpful Tools for Installation

Recommended tools by Moen to ensure safe and easy faucet replacement and installation.

Parts List and Identification

Moentrol Valve Component Overview

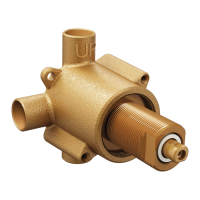
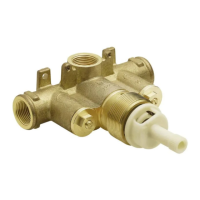
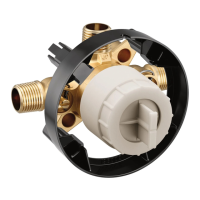
Detailed identification of all parts included in the Moentrol valve assembly kit.

Old Faucet Removal and Preparation

Tips for Removing Old Faucets

Crucial safety tips and procedures for safely removing an existing faucet before installing a new one.

Flushing Instructions

System Flushing Procedure

Detailed steps for flushing the plumbing system after valve installation to prevent debris damage.

Wall Opening and Valve Positioning

Cutting Wall Hole for Thick Walls

Guide for tracing and cutting the wall opening for installations in walls thicker than 3/16 inch.

Cutting Wall Hole for Thin Walls

Guide for tracing and cutting the wall opening for installations in walls thinner than 3/16 inch.

Valve Body Installation

Positioning for Thick Wall Installation

Instructions for flush mounting the valve body in thick walls, including plaster ground use.

Positioning for Thin Wall Installation

Instructions for positioning the valve body in thin walls, keeping the plaster ground in place.

Pipe Connections and Soldering

Connecting Copper and IPS Piping

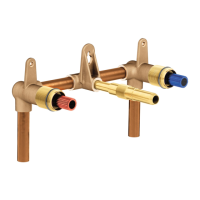
Steps for connecting copper and IPS piping to the valve, including adapter installation.

Cartridge Removal for Soldering

Essential steps to remove cartridges before soldering copper pipes to protect them from heat.

Warranty Information

Moen Limited Lifetime Warranty Details

Explains Moen's limited lifetime warranty coverage, exclusions, and how to make a claim.

Related product manuals