4
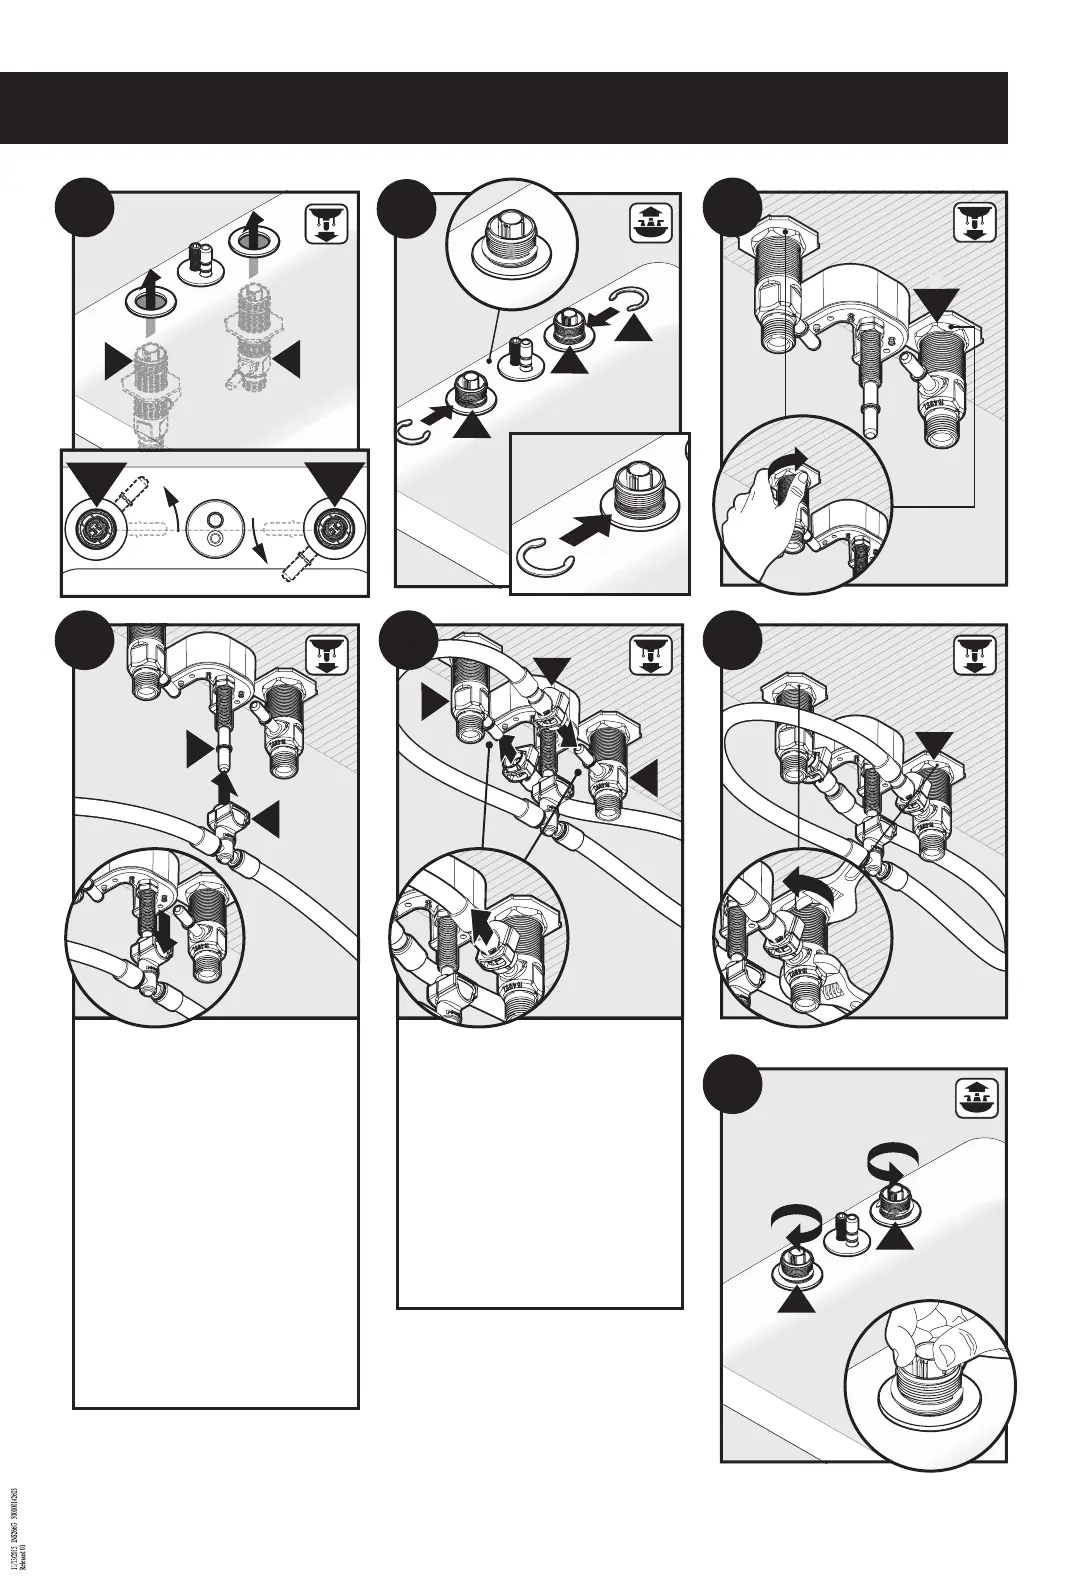
Attach Hose (L) to the bottom of the Spout
Shank (A). Push hose (L) up as far as possible,
until a “click” is heard. Tug downward to test
engagement. If necessary, click button to
disengage Hose (L).
Conecte la manguera (L) a la parte inferior del
tubo roscado del surtidor (A). Empuje la
manguera (L) hacia arriba todo lo posible
hasta oír un clic. Tire hacia abajo para probar si
está enganchada. Si es necesario, haga clic en
el botón para desenganchar la manguera (L).
Fixer le tuyau (L) au bas de la tige du bec (A).
Pousser sur le tuyau (L) aussi loin que possible
jusqu'à ce que vous entendiez un « clic ». Tirer
vers le bas pour tester l’enclenchement. Au
besoin, appuyer sur le bouton pour désengag-
er le tuyau (L).
Follow the same procedure as in step 11 to
attach the Hose (L) to the Valve Bodies (F
& J). Listen for the ”click” and tug to test
engagement.
Siga el mismo procedimiento que en el paso
11 para sujetar la manguera (L) a los cuerpos
de las válvulas (F y J). Cuando haga clic, jale
para revisar que haya quedado bien ajustada.
Suivre la même procédure qu’à l’étape 11 pour
xer le tuyau (L) aux corps des soupapes (F et
J). Écouter pour entendre le «clic» et tirer sur
le tuyau pour tester son enclenchement.
INS266G - 11/15
I
x2
J
B
F
x2
I
x2
F
J
J
L
F
1
2
L
A
J
F
J
F
 Loading...