INS10838B - 4/19
11
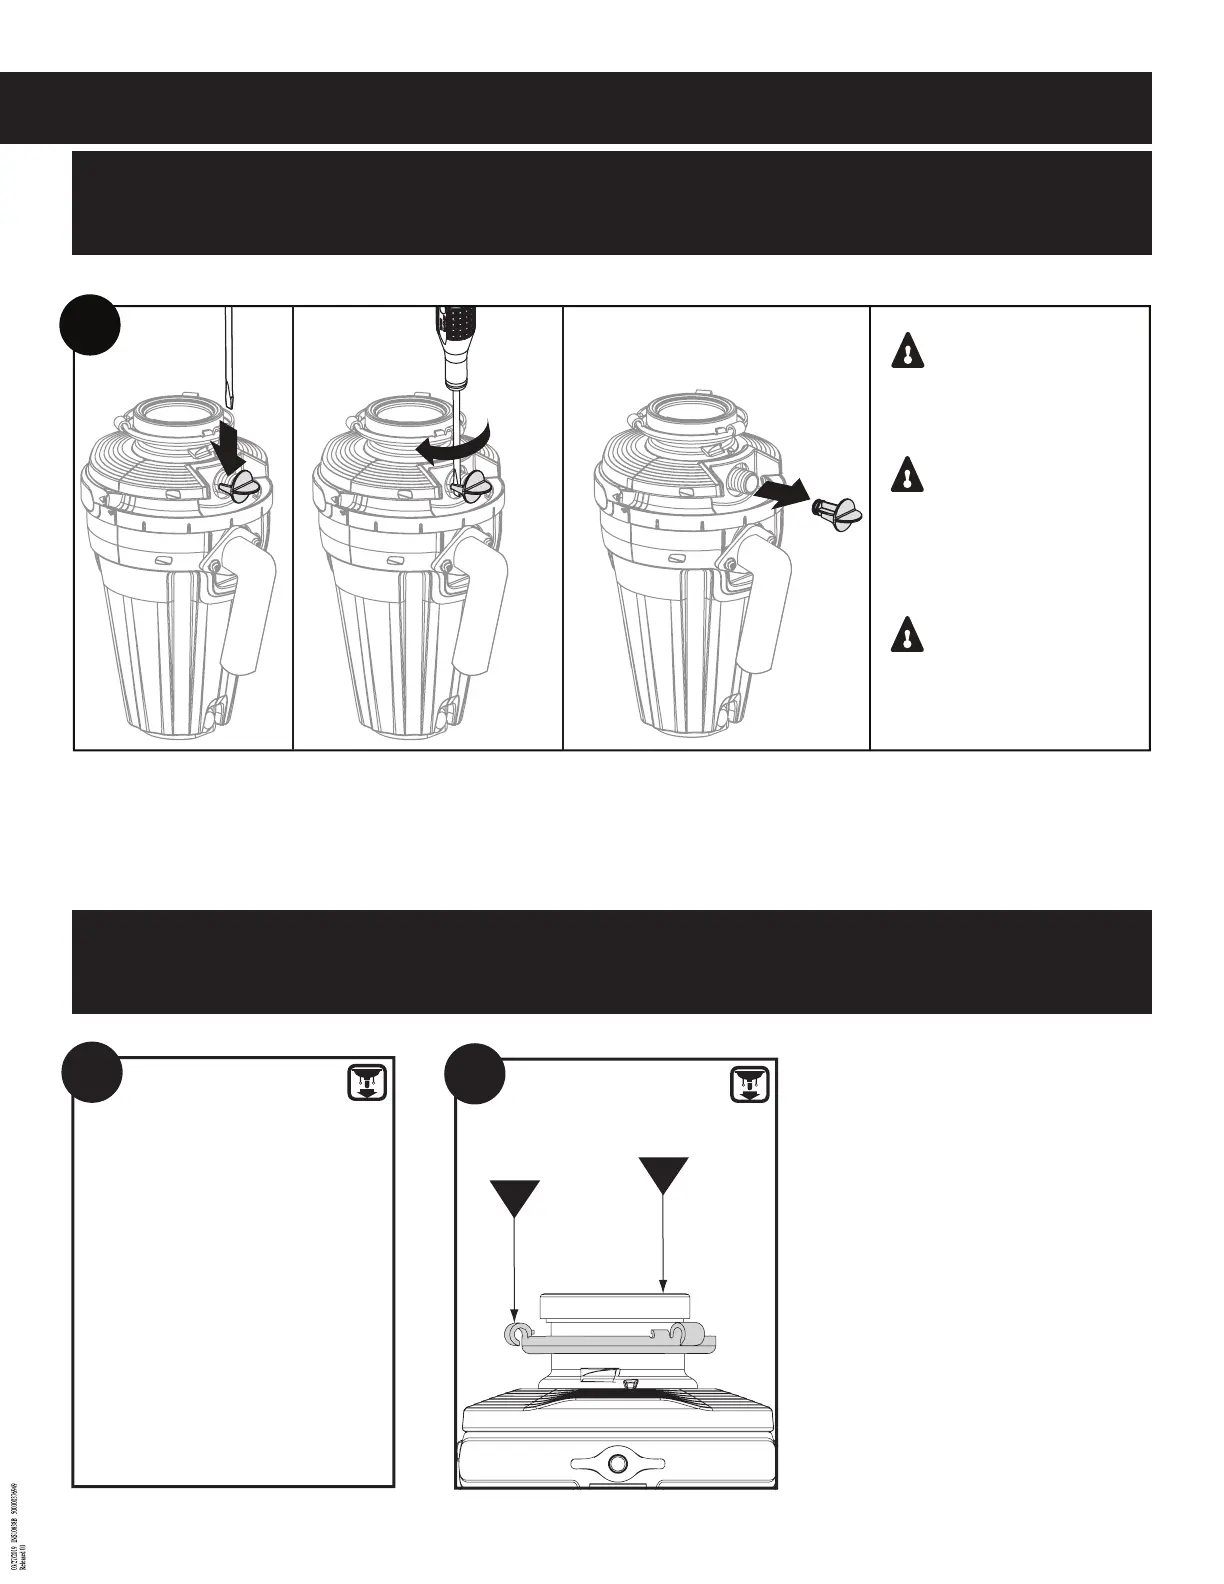
1. If you do not have a dishwasher, proceed to Step 14.
2. Remove the dishwasher drain plug by lifting the retention tabs with a screwdriver.
1. Si no tiene lavavajilla, siga al Paso 14.
2. Retire el tapón del desagüe del lavavajillas levantando las aletas de retención con un destornillador.
1. Si vous n’avez pas de lave-vaisselle, passer à l’étape 14.
2. Enlever le bouchon de bonde du lave-vaisselle en écartant les onglets de retenue à l’aide d’un tournevis.
13
Caution: Once plug is
removed, it is not intended
for re-use, and may result in
possible leaks.
Advertencia: Una vez
retirado el tapón, no está
diseñado para ser reutilizado y
puede dar como resultado
posibles fugas.
Mise en garde : Une fois le
bouchon enlevé, il ne doit
pas être réutilisé, car sa
réutilisation pourrait causer
des fuites.
CONNECT DISPOSAL TO MOUNT ASSEMBLY
CONECTE EL TRITURADOR AL CONJUNTO DE MONTAJE
RACCORD DU BROYEUR À L’ASSEMBLAGE DE MONTAGE
Before connecting the disposal to the mounting assembly under
the sink, check that the Lower Mounting Ring (I) is in place and
the Cushion Mount (H) is engaged securely around the top lip of
the disposal.
Antes de conectar el triturador al conjunto de montaje debajo del
fregadero, verique que el anillo de montaje inferior (I) esté en su
lugar y que el montaje amortiguador (H) esté bien enganchado
alrededor del labio superior del triturador.
Avant de raccorder le broyeur à l’assemblage de montage sous
l’évier, vérier que l’anneau de montage inférieur (I) est bien placé
et que le support compressible (H) est bien enclenché autour de la
lèvre supérieure du broyeur.
Cushion Mount
Montaje amortiguador
Support compressible
H
Lower Mounting Ring
Anillo de montaje inferior
Anneau de montage
inférieur
I
15
For installation requiring hardwire
electrical connections, proceed to
Page 15.
Para instalaciones que requieran
conexiones de cableado eléctrico,
vaya al Paso 15.
Pour une installation exigeant un
raccord électrique câblé, passer à la
page 15.
14
ONLY FOR INSTALLATIONS WITH DISHWASHER CONNECTIONS
SÓLO PARA INSTALACIONES CON CONEXIONES PARA LAVAVAJILLA
POUR INSTALLATION AVEC RACCORDS DE LAVE-VAISSELLE SEULEMENT
 Loading...