7
holes provided on the wheel.
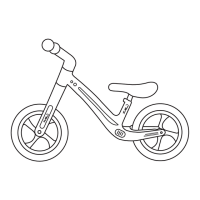
6. Repeat with the front wheels. Place a fl at metal washer over the longer metal pin, and then thread
it over the wheel (all wheels are the same for both front and rear of the vehicle) and the front of the
body as shown in Figure 3-4.
7. Put the pads on the outside of the mounted front wheels by pressing the protruding parts into the
holes provided on the wheel.
8. Put the handlebar with the handles on the front part of the body. The buttons on both sides should
pop out and you will hear a click, which indicates that the steering wheel is properly seated (Fig. 5)
9. In order to adjust the steering wheel to the appropriate height for the child, press both buttons
simultaneously and pull the steering wheel up or down.
10. Use a cross-head screwdriver to unscrew the saddle. Under the saddle, there is a container for three
AA batteries and a container for soap bubbles (fi g. 6-7). Refi ll the containers, making sure the bubble
fl uid is properly sealed in the container and does not cause any leakage. ATTENTION! The escaping
fl uid may damage the device.
11. In the center of the steering wheel there is a button that functions as a horn (fi g.8).
12. Just above the saddle, on the body of the vehicle, there is another, smaller button, pressing which
turns on the headlight.
13. Pressing the button again activates the soap bubbles function (fi g.11). ATTENTION! The bubble
function should not be used for more than 3 minutes. After 3 min. Turn off the bubbles and wait half
a minute. After half a minute, you can turn on the bubble function again.
14. The next pressing of the button turns off all functions.
MAINTENANCE OF THE PRODUCT
The condition of the bike should be checked regularly. Cleaning and maintaining the bike have to be done
by an adult. The product should be cleaned with a damp cloth or a sponge. Protect the product from dust,
moisture, extremely high and low temperatures, fall, etc. Only grease the moving parts of the bike with a
silicon-based product. Excess of the grease should be wiped away using a clean cloth. The bicycle’s screws
and bolts should be checked regularly. Exchange and repair parts only when needed. Keep in a dry place.
Keeping the bike in direct sunlight may cause the plastic parts to bend. Before each use check the bike for
any damage make sure that all screws securing the individual elements of the bike are properly tightened.
Worn or damaged elements should be replaced with new ones at an authorized service centre.
BATTERY MANUAL
You should use 2 x AA battery
Not included
• Do not mix different types of batteries or new and used batteries,
• Do not mix alkaline, standard (carbon-zinc) and rechargeable batteries at the same time,
• Do not recharge non-rechargeable batteries,
• Rechargeable batteries may only be charged under adult supervision,
• Batteries intended for charging should be removed from the toy before charging,
• Batteries must be inserted with the correct polarity (+ and -),
• Exhausted batteries should be removed from the toy,
EN
 Loading...