The Monport CW-5000 Series Chiller is an industrial chiller designed to provide optimal cooling for CO2 laser tubes, ensuring their longevity and performance. This manual details the installation, operation, and maintenance of the CW-5000 series chillers, emphasizing customer service and clear instructions.
Function Description:
The primary function of the Monport CW-5000 Series Chiller is to circulate and cool water through a CO2 laser tube, maintaining a stable operating temperature. This prevents overheating, which can damage the laser tube and reduce its lifespan. The chiller features an intelligent startup mode with factory-controlled settings, designed to optimize cooling performance. It also incorporates various alarm systems to alert users to potential issues such as high or low room temperature, high or low water temperature, sensor failures, and water flow obstructions. The chiller is designed for ease of use, with clear indicators for alarm status, normal operation, and water level.
Important Technical Specifications:
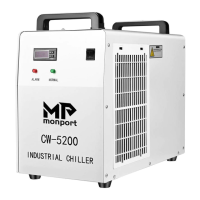
The Monport CW-5000 series chillers can draw approximately 4.6 to 6.5A of power, depending on whether the compressor is on or off. It is highly recommended to use a dedicated wall outlet rated at 15A or better for power supply. The chiller requires purified or distilled water for operation, with a capacity of six liters (almost two gallons). The optimal operational temperature range for a CO2 laser tube is 15° - 25°C (59° - 77°F), and the chiller's intelligent mode aims to keep the laser tube within 2° of the ambient room temperature. The chiller is equipped with a power socket (with a spare fuse), water tube inlet and outlet, a water supply port, a power switch, a temperature display, an error indicator light (red), a normal indicator light (green), a water level observation window, and radiator fans. An optional water flow sensor connector (metal Aviation plug) is available for lasers not already equipped with flow protection.
Usage Features:
- Installation: Installation is straightforward. Users need to open the water supply port and fill the tank with purified or distilled water. The water level observation window helps monitor the filling process. It's crucial not to start the chiller without the proper water level to avoid damaging the internal pump.
- Water Line Connection: The chiller ships with protective caps or short hoses over the inlet and outlet fittings, which must be removed. Water hoses are connected from the chiller's inlet to the laser's water outlet, and from the chiller's outlet to the laser's water input. Hose clamps are provided to secure these connections.
- First Run Power-On: Before turning on the power switch, users should press and hold both the up and down arrows on the controller. After turning the power switch to the "on" position, an alarm will sound, and the LED screen will display "rE." Releasing the arrows will initiate the intelligent startup mode. It's important not to power off the chiller during startup, which can take 2 to 5 minutes, and to allow it to operate for at least 5 minutes before powering off to prevent damage.
- Leak Check: After installation, all water connections and the water indicator gauge should be checked for leaks during the first 10 minutes of operation. The laser's back cover should also be opened to ensure water fills the tube and flows correctly.
- Placement: The chiller should be located in an area with no obstructions, maintaining at least one foot of clearance around it for proper airflow.
- Intelligent Mode: The chiller's "Intelligent Mode" is highly recommended as it maintains the laser tube temperature within 2° of the ambient room temperature, which is optimal. Operating the tube significantly below ambient temperature can lead to condensation and damage.
- Alarm System: The chiller has built-in alarms for various conditions:
- E1: Room temperature too high.
- E3: Water temperature too low.
- E2: Water temperature too high (after prolonged use).
- E4: Failed room temperature sensor.
- E5: Failed water temperature sensor.
- Red LED (no error message): Water flow alarm, indicating an obstruction in the water line.
- Audible alarms accompany most error codes. The RST button can silence audible alarms for E2.
- Custom Settings: While possible to turn off intelligent mode and use custom settings, it is strongly advised against, as improper settings can damage the laser tube or chiller.
Maintenance Features:
- Filter Cleaning: The chiller has two ventilation doors, one on each side, with fitted filters. These filters should be washed under running water at least once every 40 hours of use or weekly. Dust buildup can cause the chiller to overheat and malfunction. The outside of the chiller and vent doors should also be wiped down during cleaning.
- Water Change: It is highly recommended to change the water at least once every 4 weeks. If optional water conditioning instructions (adding algicide and dishwashing liquid) are followed, the water may last up to 3 months, but weekly inspection of the CO2 tube's water color is advised.
- Contamination Disinfection: If discoloration (cloudy water) is observed in the CO2 tube, it indicates contamination. The tank and lines need immediate disinfection. This involves draining and refilling the water tank, adding 6-8 capfuls of unscented laundry bleach, running the chiller for 45-60 minutes, and then draining and refilling again.
- Visual Inspection: Daily visual inspection is good practice. Check water lines for leaks, water level, the inside of the laser for leaks and water clarity, and ensure no obstructions around the chiller.