This document serves as a comprehensive user manual for the ABRA A5 V20.4 notebook computer, providing technical information, instructions, and illustrations for its operation.
The ABRA A5 V20.4 is classified as a technical information equipment (ITE) in class B, suitable for use in living rooms and offices. It complies with EU guidelines including EMC Directive 2014/30/EU, Low Voltage Directive 2014/35/EU (equivalent to A2: 2013), and RF Directive 2014/53/EU. The device also adheres to FCC Part 15 rules, ensuring it does not cause harmful interference and accepts any received interference.
Safety Information:
- Avoid applying heavy pressure or strong impacts to the computer to prevent damage or malfunction.
- Never cover or block the air vents, including those at the base, to ensure proper cooling.
- Do not expose the computer to liquids, rain, or moisture.
- Avoid using the modem during electrical storms.
- Keep the device away from strong magnetic fields, as they can affect performance.
- Protect the work area from direct sunlight to maintain optimal operating conditions.
- The unit operates at ambient temperatures between 5°C (41°F) and 35°C (95°F). Do not expose it to temperatures below 5°C (41°F) or above 40°C (104°F).
- Battery Safety: Do not throw the battery into fire or a hot oven, crush or cut it, immerse it in water, heat it above 60°C, repair or disassemble it, or leave it in extremely low air pressure or high-temperature environments. Risk of explosion if replaced by an incorrect type; dispose of used batteries according to instructions.
- Hearing Protection: Listening to music at high volume for extended periods can damage hearing. Reduce volume to a safe, comfortable level and limit listening time at high levels. Headsets must comply with EN 50332-2 requirements.
Technical Specifications
Physical Characteristics:
- Dimensions: 360.2 x 243.5 x 23.0 mm
- Weight: 2 kg +/- 5% (TBD)
Processor - CPU:
- Support Processor: i5-12450H 45W
Graphic Card - GPU:
- Graphic Card: 6 GB RTX 4050
Memory:
Display:
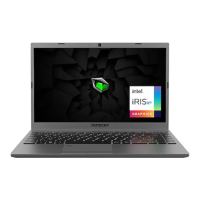
- LCD: 15.6” 1920x1080, IPS/45% 144Hz
I/O Ports:
- DC-in: x 1
- USB Type A (Right side): x 2 (USB 3.2 Gen1)
- USB Type A (Left side): x 1 (USB 2.0)
- USB Type C (Rear side): x 1 (USB 3.2 Gen2)
- RJ45: x 1
- HDMI: x 1 (HDMI 2.1)
- Mini DP: x 1
- Mic / Audio Combo: x 1
- Card Reader: x 1 (USB interface, SD/SDHC/SDXC, UHS-I speed, Full SD size connector)
Audio:
- Codec: Realtek ALC256 (Azalia standard support, D3 mode support)
- Speaker/Mic: Built-in 2 speakers (2W each), Digital Microphone support
Input:
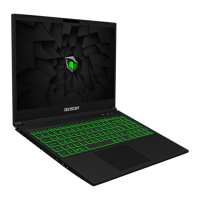
- Keyboard: Membrane single zone RGB backlight support (340 x 109.2 x 3.6 mm)
- Pointing Device: TDA1470 (114.5 x 70 x 0.8 mm), TP mylar, Enable/Disable area: 10 x 10 mm, Palm Rejection: Support
Communication Port:
- Wireless LAN +BT: M.2 2230 w/ CNVI interface (Intel Wi-Fi 6 AX201) IEEE802.11 a/b/g/n/ac/ax support
Webcam:
- Infrared capability for facial recognition camera: HD webcam with D-MIC x 1
Power:
- AC Adapter: Automatic Voltage adjustment between 100 and 240VAC 50/60Hz, 180 Watts (19.5V/9.23A) 3 Pins.
- Battery: Li-polymer Battery, SW Gas Gauge IC, soft pack, 4 cells (4s1p 4100 mAh) 62.32Wh.
- Caution: The model is designed to use with the DC input: 180 Watts (19.5V/9.23A) 3 Pins.
Usage Features
Getting Started:
- Connect AC Adapter: Plug the AC adapter's DC output into the DC IN jack. It's recommended to use AC power for the first time, as the battery charges immediately.
- Open Display Panel: The display panel can be opened to a wide range of angles for optimal viewing.
- Power On: Press the power button to turn on the notebook.
Top-Open View Components:
- Webcam: Records video and takes photographs.
- Microphone: Built-in for audio input.
- Camera Status LED: Indicates camera status.
- LCD Screen: Displays the notebook's output.
- Turbo / Balance / Office Mode Switch:
- Office mode: LED off
- Balance mode: White (Faint light)
- Turbo mode: Both white (Bright)
- Power Button: Turns the computer on/off.
- Power ON: White
- Suspend: White, slow/smooth, blinking white (3 sec/cycle)
- Power OFF: OFF
- Charging & Battery Indicator:
- Charging (Power ON/OFF): White flash
- Battery low (<6%): Orange flash
- Charging finish (w/AC): OFF (w/o AC): OFF
- Caps Lock Status LED: ON (White)
- Caution: Keep the LCD screen closed when not in use to protect it from dust.
- Keyboard: Provides comfortable key travel; layout may vary by spec/region.
- Touchpad LED indicator/Touchpad switch: Double-click to enable/disable touchpad functionality (see 3.3 for details).
- Touchpad/Clickpad: Touch-sensitive pointing device functioning like a mouse.
Right Side View Components:
- Card Reader: USB interface, SD/SDHC/SDXC, UHS-I speed, Full SD size connector.
- USB Ports: Connects USB devices (e.g., Zip drive, keyboard, mouse) with charging function.
- Vents: Thermal vents for cooling internal components and preventing overheating.
Left Side View Components:
- Kensington® Lock Port: For securing the notebook with Kensington® security products.
- USB Ports: Connects USB devices with charging function.
- Mic In Jack: Connects amplified speakers.
- Audio Combo: Connects 3.5mm audio combo jack/headphones.
Bottom Side View Components:
- Vents: Thermal vents for cooling internal components and preventing overheating.
- Speaker: Audio output.
- Caution: To prevent heat-related injuries or overheating, do not place the computer directly on your lap or obstruct air vents. Use on a hard, flat surface. Do not block airflow with soft surfaces (pillows, rugs, clothing). Ensure the AC adapter does not contact skin or soft surfaces during operation.
Compartment View:
- Shows locations for SSDs, RAM, and Battery. Specifications may vary by product.
Back Side View Components:
- Mini Display Port: Supports high-definition digital video connection.
- USB Port Type C: Connects USB devices.
- HDMI port: Connects to a screen or home theater system.
- Network Jack: Connects to a LAN.
- Power Connector: Connects the AC adapter.
- Vents: Thermal vents for cooling internal components and preventing overheating.
Keyboard Hotkeys (Fn + F1-F12):
- Fn+F1 (Suspend): Enters Sleep Mode.
- Fn+F2 (Windows Lock/On): Turns Windows Lock on/off.
- Fn+F3 (Display Mode): Enables Display Mode.
- Fn+F4 (RADIO On/Off): Turns all radios on/off.
- Fn+F5 (Touch pad On/Off): Turns touchpad mode on/off.
- Fn+F6 (Keyboard Brightness Down): Decreases keyboard brightness.
- Fn+F7 (Keyboard Brightness Up): Increases keyboard brightness.
- Fn+F8 (MUTE): Enters MUTE mode.
- Fn+F9 (Volume down): Decreases volume.
- Fn+F10 (Volume up): Increases volume.
- Fn+F11 (Brightness down): Decreases LCD display brightness.
- Fn+F12 (Brightness up): Increases LCD display brightness.
- Windows Key + Q (Search Charm): Opens Windows search charm.
Touchpad / Clickpad Usage:
- A rectangular electronic panel below the keyboard.
- Double-click the left corner to open or close (light) touchpad functionality.
- Slide a finger across the static-sensitive panel to move the cursor.
- Buttons below the touchpad function as left and right mouse buttons. Tapping the touchpad/clickpad produces similar results.
BIOS Setup
About BIOS Setup:
- When to use: When an error message appears during system boot requesting SETUP, to change default settings for customized features, or to reload default BIOS settings.
- How to run: Turn on the notebook and press the [Del] key during POST. If the message disappears, restart by turning OFF/ON or pressing [Ctrl]+[Alt]+[Del].
- Note: Screen snaps and settings may vary due to BIOS updates. The setup function can also be invoked by pressing [F2] during POST. Press [F7] for the Boot Menu. Drivers, BIOS, and utilities may vary by model and are subject to change without notice.
BIOS Setup Menu:
- Main Menu: Shows system overview (memory size, system time, date).
- System Time: Set system time (hour:minute:second) using [+] or [-].
- System Date: Set system date (day:month:date:year) using [ENTER], [TAB], or [SHIFT-TAB].
- Total Memory: Displays total installed memory.
- Advanced Menu: Selects/enables/disables XD feature (Intel platform + Windows only).
- Operating system support [UFEI OS]: Supports UEFI-compatible OS.
- NVME Device: Displays AHCI NVME SSD information.
- Intel Virtualization Technology: When enabled, VMM can use additional hardware features from Vanderpool technology.
- Thunderbolt Security Level: Options for User Authorization, Secure Connect, Display Port only, USB Docking Only, or Unknown Status.
- Security Menu: Installs/clears password settings for supervisor and user.
- Change Administrator Password: Set a maximum 20-digit password. This password cannot be reset even by removing the CMOS battery.
- Key Management: Allows expert users to modify Secure Boot Policy variables without full authentication.
- Boot Menu: Configures settings during system boot.
- Set Boot Priority: Specifies boot sequence from available devices.
- Hard Disk Drive / USB Hard Disk Drive: Specifies Boot Device Priority sequence.
- Exit Menu:
- Save Changes and Reset: Exits setup after saving changes (F10).
- Discard Changes and Exit: Exits setup without saving changes (ESC).
- Restore Defaults: Restores default values for all setup options (F9).
Maintenance Features
- AC Adapter: Use only the authorized AC adapter included with the notebook. Using inferior extension cords or unauthorized adapters may void warranty. The adapter may become hot during use; ensure it is not covered and kept away from exposed body parts.
- Dust Protection: Keep the LCD screen closed when not using the computer to protect it from dust.
- Overheating Prevention: Ensure air vents are not blocked. Use the computer on a hard, flat surface.