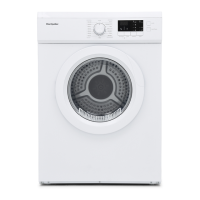
The Montpellier MIHP75 is an integrated heat pump dryer designed for household and domestic use, offering a perfect balance of function and style. This appliance is part of Montpellier's range of laundry, dishwashing, cooking, and cooling products. It has a maximum load capacity of 7.0kg and an energy class rating of A+.
Function Description
The MIHP75 is a tumble dryer specifically designed to dry household textiles and garments. It utilizes heat pump technology, which is an eco-sustainable refrigerating gas (R290) that is flammable. The drying process involves collecting water removed from the laundry in a container, which needs to be emptied when full. The dryer features various programs and options to cater to different fabric types and desired dryness levels. A cool-down cycle is integrated at the end of each program to ensure items are left at a safe temperature and to minimize creasing.
Important Technical Specifications
- Power Input: 900W
- Current Fuse: 13Amp
- Supply Voltage: 220-240V 50Hz
- Maximum Load: 7.0kg
- Energy Class: A+
- Refrigerating Gas: R290 (flammable)
- Adjustable Height: From 827 mm to 847 mm via 4 adjustable feet.
- Ambient Room Temperature for Optimal Performance: 5-35°C. Operating in colder conditions (between +2 and +5°C) may cause water condensation.
- Minimum Ventilation Hole for Furniture Door/Plinth: Ø 127mm.
Usage Features
The dryer offers a user-friendly interface with a Programme Selector dial and various option buttons.
Controls and Programmes:
- Programme Selector: Used to select the desired drying program. Must be set to "Off" at the end of a cycle before selecting a new one.
- START/PAUSE Button: Initiates or pauses the selected cycle. Pressing for 2 seconds pauses the machine; pressing again restarts it.
- DELAY START Button: Allows delaying the start of a program from 30 minutes up to 24 hours in 30-minute intervals.
- TIME SELECTION Button: Transforms an automatic cycle into a programmed one, increasing drying time in 10-minute intervals up to 3 minutes after the cycle starts.
- MEMORY Button: Stores selected options for a cycle. Press for 3 seconds to store (MEMO blinks for 2 seconds); press to recall stored options (not the cycle).
- DRYING SELECTION Button: Sets the desired dryness level, editable up to 3 minutes after the cycle starts:
- Ready to Iron: Leaves garments slightly wet for easier ironing.
- Dry Hanger: Garments ready to be hung.
- Dry Wardrobe: Laundry ready for direct storage.
- Extra-dry: Completely dry garments, ideal for full loads.
- ANTI CREASE Button: Activates alternate drum movements to reduce folds and sets the drying level to "Ready to Iron." Also activates an anti-crease movement pre-cycle (with delay) and post-cycle (for up to 6 hours in 10-minute intervals).
- CHILD LOCK (C+D buttons simultaneously): Locks the keys to prevent accidental changes during a cycle. To unlock, press the two buttons simultaneously again. If the door is opened with CHILD LOCK active, the cycle stops but the lock remains; unlock and press START/PAUSE to restart.
Display: Shows remaining drying time, postponed time, and other notifications.
- Drying Selection Indicator Lights: Display selected dryness levels.
- Water Container Indicator Light: Illuminates when the condensate water tank needs emptying.
- Filter Cleaning Indicator Light: Illuminates when the door and lower filters require cleaning.
Programmes:
- Cotton: Energy-efficient program for normal wet cotton laundry (hang dry).
- Whites: For cottons, sponges, and towels.
- Synthetics: For synthetic fabrics requiring specific treatment.
- Small Load: For even drying of small loads without over-drying.
- Mix & Dry: For various fabrics like cotton, linen, synthetics.
- Jeans: For jeans or denim; recommended to turn garments inside out.
- Sport: For technical sport garments; gentle drying to prevent shrinking.
- Down Jackets: For duvets and quilts, revitalizing feathers.
- Coloured: Delicate cycle for dark and colored cotton or synthetics.
- Shirts: Minimizes tangles and folds; recommended to remove linens immediately.
- Delicates: For delicate fabrics.
- Wool: For up to 1 kg of woolen clothes (around 3 jumpers); recommended to reverse clothes before drying. Not for acrylic clothes. Felting is irreversible.
- Anti-allergy: Dries and reduces allergens like dust mites, pet hair, pollens, and detergent residue.
- Pre-Iron: A warm 12-minute cycle to relax folds and creases.
- Refresh: Removes smells and smooths creases from linens.
Maintenance Features
Regular maintenance is crucial for the dryer's efficiency and longevity.
- Water Container: The water container must be emptied when the indicator light is on, or after each drying cycle. To remove, gently pull out the handle (A), tilt to empty (B), then reinsert (C).
- Lint Filter: Clean before every cycle. Pull upwards, open, gently remove lint with a soft brush or fingertips, then snap back together and push into place.
- Condenser Filter: Clean regularly. Remove the kickplate, turn locking levers anti-clockwise, pull out the front cover. Gently remove the filter frame and clean with a cloth (do not use water). Remove and wash the sponge under running tap, ensuring it's fully dry before refitting. Refit the front cover (arrow indicated) and lock levers clockwise. Refit kickplate.
- Drum and Door: After each use, wipe the inside of the drum and leave the door open for air circulation. Wipe the outside and door with a soft cloth. Clean the inner door and gasket with a damp cloth after every drying cycle to prevent fluff buildup and sticking.
- General Cleaning: DO NOT use abrasive pads or cleaning agents. Always switch off and remove the plug from the electricity supply before cleaning.
Installation Guidelines
- Location: Do not install in low-temperature rooms or where frost may occur. Avoid installing near curtains.
- Furniture Door Mounting:
- Adjust dryer height (827-847 mm) using adjustable feet, ensuring the machine is level.
- Determine dryer depth based on kick plate and choose installation option (Option 1: plinth less than 54mm from furniture front; Option 2: plinth more than 55mm from furniture front).
- Position template on furniture door, mark screw holes, and drill. Mount hinges and magnet.
- Mount plate (D) on right or left side, place plastic support (E) under plate, fix with screw (F). Snap mount cap (G).
- Mount furniture door to dryer using hinges, spacers (I), and screws (H).
- Slide dryer into opening (dimensions in diagram).
- For Option 2, fix door to furniture with standard hinges and supports (not supplied) and a hook (not supplied). Position bottom hinge 40mm above kick plate for removal.
- Use mount caps (G) to cover holes on dryer front panel.
- If gap between dryer top and furniture top is >10mm, fix L metal brackets (K) to furniture sides to prevent tilting.
- Ventilation: Adequate ventilation is essential to prevent gases from other appliances being drawn in. Install the rear close to a wall, leaving a 12mm gap. Keep inlet and outlet air clear of obstructions. Carpets or rugs must not obstruct ventilation openings. Exhaust air must not be discharged into a flue used for other fuels.
- Electrical Connections: Ensure the electrical system is earthed and compatible with the appliance's plug. Do not use adapters or extensions. The plug should be accessible after installation. Do not plug in until installation is complete. If the supply cord is damaged, it must be replaced by qualified personnel. The appliance must not be supplied through external switching devices (timers, etc.).
- Flammable Materials: Keep open flames and ignition sources away from the appliance due to the flammable refrigerating gas. Do not damage the refrigerating circuit.
Safety Warnings
- Misuse of a tumble dryer can create a fire hazard.
- Do not use if the fluff filter is not in position or is damaged.
- Never stop a tumble dryer before the end of the drying cycle unless items are quickly removed and spread out to dissipate heat.
- The hot surface symbol indicates temperatures may exceed 60°C during operation.
- Always remove the plug before cleaning.
- The drum inside may be very hot; allow cool-down period before removing laundry.
- Do not tumble dry foam rubber materials, items treated with dry cleaning fluids, or glass fiber curtains.
- Wash items soiled with cooking oil, acetone, alcohol, petrol, kerosene, spot removers, turpentine, waxes, and wax removers in hot water with extra detergent before drying.
- Remove all objects from pockets (lighters, matches).
- Do not overload the drum.
- During transport, ensure the dryer is in an upright position. If tilted, wait at least 4 hours before switching on to allow oil to flow back into the compressor.
- Ensure openings on the appliance and compartment are clear of obstructions.
- Any repairs must be carried out by an authorized assistance service.
- Incorrect disposal of the device could cause fires or poisoning. Dispose of correctly and do not damage pipes used for refrigerating fluid.