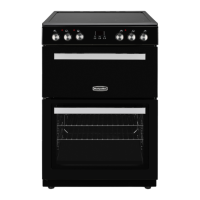
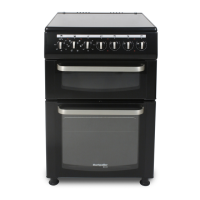
This document provides installation and operating instructions for the Montpellier 60cm Ceramic Mini Range Cooker, models MMRC60FC/K/X (Cream/Black/Stainless Steel). It emphasizes safety, proper installation, and maintenance for optimal performance and longevity.
General Safety Warnings:
The appliance is designed for children aged 8 and above, and persons with reduced physical, sensory, or mental capabilities, provided they are supervised and instructed on safe use. Children should not play with the appliance, and cleaning/maintenance should not be performed by children without supervision. The appliance and its accessible parts become hot during use; avoid touching heating elements. Children under 8 should be kept away unless continuously supervised. Unattended cooking with fat or oil can be dangerous and lead to fire. Never use water to extinguish such fires; switch off the appliance and cover the flame with a lid or fire blanket. The cooking process must be continuously supervised. Do not store items on cooking surfaces. If the surface is cracked, switch off the appliance to avoid electric shock. For models with a hob lid, clean spills before use and allow the cooker to cool before closing the lid. Do not operate with an external timer or separate remote-control system. Stabilizing brackets must be installed to prevent tipping. During use, the appliance gets hot; avoid touching heating elements inside the oven. Handles may become hot. Do not use harsh abrasive cleaners or scourers on oven surfaces, as they can scratch and shatter the door glass. Do not use steam cleaners. Switch off the appliance before replacing the lamp to avoid electric shocks. Accessible parts may be hot during cooking/grilling; keep young children away. The appliance complies with local and international standards. Maintenance and repairs should only be carried out by authorized service technicians. Do not alter specifications. Ensure local distribution conditions (gas type/pressure, electricity voltage/frequency) match appliance specifications. The appliance is for indoor domestic household cooking only; not for non-domestic, commercial, or room heating. Do not use oven door handles to lift or move the appliance. Take care when cleaning glass to avoid scratching or hitting it. Ensure the supply cord is not trapped or damaged during installation; if damaged, it must be replaced by a qualified person. Do not let children climb or sit on the open oven door. Keep children and animals away.
Installation Warnings:
Do not operate before full installation. Installation must be by an authorized technician. The manufacturer is not responsible for damage from incorrect installation. Check for transport damage upon unpacking; if damaged, contact a service agent. Packaging materials can be harmful to children; dispose of them immediately. Protect the appliance from sun, rain, snow, dust, or excessive humidity. Surrounding materials (cabinets) must withstand at least 100°C. Do not install behind a decorative door to avoid overheating.
During Use:
A slight smell may occur during first use due to insulation materials; this is normal. Run the empty oven at maximum temperature for 45 minutes with good ventilation before first use. Hot steam/air from the oven can cause burns when opening the door. Do not place flammable materials near the appliance. Always use oven gloves. Do not line the oven with aluminum foil to prevent overheating. Do not place dishes or baking trays directly on the oven base. Do not leave the cooker unattended when cooking with oils. Position pans over the center of the cooking zone with handles in a safe position. Turn off the main control switch and gas valve (for gas appliances) when not in use for long periods. Ensure control knobs are in the "0" (stop) position when not in use. Trays incline when pulled out; be careful not to spill hot food. Do not place anything on the open oven door. Do not place heavy or flammable items (e.g., nylon, plastic bags, paper, cloth) or cookware with plastic accessories into the drawer. The inside surface of the storage compartment may get hot. Do not hang towels, dishcloths, or clothes from the appliance or its handles.
During Cleaning and Maintenance:
Turn off the appliance at the mains before cleaning or maintenance. Do not remove control knobs for cleaning. Use original spare parts and call authorized service agents for efficiency and safety.
The products comply with applicable European Directives, Decisions, Regulations, and referenced standards.
Disposal of Old Machine:
The product should not be treated as household waste. Hand it over to an applicable collection point for recycling electrical and electronic equipment. Correct disposal prevents negative environmental and health consequences. Contact local city office, household waste disposal service, or retailer for recycling information.
Installation and Preparation for Use:
Installation must be by an authorized service person/qualified technician according to instructions and local regulations. Incorrect installation voids warranty. Ensure local distribution conditions (electricity voltage/frequency, gas type/pressure) match appliance specifications on the label. Follow all laws, ordinances, directives, and standards. If the product has removable shelf guides and recipes like yogurt, remove wire racks and operate the oven in the defined cooking mode.
General Installation Instructions:
After unpacking, check for damage. If damaged, do not use and contact a service person. Keep flammable materials away. Worktop and furniture must withstand over 100°C. Do not install directly above a dishwasher, fridge, freezer, washing machine, or clothes dryer. The appliance can be placed near other furniture if its height does not exceed the cooktop height.
- If kitchen cupboards are above the worktop adjacent to the cooker, they must be a minimum of 420mm above the worktop (A).
- If a cooker hood or cupboard is above the appliance, the safety distance between cooktop and any cupboard/cooker hood should be as per manufacturer guidelines. Standard minimum distance is 650mm above a ceramic hob (B).
- If kitchen furniture is higher than the cooktop, it must be at least 10 cm from the sides of the appliance for air circulation and safety (D).
Electrical Connection and Safety:
Electrical connection must be by an authorized service person/qualified electrician. The appliance must be earthed. Use isolated cables during installation. Incorrect connection can damage the appliance. If the mains cable is damaged, it must be replaced by qualified personnel. Before connecting, check that the appliance's voltage rating matches the mains supply voltage and that the wiring can handle the power rating. Do not use adaptors, multiple sockets, or extension leads. Keep the supply cord away from hot parts, and ensure it is not bent or compressed.
Anti-tilting Kit:
The anti-tilting bracket must be installed. The document provides instructions for attaching the bracket to the wall and securing the appliance.
Adjusting the Feet:
The appliance has four adjustable feet. Adjust them to ensure the appliance is level and stable. To increase height, turn clockwise; to decrease, turn anti-clockwise. The appliance can be raised up to 30 mm. This is a heavy appliance; two people are needed to move it.
Product Features:
List of Components:
- Cooktop
- Control Panel
- Top Oven Door Handle
- Top Oven Door
- Main Oven Door Handle
- Main Oven Door
- Adjustable Feet
Control Panel:
- Timer
- Main Oven Control Knob
- Top Oven Control Knob
- Hob Control Knob
Use of Product:
Hob Controls - Ceramic Heater:
Controlled by a 6-position knob. The on/off light on the control panel indicates if any ceramic heaters are in use.
- Knob Position Functions:
- 0: Off position
- 1: Keep warm position
- 2-3: Heating position at low heat
- 4-5-6: Cooking, roasting, and boiling position
- Hints and Tips:
- When ceramic heaters operate at higher heat settings, they may switch on/off due to a safety device preventing glass overheating. This is normal.
- Never operate the hob without pans.
- Use flat-bottomed saucepans with a thick base.
- Ensure the pan bottom is dry.
- Center the pan correctly over the zone.
- Use a pan with a diameter appropriate for the hotplate.
- Do not use pans with rough bottoms.
- Place lids on pans.
- Accessible parts may become hot; keep children and animals away.
- If a crack appears on the cooktop, switch off immediately and replace by authorized service personnel.
- Residual Heat Indicator:
- After use, heat is stored in the vitroceramic glass. If the residual heat is >60°C, the indicator activates.
- If power is disconnected while the indicator is on, it will flash when reconnected until heat decreases or a cooking zone is activated.
Oven Functions:
Main Oven:
- Defrost Function:
- Switch on using the main oven function control knob. Warning lights illuminate, and the fan operates.
- Place frozen food on a middle shelf with an oven tray underneath to catch water.
- This function defrosts but does not cook or bake.
- Turbo Function:
- Switch on using the main oven function control knob. Thermostat and warning lights illuminate, and the ring heating element and fan operate.
- Temperature can be adjusted.
- Evenly disperses heat for cooking on all racks. Preheat for 10 minutes.
Top Oven:
- Static Cooking Function:
- Switch on using the top oven function control knob. Thermostat and warning lights illuminate, and upper/lower heating elements switch on.
- Temperature can be adjusted.
- Ideal for cakes, baked pasta, lasagne, and pizza. Preheat for 10 minutes, cook on one rack at a time.
- Lower Heating Function:
- Switch on using the top oven function control knob. Thermostat and warning lights illuminate, and the lower heating element switches on.
- Temperature set to the highest level.
- Ideal for warming pizza or heating food (not cooking).
- Upper Heating Function:
- Switch on using the top oven function control knob. Thermostat and warning lights illuminate, and the upper heating element switches on.
- Temperature set to the highest level.
- Ideal for heating food or frying the top of cooked food.
- Grilling Function:
- Switch on using the top oven function control knob. Thermostat and warning lights illuminate, and the grill heating element switches on.
- Switch off the top oven after grilling. Keep children away during grilling and until cooled.
- Warning: The top oven door must be fully open when this function is selected.
Use of the Digital Timer:
- Function Description:
- Auto cooking, Manual cooking, Cooking time, Cooking end time, Dot, Minute minder, Mode function, Decrease timer, Increase timer, Timer display.
- Time Adjustment:
- Set time before using the oven. Upon power connection, "A" and "000" flash.
- Press "+" and "-" simultaneously; symbol and dot flash.
- Adjust time with "+" and "-".
- After a few seconds, the dot stops flashing and remains illuminated.
- Audible Warning Time Adjustment:
- Set between 0:00 and 23:59 hours. For warning purposes only; oven not activated.
- Press "MODE"; symbol A flashes, "000" displayed.
- Select time with "+" and "-" while A flashes.
- Symbol remains illuminated, time saved, warning set.
- When timer reaches zero, audible warning sounds, symbol A flashes. Press any key to stop.
- Semi-automatic Time Adjustment (cooking period):
- For a fixed period between 0 and 10 hours.
- Select desired cooking function and temperature.
- Press "MODE" until "dur" and symbol appear; "A" flashes.
- Select cooking time with "+" and "-".
- Current time reappears; "A" and symbols remain illuminated.
- Oven starts and cooks for the set period. When timer reaches zero, oven switches off, audible warning sounds, "A" and symbols flash. Turn control knobs to "0", press any key to stop.
- Full-automatic Programming:
- Set cooking period (0-10 hours) and finishing time (up to 23 hours 59 minutes).
- Select desired cooking function and temperature.
- Press "MODE" until "dur" and symbol appear; "A" flashes.
- Select cooking time with "+" and "-".
- Current time reappears; "A" and symbols remain illuminated.
- Press "MODE" until "end" and symbol appear; "A" and symbols flash.
- Select desired finishing time with "+" and "-".
- Current time reappears; "A" and symbols remain illuminated.
- Oven calculates operating time and starts automatically to finish at the set time. When timer reaches zero, oven switches off, audible warning sounds, "A" and symbols flash. Turn control knobs to "0", press any key to stop.
- Sound Adjustment:
- To adjust audible warning volume, press and hold "-" for 1-2 seconds while current time is displayed. Different signals sound with each press. Select desired sound; it will be saved.
Accessories:
- The Grill Pan and Handle Set:
- Best for grilling steaks.
- Warning: Handle is detachable. Ensure it is centralized and secure. Do not leave handle in position during grilling.
- The Wire Grid:
- Best for grilling or processing food in oven-friendly containers.
- Warning: Place grid correctly on any corresponding rack and push to the end.
Cleaning and Maintenance:
Cleaning:
- General Instructions:
- Switch off appliance and allow to cool before cleaning.
- Check cleaning materials are appropriate.
- Use cream or liquid cleaners without particles. Do not use caustic creams, abrasive powders, rough wire wool, or hard tools.
- Do not use cleaners with particles on glass, enamelled, or painted parts.
- Clean up liquid overflows immediately.
- Do not use steam cleaners.
- Cleaning the Inside of the Oven:
- Enamelled ovens are best cleaned while warm.
- Wipe with a soft cloth soaked in soapy water, then with a wet cloth, and dry.
- Use liquid cleaning material occasionally for a complete clean.
- Catalytic Cleaning:
- Catalytic liners (matte-finished panels on sides/rear) collect grease and oil residue.
- Liners self-clean by absorbing fats/oils and burning them to ash, which can be removed with a damp cloth.
- If large amounts of fat spill, set oven to maximum temperature for 20-30 minutes (preferably after cooking) to burn off grease. Wipe the floor after cooling.
- Manual cleaning of catalytic liners is not recommended; avoid soap-impregnated steel wool or abrasives. Do not use aerosol cleaners.
- Removal of Catalytic Liner:
- Remove metal side rails (refer to page 22).
- Remove screws holding each catalytic panel.
- Cleaning the Ceramic Glass:
- Ceramic glass can be damaged by hard/sharp objects.
- Warning: If the surface is cracked, switch off to avoid electric shock.
- Use a cream or liquid cleaner.
- Do not use cleaning materials meant for steel.
- If substances with a low melting point (sugar, plastic, foil) fall on the hot glass-ceramic cooktop, scrape them off immediately. If they melt, they can damage the cooktop.
- Dust on the surface must be cleaned with a wet cloth.
- Any changes in color do not affect structure or durability.
- Colour changes may be due to:
- Spilt food not cleaned off.
- Incorrect dishes on the hob.
- Using wrong cleaning materials.
- Cleaning the Enamelled Parts:
- Clean with cream cleaners on a regular basis.
- Wipe with a soft cloth soaked in soapy water, then with a wet cloth, and dry.
- Do not clean with rough wire wool.
- Do not use vinegar, coffee, milk, salt, water, lemon, or tomato juice.
- Cleaning the Stainless Steel Parts:
- Clean with cream cleaners on a regular basis.
- Wipe with a soft cloth soaked in soapy water, then with a wet cloth, and dry.
- Do not clean with rough wire wool.
- Do not use vinegar, coffee, milk, salt, water, lemon, or tomato juice.
- Do not wash these parts in a dishwasher.
- Cleaning Painted Surfaces:
- Spots of tomato, potato paste, ketchup, lemon, oil derivatives, milk, sugary foods, sugary drinks, and coffee should be cleaned immediately. If left, they may cause damage.
- Do not use abrasive cleaners or rough objects.
- The manufacturer is not responsible for damage caused by inappropriate cleaning.
- Removal of the Inner Glass:
- Push glass in direction B, release from bracket (x). Pull glass out in direction A.
- To replace: Push glass towards and under bracket (y) in direction B. Place glass under bracket (x) in direction C.
- For triple glass ovens, the third layer is removed similarly.
- Removal of the Oven Door:
- Open the oven door.
- Open the locking catch (a) with a screwdriver.
- Close the door until it almost reaches the fully closed position, then pull it towards you.
- To replace: Locate hinges in door guides. Close locking catch and door, ensuring it closes correctly.
- Removal of the Wire Racks:
- Pull the wire rack, release from clips (a), lift up and out.
- To replace: Hook guides into locating holes, push rack into clips (a).
Maintenance:
- Maintenance must be by an authorized service person/qualified technician.
- Changing the Oven Lamp:
- Disconnect from mains supply and ensure it is cool.
- Remove glass lens, then bulb.
- Insert new bulb (resistant to 300 °C, 230 V, 15-25 Watt, Type E14).
- Replace glass lens.
- Product contains a light source of energy efficiency class G.
- The included light source is not for other applications; it is specifically for household cooking appliances, not room illumination.
Troubleshooting & Transport:
Troubleshooting:
- Hob/cooking zones cannot be switched on: No power supply. Check household fuse, power cut, other electronic appliances.
- Oven does not switch on: Power is switched off. Check power supply, other kitchen appliances.
- No heat/oven does not warm up: Oven temperature control incorrectly set, oven door left open. Check knob setting, recommended temperatures/shelf positions, avoid frequent door opening.
- Cooking is uneven: Oven shelves incorrectly positioned. Check positions.
- Oven light does not operate: Lamp failed, electrical supply disconnected/switched off. Replace lamp, check wall socket.
- Timer buttons cannot be pressed: Foreign matter between buttons, moisture on control panel, key lock function set. Remove matter/moisture, check key lock.
- Oven fan is noisy: Oven shelves vibrating. Check oven level, shelves/bakeware not vibrating or touching back panel.
Transport:
- Use original packaging and follow transport signs. Tape independent parts.
- If no original packaging, use a carriage box to protect external surfaces.
Technical Specifications:
Energy Fiche:
- Brand: Montpellier
- Model: MMRC60FK, MMRC60FC, MMRC60FX
- Type of Oven: Electric
- Mass: 54.9 kg
- Upper Cavity:
- Energy Efficiency Index - conventional: 105.1
- Energy Efficiency Index - fan forced: -
- Energy Class: A
- Energy consumption (electricity) - conventional: 0.75 kWh/cycle
- Energy consumption (electricity) - fan forced: - kWh/cycle
- Heat Source: Electric
- Volume: 39 L
- Lower Cavity:
- Energy Efficiency Index - conventional: -
- Energy Efficiency Index - fan forced: 95.0
- Energy Class: A
- Energy consumption (electricity) - conventional: - kWh/cycle
- Energy consumption (electricity) - fan forced: 0.81 kWh/cycle
- Heat Source: Electric
- Volume: 72 L
- Number of cavities: 2
- Compliance: EN 60350-1
Energy Saving Tips (Oven):
- Cook meals together.
- Keep pre-heating time short.
- Do not elongate cooking time.
- Turn off oven at end of cooking.
- Do not open oven door during cooking.
Energy Fiche (Hob):
- Brand: Montpellier
- Model: MMRC60FK, MMRC60FC, MMRC60FX
- Type of Hob: Electric
- Number of Cooking Zones: 4
- Heating Technology-1: Radiant, Size-1: Ø14.5 cm, Energy Consumption-1: 192.0 Wh/kg
- Heating Technology-2: Radiant, Size-2: Ø14.5 cm, Energy Consumption-2: 192.0 Wh/kg
- Heating Technology-3: Radiant, Size-3: Ø18.0 cm, Energy Consumption-3: 192.0 Wh/kg
- Heating Technology-4: Radiant, Size-4: Ø18.0 cm, Energy Consumption-4: 192.0 Wh/kg
- Energy Consumption of Hob: 192.0 Wh/kg
- Compliance: EN 60350-2
Energy Saving Tips (Hob):
- Use cookware with flat base.
- Use cookware with proper size.
- Use cookware with lid.
- Minimize liquid or fat.
- Reduce setting when liquid starts boiling.
After-sales assistance:
Contact Montpellier customer service helpline: 01759 487839. Provide model number, serial number, and original sales invoice.
2-year Manufacturer's Guarantee:
Covers repair costs for 24 months from purchase date, with proof of purchase.
- Not covered: Incorrect installation/operation, non-domestic use, accident, misuse, unauthorized modification/repair, call-out where no fault found, routine maintenance, door alignment, use by non-householder, commercial use, consumable items (fuses, bulbs), unauthorized repairs, consequential loss, rusting, corroding, delivery damage, scratches.
- Guarantee valid in UK & Republic of Ireland. Register online at www.montpellier-appliances.com/support.