www.Deuba24online.de www.Deuba24online.de
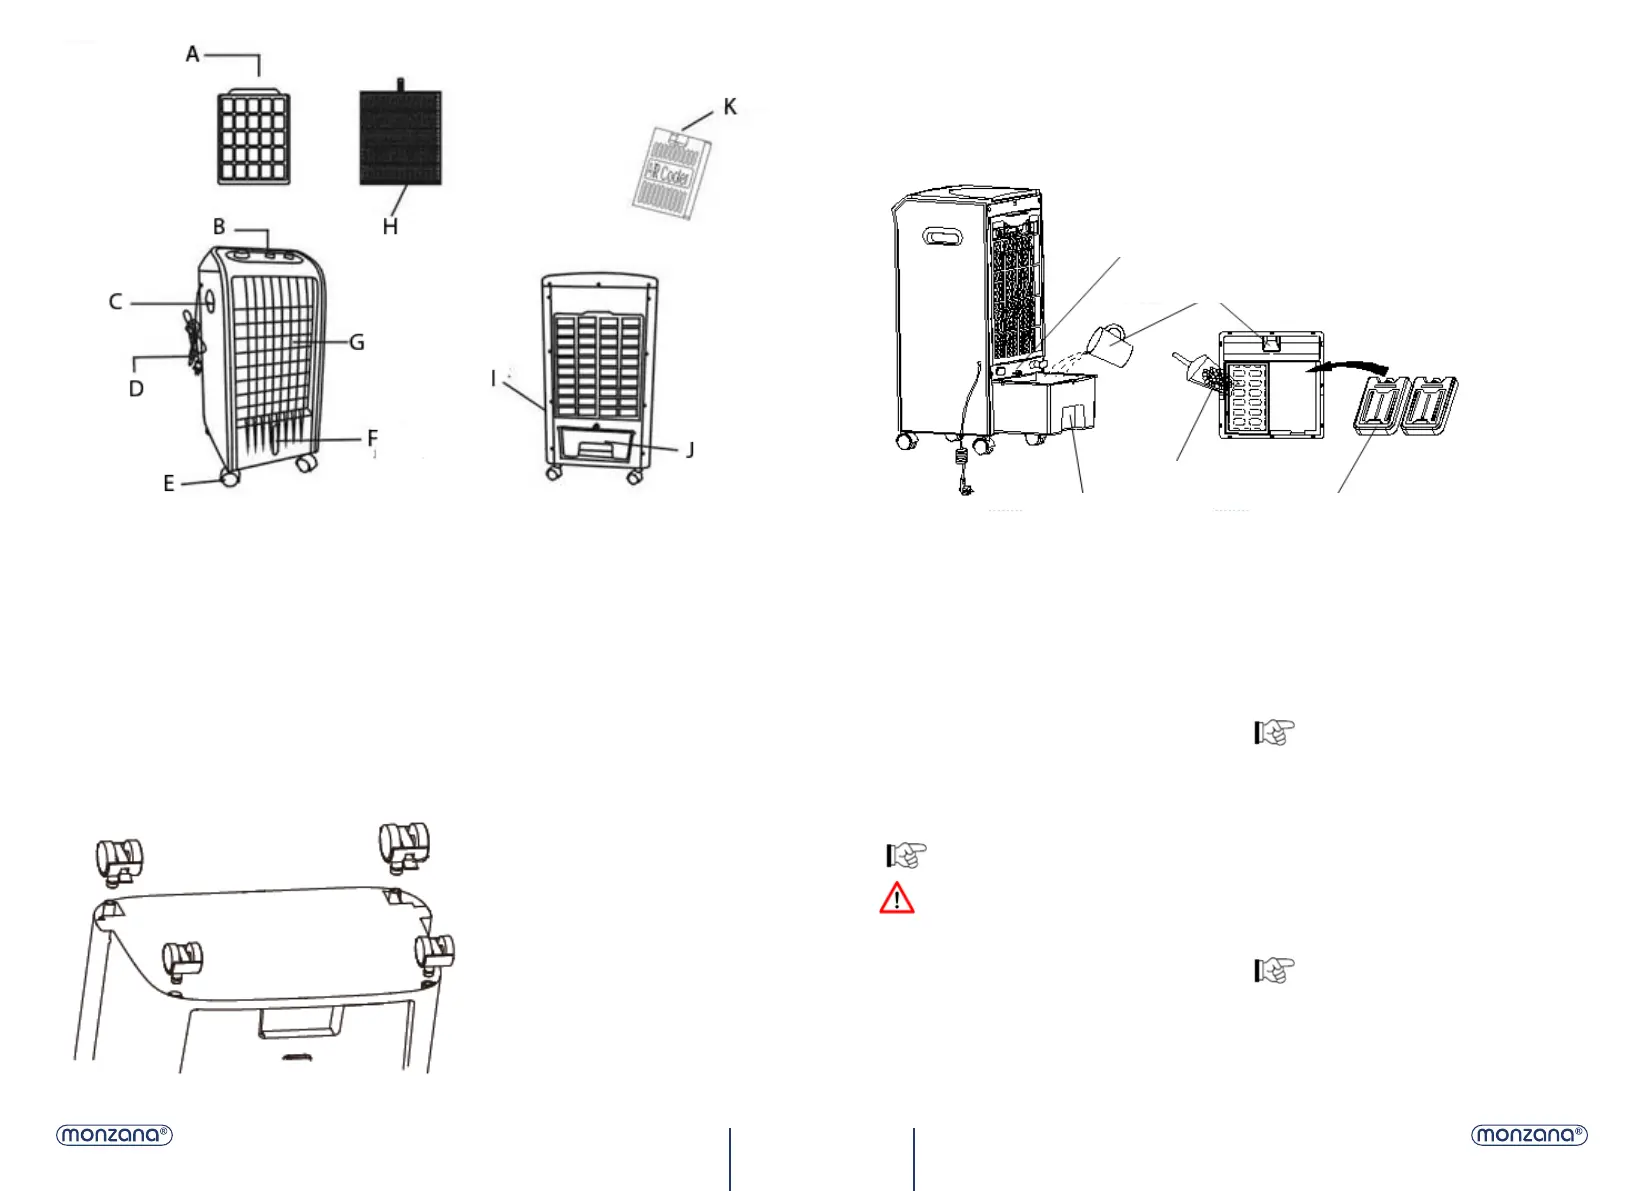
A-Air filter screen B-Control panel
C-Handle D-Power cord & plug
E-Castors F-Water level indicator
G-Air Vent H-Wetted pad
I-Back J-Water Tank
K-Ice cystal box
STRUCTURE AND PARTS
2. Insert the plug directly into a standard AC
socket-outlet. Be sure plug ts ghtly into outlet.
3. Turn the mer knob to ON posion.
4. Press the LO/MI/HI buon to set the desired
fan speed (Low/ Medium/High).
5. If you want to enlarge blast area in your room,
press the VANE button, the fan will blast your
room in large scope. To stop oscillang, just press
the VANE button again. Moving the horizontal
louvers either up or down can make further wind
direcon enhancements.
6. Cool buon
NOTE: The function of Cool can be set
only under the fan operang.
• Before operang the unit in Cool mode,
make sure that water tank is properly xed.
Then proceed to add clean water into the water
tank. While adding the water, make sure that you
keep an eye on the water level indicator to make
sure that you do not OVER or UNDER FILL the
unit. Press the buon Cool aer you have added
the water and the unit should commence to blow
cooler air.
7. Timer knob can set 0-120 minute.
• If you nd that the air aer Step 1) is sll not
cool enough, you can add additional ice block
into the water tank or ice basket directly by
drawing out the water tank. Be sure not to ex-
ceed the water tank capacity otherwise damage
to the unit or electric shock may occur.
Note: Before using the Ice Block, firstly
you must remove the lid from Ice Block
box and add clean water into the Ice Block box
until reach the water level scale, then turn the
lid back to the Ice Block box and wait for 15
minutes; secondly you should place it in your
refrigerator and let the Ice Block freeze for 1 to 2
hours.
You may complete pull out water tank, then
replace water in the water tank or clean water
tank.
Note: Change the water in the water tank
regularly. Stagnant water may cause un-
pleasant odors, in parcular in warm weather.
10 11
INSTRUCTIONS FOR USE
1. When using the appliance, make sure that it is on a at and stable surface. Damage may occur if it is
placed on an incline or decline and put the ice box into water tank:
1.Rotate the small knob updowm.
3.Add the water from here into water tank
4.Put ices into ice basket
2.Pull out the water tank 5.Put the ice box also into water tank
Aaching the wheels
Place the air cooler on a slightly elevated surface (e.g. a table) so the boom end protrudes slightly to
fasten the wheels. If necessary, place a sheet or blanket beneath the product to protect the surface. In-
sert the wheels into the openings on the boom of the air cooler as illustrated below and screw them.
 Loading...