EasyManua.ls Logo

Moog Etherwave User Manual

Moog Etherwave
8 pages
To Next Page IconTo Next Page
Page #1 background imageLoading...
Page #1 background image
Moog Music Inc.
554C Riverside Drive
Asheville, NC 28801
SETTING UP AND PLAYING THE MOOG
ETHERWAVE
THEREMIN
INTRODUCTION
The theremin is an electronic musical instru-
ment played by the free movement of the
performer's hands in the space surrounding it.
This method of playing gives the theremin tone
its unique ethereal and dramatic quality, while
at the same time allowing the performer a
measure of artistic freedom that other musical
instruments do not offer. The techniques of
playing the theremin can be mastered by
anyone who has a good musical ear, and who
is willing to invest a modest amount of
practicing time. Two motions are involved.
Movement of the right hand toward the pitch
antenna controls pitch, while movement of the
left hand toward the volume antenna controls
loudness or volume.
The Moog ETHERWAVE theremin is powered by
a special adapter which plugs into a standard
110-125 volt grounding power outlet. It is
designed to operate with a wide range of
amplifier-speaker combinations.
PREPARING THE
ETHERWAVE
THEREMIN FOR
PLAYING
Your ETHERWAVE theremin is completely
assembled. Only the following preparations for
playing are necessary: a) Placing the
instrument on a stand, b) attaching the two
antennas, c) connecting the power adapter,
d) connecting the amplifier-speaker with an
audio cord, and e) setting the panel
adjustments. Each of these steps will now be
described in detail. Note that the steps of
preparation are listed in the order in which they
are to be executed.
a) Placing the instrument on a stand: The
ETHERWAVE theremin requires either a standard
microphone stand (preferred) or a small table
36" to 42" high. If a table is used, no objects on
the table should be within a foot or two of the
theremin, and the theremin itself should be
positioned so that the the volume antenna will
overhang the edge of the table. Whichever
type of stand is used, the ETHERWAVE should be
securely mounted, and away from walls and
other large stationary objects.
b) Attaching the two antennas: The pitch
antenna, which is the long straight tube, is
placed in the elbow (right angle) fitting on the
right end of the instrument, with the brass
compression ring down. The mounting nut is
slipped over the antenna and screwed onto
the fitting. The nut need be only finger-tight, but
should be tight enough so that the antenna is
firmly in place.
The volume antenna, which is the tubular loop,
is placed in the straight fittings on the left end
of the instrument, with the bulge in the loop
facing forward and down. The mounting nuts
already on the antenna are screwed onto the
fittings. The nuts need be only finger-tight, but
should be tight enough so that the antenna is
firmly in place.
c) Connecting the power adaptor: The
ETHERWAVE
is powered by a special adaptor
which is grounded to the power ground and
which supplies 14 volts AC to the
ETHER-WAVE
Question and Answer IconNeed help?

Do you have a question about the Moog Etherwave and is the answer not in the manual?

Moog Etherwave Specifications

General IconGeneral
TypeTheremin
Pitch Range5 octaves
Audio Outputs1/4" audio out
Power SupplyExternal power supply
Outputs1x 1/4" Audio Out
ControlsWaveform
Volume Antenna3/8" OD plated brass tubing

Summary

Introduction to the Theremin

Setting Up and Playing the Moog Etherwave Theremin

Etherwave Theremin Preparation

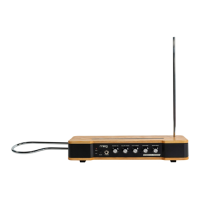
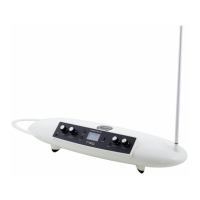
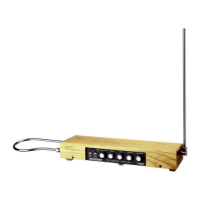
Essential steps for setting up the Etherwave theremin, including stand, antennas, and connections.

Instrument Placement and Stand Setup

Guidance on positioning the theremin on a stand or table for optimal performance and clearance.

Antenna Installation Guide

Instructions for securely mounting the pitch and volume antennas to the instrument.

Power Adapter Connection

Details on connecting the power adapter for proper instrument operation and grounding.

Amplifier and Speaker Connection

How to connect the theremin to various audio systems and recommended input types.

Tuning and Adjustment Procedures

Steps for calibrating the volume and pitch controls for correct instrument response.

Playing the Etherwave Theremin

Theremin Performance Basics

Explanation of how hand movements control pitch and volume, and basic performance principles.

Optimal Playing Position and Stance

Guidance on the optimal physical stance and hand placement relative to the antennas.

Theremin Practice Exercises

Practical exercises to develop essential theremin playing skills like pitch accuracy and dynamics.

Etherwave Theremin Maintenance

Instrument Care and Precautions

Essential care instructions and environmental considerations to ensure instrument longevity.

Etherwave Plus Model Features

Etherwave Plus Extended Functionality

Highlights additional features of the Etherwave Plus model, such as CV outputs and headphone functions.

Etherwave Plus Front Panel Overview

Diagram and explanation of the controls and connections on the Etherwave Plus front panel.

Understanding CV and Gate Signals

Explanations of Control Voltage (CV) and Gate signals used in analog synthesizers and the Etherwave Plus.

Utilizing Etherwave Plus CV Outputs

Instructions on connecting and utilizing the CV outputs for controlling external equipment.

Etherwave Plus Integration Examples

Practical examples of integrating the Etherwave Plus with other Moog synthesizers and effects.

Headphone Output Pitch Preview Setup

Steps to modify the headphone output for monitoring pitch independently of the main audio signal.

Related product manuals