MOONEY INTERNATIONAL CORPORATION
M20V SERVICE AND MAINTENANCE MANUAL
Page
Date
22
MAR 2017
Rev Date
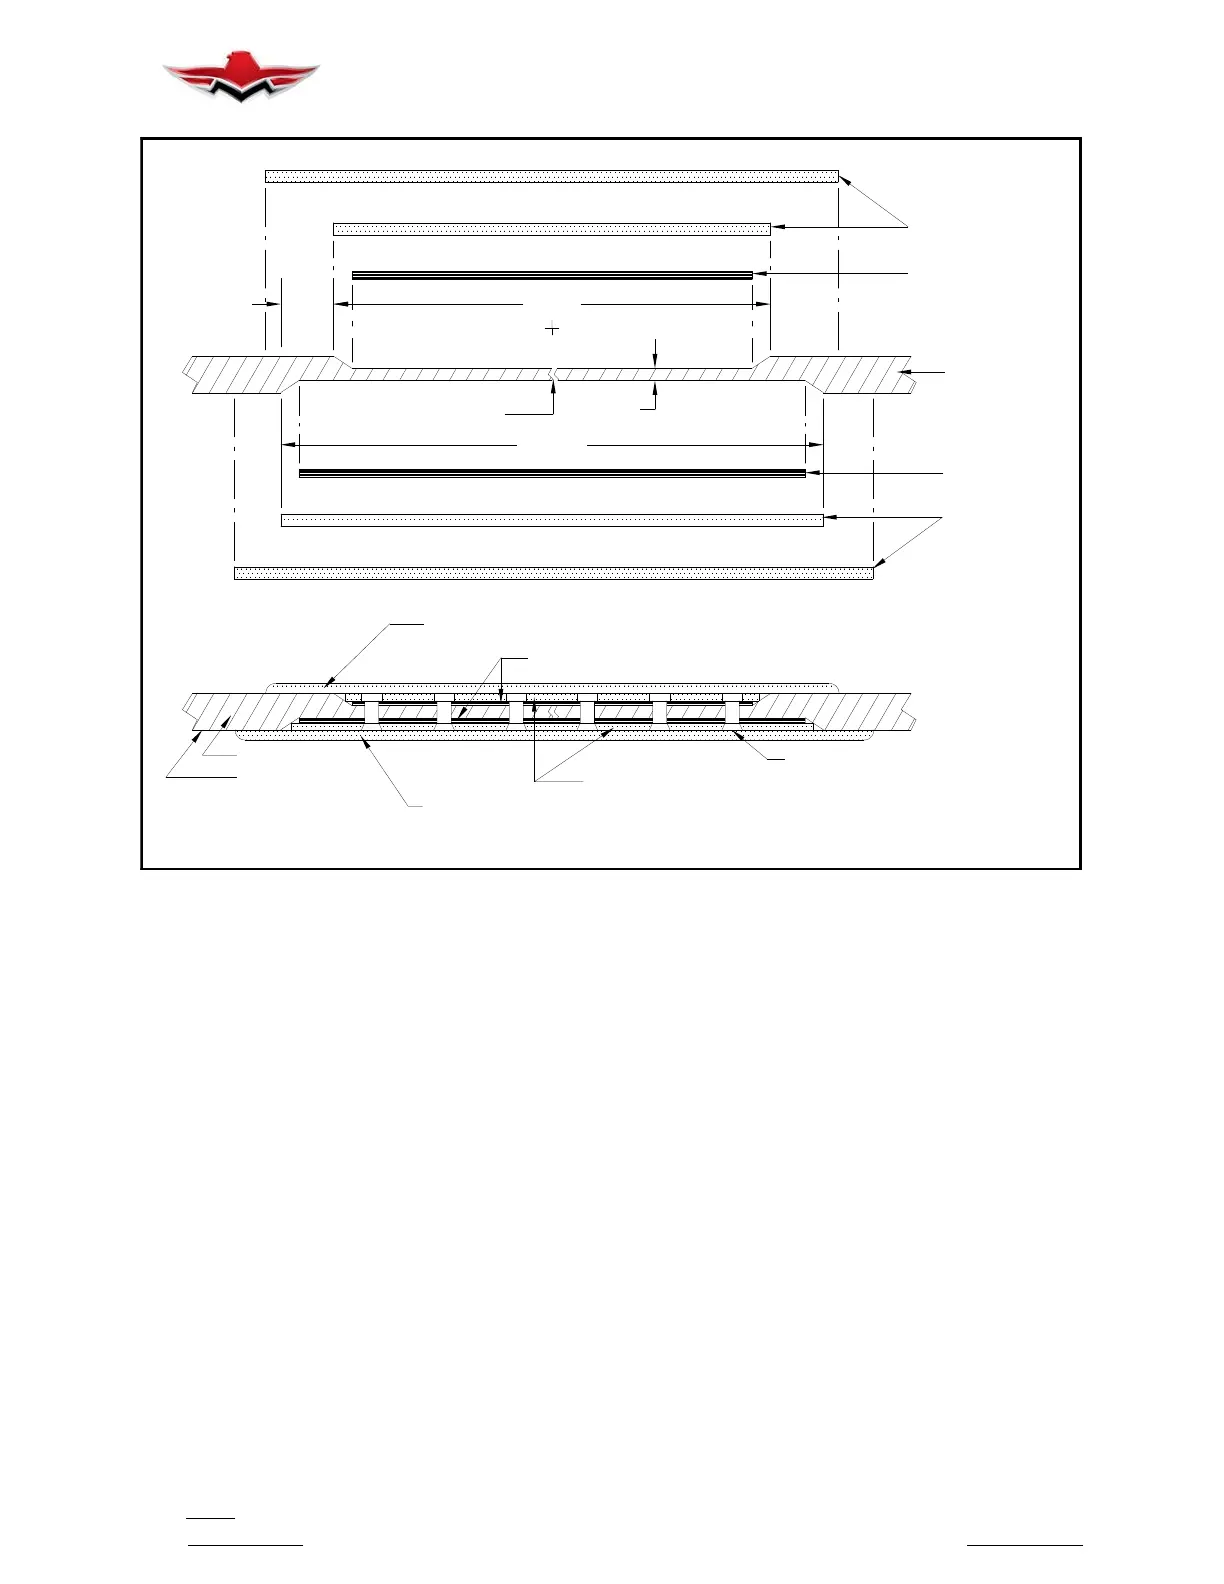
SIDE IS A NON- FINISHED SURFACE.
OVERLAP (1) LAYER FIBERGLASS ONLY IF THIS
FIBERGLASS - BOND IN PLACE
ALUM. PLATES
OVERLAP (1) LAYER FIBERGLASS
2.75”
.03”
2.0”.375”
SURFACE
LAMINATE
FINISHED
CRACK
51- 15- 03, 2)
(SEE SECTION
FLUSH RIVET (TYP.)
.025 T- 3 ALUM.
.025 T- 3 ALUM.
CLOTH
#181 FIBERGL ASS
51- 15- 03, 2)
(SEE SECTION
FIBERGLASS
CLOTH
#181
LAMINATE
COMMON STRUCTURAL LAMINATE REPAIR - METAL INSERT
FIGURE 51- 28
51-15-05 - COMMON STRUCTURAL LAMINATE
REPAIR (FIBERGLASS- RESIN COMBINATION)
1. Apply wet coat of catalyzed epoxy resin to cham-
fered surface (Figure 51- 29).
2. Apply one layer of #181 fiberglass cloth saturated
with catalyzed epoxy resin.
3. Add additional plies of #181 fiberglass cloth satu-
rated with epoxy resin to attain original laminate thick-
ness.
4. Apply one layer of #181 fiberglass cloth to the non-
finished side of laminate, extending 1/2” each side of
the chamfer and bond in place.
5. Lay wax paper over both sides of the repaired area
while still wet. This prevents adhesion to the pressure
clamp application (paragraph 6).
6. Place rigid aluminum plates on both sides of repair
area and clamp into place with “C” clamps. Permit lami-
nate repair to cure.
7. After fiberglass repair has cured, remove clamps
and install #3 AN426 rivets. Flush head to be on fin-
ished surface side. The number of rivets and spacing
will be determined by the size of the repair.
8. Upon completion of steps 1 thru 7, allow repair to
cure before attempting further treatment of appearance
surface.
9. Appearance surfaces will normally require ap-
plication of a filler- sealer coating. The appearance
area is to be wiped clean, using a clean cloth saturated
with M.E.K. prior to applying a filler- sealer coating.
10. Mix epoxy resin and catalyst per manufacturer’s
specifications and apply to appearance surface area.
Care should be taken to assure as smooth as possible
surface in this particular operation.
Permit this surfacing coat to cure prior to any additional
application or further rework.
11. Using #240 sandpaper, sand and blend repaired
area to match surrounding surface. Steps 10 and 11
may be repeated to acquire a satisfactory surface fin-
ish.
51- 15- 05
 Loading...


