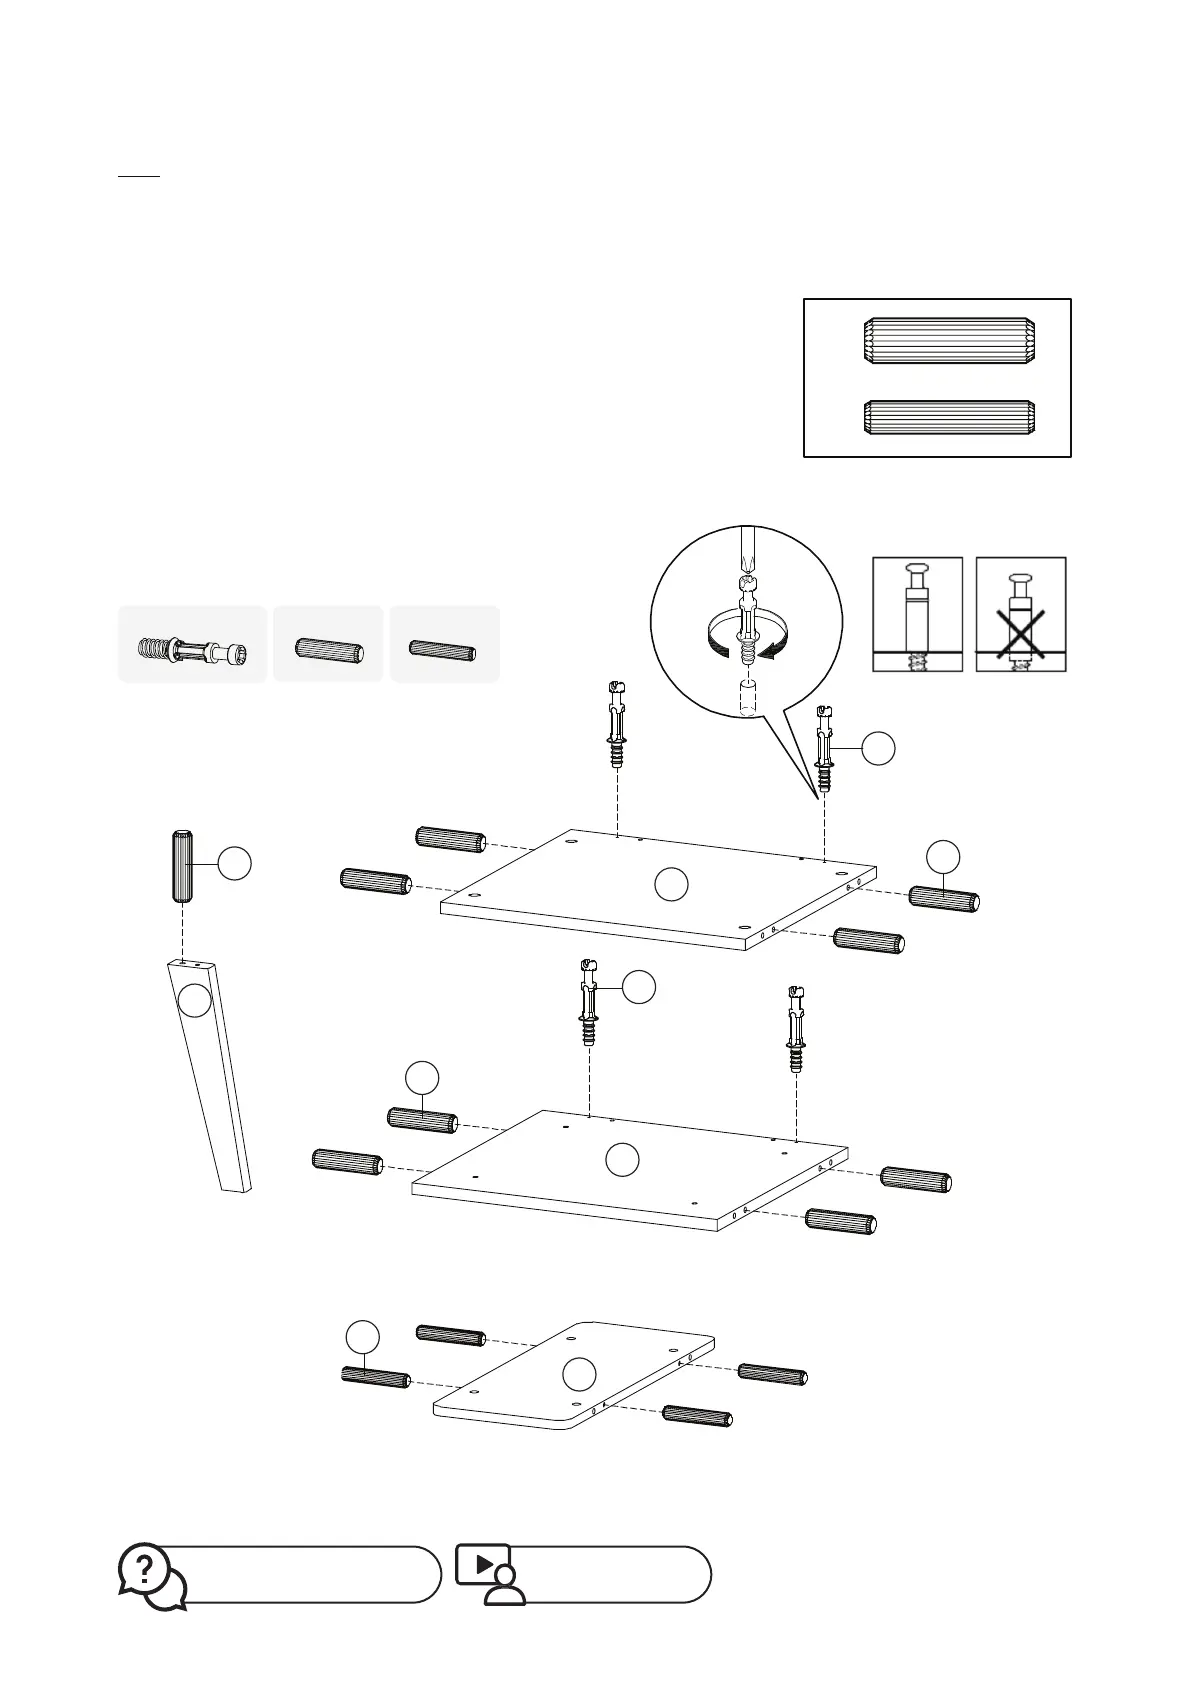
Step 1
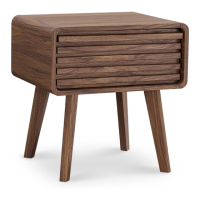
ENSLEY SIDE TABLE | 06
A
D
D
A
E
1
2
11
D
E
D
5
x4
A
x4
D
x12
E
x4
Ensure your floor is properly protected, then take out board
No.1, No.2, No.11 and 4 pcs of leg No.5. We recommend using
cardboard or foam to lift up the boards so as to avoid
scratches due to assembly actions.
Screw cambolt A to board No. 1 and No.2 (don’t over screw).
Please check carefully the dierent sizes for dowel D and
dowel E. Follow the illustration for matching the correct size
dowel to the correct position.
Plug in dowel D into side holes of board No.1 and No.2.
Plug in dowel E into side holes of board No. 11.
Plug in dowel D into 4 pieces of leg No.5 respectively.
*Don’t screw too deep
Missing parts? Or feeling stuck?
Contact us at help@mopio.com.
Watch demo video at:
https://bit.ly/36WUTt2