5
1.4 Connection of the stove
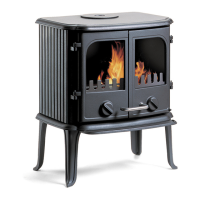
Your Panther will arrive with the ue collar (3) tted to the rear and the ue blanking plate
(4) tted to the top plate. These two pieces can be swapped if the top outlet is to be con-
nected to the ue.
Angles and bends in the ue
A right angle bend in the ue may be used immediately o the stove, but other variations in
ue direction must be kept to a minimum in number and to a minimum in angulation. A mild
variation from vertical will allow a better ue performance than a severe variation. Apart
from the immediate connection to the stove, ue angles should never exceed 45 degrees.
Indeed the recommended limit to variation from vertical is 30 degrees, and there should
be a maximum of two angles in the ue system (apart from any stove connection bend that
may be needed).
Painted nish
Protect the surface of the stove during installation if any adjacent brickwork is to be acid
washed. Cans of Senotherm grey-black spray paint are available if the paint nish is scued.
When the stove is lit for the rst time or two, some fumes will be given o as the paint cures.
Ventilate the room well. Fire the stove gently during this phase.
Checks before ring
(Always push the grate control lever at the lower-right corner of the righthand door fully in
before opening the doors).
Make sure that:
- the ue system, from the ue collar (3) upwards is rmly secured.
- the ue blanking plate (4) is in position.
- the bae plate (1) is sitting rmly on the back-plate scoop and the two side bricks.
- the log retaining bar (7) is in position.
- the air valves (6) and riddling grate (5) all move freely.
Attention
Never re a cold stove ercely. Build up temperature slowly. Remember to close the doors
rmly after initial lighting (see Operating Advice). Do not place wood underneath the stove
for storage; temperatures under the base plate can sometimes get high.
Further advice concerning the operation of the stove is contained in the leaet ”Operating
Advice”, also supplied with the Panther. Please read this before rst ring.



 To Next Page