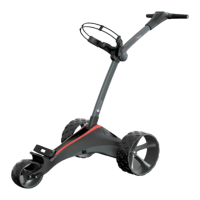
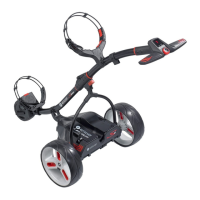
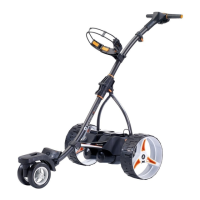
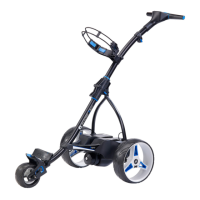
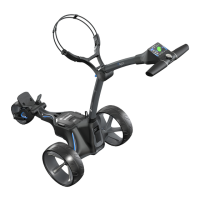
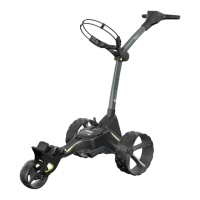
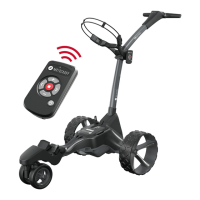
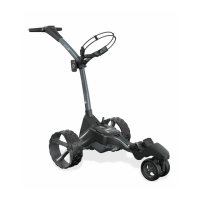
The Motocaddy S-Series is a range of electric golf trolleys designed to assist golfers by carrying their golf bags around the course. The manual covers two main models: the S1 Digital and the S3 Digital, both offering advanced features to enhance the golfing experience.
Function Description:
The primary function of the Motocaddy S-Series trolleys is to transport a golf bag, reducing the physical strain on golfers. Both models feature a digital control panel for speed adjustment and on/off control. The S3 Digital model offers additional advanced features such as adjustable distance control, competition mode, security pin code, time display, speed measurement, battery meter, and a USB charging port.
Important Technical Specifications (General to S-Series):
- Control System: Digital control panel with speed settings (1-9).
- Wheels: Rear wheels with "free-wheel" option for manual pushing if battery power runs out. Front wheel alignment is adjustable.
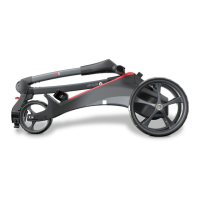
- Folding System: Central folding system for compact storage and transport.
- Bag Supports: Upper and lower bag supports with elasticated straps for secure bag attachment, adjustable for different bag sizes.
- Battery: Compatible with Lead Acid and Lithium batteries. Specific charging instructions are provided for both types.
- Motor: Integrated motor for propulsion.
- Connectivity: Battery connector for power supply.
- Weatherproofing: Weatherproofed design, though minimizing exposure to heavy rain and avoiding submersion in water is recommended.
Usage Features:
General Trolley Usage:
- Serial Number Location: Found on the underside of the battery tray frame, important for warranty registration and future reference.
- Wheel Attachment: Wheels are labeled "L" (left) and "R" (right) and must be attached correctly. Push the release button, slide the wheel onto the inner groove of the axle, release the button, and pull the wheel outwards until it clicks into place. The outer groove allows for "free-wheel" mode.
- Folding & Unfolding:
- Unfolding: Pull the clip to release the locking system, raise the wishbone to the vertical position, hook the lower frame into the clip, unfold the upper frame, and pull the clip again to lock it.
- Folding: Pull the clip, fold the main frame in half, fold the wishbone down, and pull the clip to lock. Ensure no bag or battery straps obstruct folding.
- Bag Support Adjustment: Position the two placement straps around the bag handle, stretch the elasticated strap around the bag, and loop the rounded bar underneath the housing hook. To adjust tightness, unclip the straps from the housing, pull them outwards, and move the bar downwards (tighten) or upwards (loosen).
S1 Digital Specific Usage:
- On/Off & Speed Control: The red button turns the trolley on/off and controls speed. Rotate the speed dial clockwise to increase speed (1-9) and anti-clockwise to decrease. Press the button to start or stop the trolley.
- LED Indicators: Right-hand LED displays battery capacity (green, amber, red). Left-hand LED illuminates when power is on.
S3 Digital Specific Usage:
- Control Panel Activation: Connect the battery to the cart. The speed setting number in the blue circle indicates the initial speed. The solid blue circle rotates when the trolley is moving.
- Setting the Time: Hold Button B for three seconds until minutes flash. Press Button A to adjust minutes. Press Button B again to toggle to hours, adjust with Button A. Hold Button B for three seconds to set.
- Starting/Stopping & Speed Change: Twist the central button clockwise to increase speed (1-9). Press the button to start or stop. The blue circle rotates when moving, and speed (mph/kph) is displayed after a few seconds. Toggle between mph/kph by pressing Button B.
- Distance Readouts:
- "Distance 1": Measures drives or specific shots. Press Button A to toggle. To reset, press and hold Button A for three seconds when the cart is stationary. Readings are in yards or meters (toggle with Button B).
- "Distance 2": Measures approach shots. Similar to Distance 1, reset by holding Button A for three seconds. Both Distance 1 and 2 reset if the battery is unplugged.
- "Total Distance": Shows lifetime distance traveled (miles/km). Cannot be reset. Toggle with Button A.
- Adjustable Distance Control (ADC): While stationary, hold the central on/off button for a couple of seconds. "05" and "ADC" will appear. Turn the button clockwise to increase distance or anti-clockwise to decrease. Press the button once to set the trolley in motion for the selected distance (counts down in 1-yard/meter increments). Can be stopped at any stage by pressing the central button.
- Competition Mode: To temporarily disable distance measuring functions, hold the left and right blue distance buttons (A & B) for three seconds. "COMP MODE" will appear. Repeat the procedure to return to normal mode.
- Security Pin Code:
- Setting: Plug in the battery connector while holding Button A. Use the On/Off button to choose the first digit (0-9), then press Button B to confirm. Repeat for all four digits. The blue circle illuminates for a valid pin.
- Changing: Follow steps 1-5, entering the current pin first, then the new pin.
- Disabling: Follow the changing procedure and select four zeros as the new code.
- USB Charging Port: Located on the underside of the handle. Remove the cap and plug in a USB cable (not supplied) to charge GPS devices or other USB-chargeable units. Charging speed is lower than a mains AC charger. The port draws power from the main trolley battery and disables itself if the trolley battery capacity reaches a preset level to prolong battery life.
Maintenance Features:
Battery Charging (Lead Acid):
- General: Always disconnect and remove the battery from the trolley before charging.
- Connection: Plug the charger into a power socket, then attach the battery cable to the charger (matching red/black connections).
- Indicators: Red power indicator illuminates when connected to power. Green LED charging lights illuminate in sequence during charging. If they fail to do so, investigate.
- Disconnection: Disconnect the charger from the mains and battery once charging is complete. Never leave connected when not on charge.
- Storage: Charge regularly if not used for long periods. Charge for at least 8 hours before first use.
- Environment: Do not charge outside or in moist conditions.
Battery Charging (Lithium - where applicable):
- S3 Digital Battery Meter Adjustment: Hold the left blue button while plugging in the battery, release when the screen turns on. Use the left button to toggle between "S" (Standard/Extended Range Battery) and "L" (Lithium Battery). Unplug for five seconds, then reconnect.
- Important Advice: Always recharge after each use. Store in a dry, non-carpeted place at 10-30°C. Use only Motocaddy Lithium chargers. Do not open the charger. Disconnect as soon as possible after charging.
- Procedure: Unplug from trolley. Connect battery to charger (black to black, blue to blue). Plug charger into mains. Green LED indicates full charge. Charging takes 3-5 hours.
- Hibernation (Winter Storage): For long periods of non-use (e.g., 3 months), store the battery half-charged. Use for a round, then charge for 1.5 hours. Fully recharge before next use. Always disconnect the charger from the battery after charging.
- Battery Management System (BMS): Protects against abuse, high currents, deep discharge, and overcharge. Battery may have no output when delivered; fully charge to activate BMS. If the BMS switches off due to deep discharge or long-term storage, a full charge will rectify it. The voltage meter is synchronized with the BMS. If the trolley warns of low battery, be prepared to push it home if ignored, as Lithium batteries "drop off" quickly.
Trolley Care:
- Storage: Do not store outside.
- Rain Exposure: Minimize exposure to heavy rain (use an umbrella).
- Water Damage: Avoid submerging in water. Wipe water droplets from the screen before storage.
- Cleaning: Never use a pressure washer. Wipe with a damp cloth.
Troubleshooting (S1 & S3 Digital):
- Trolley Does Not Move: Flowchart guides diagnosis for battery connection, LED board, controller box, or motor issues.
- Trolley Only Goes One Speed: Flowchart guides diagnosis for speed setting, ON/OFF PCB board, controller box, or motor issues.
- Cart Will Not Complete 18 Holes: Indicates battery capacity reduction, likely due to not charging within 24 hours of use or prolonged sitting without charge. Suggests ordering a new battery.
- S3 Digital Clock Resets: Suggests the battery inside the handle is flat. Instructions provided to open the handle, replace the battery, and reassemble carefully.
- Adjusting the Front Wheel: If the trolley is not tracking straight, lift the lever on the front wheel housing, adjust the two small metal gear wheels to realign, and push the lever down to lock. This can be repeated until alignment is satisfactory.