•
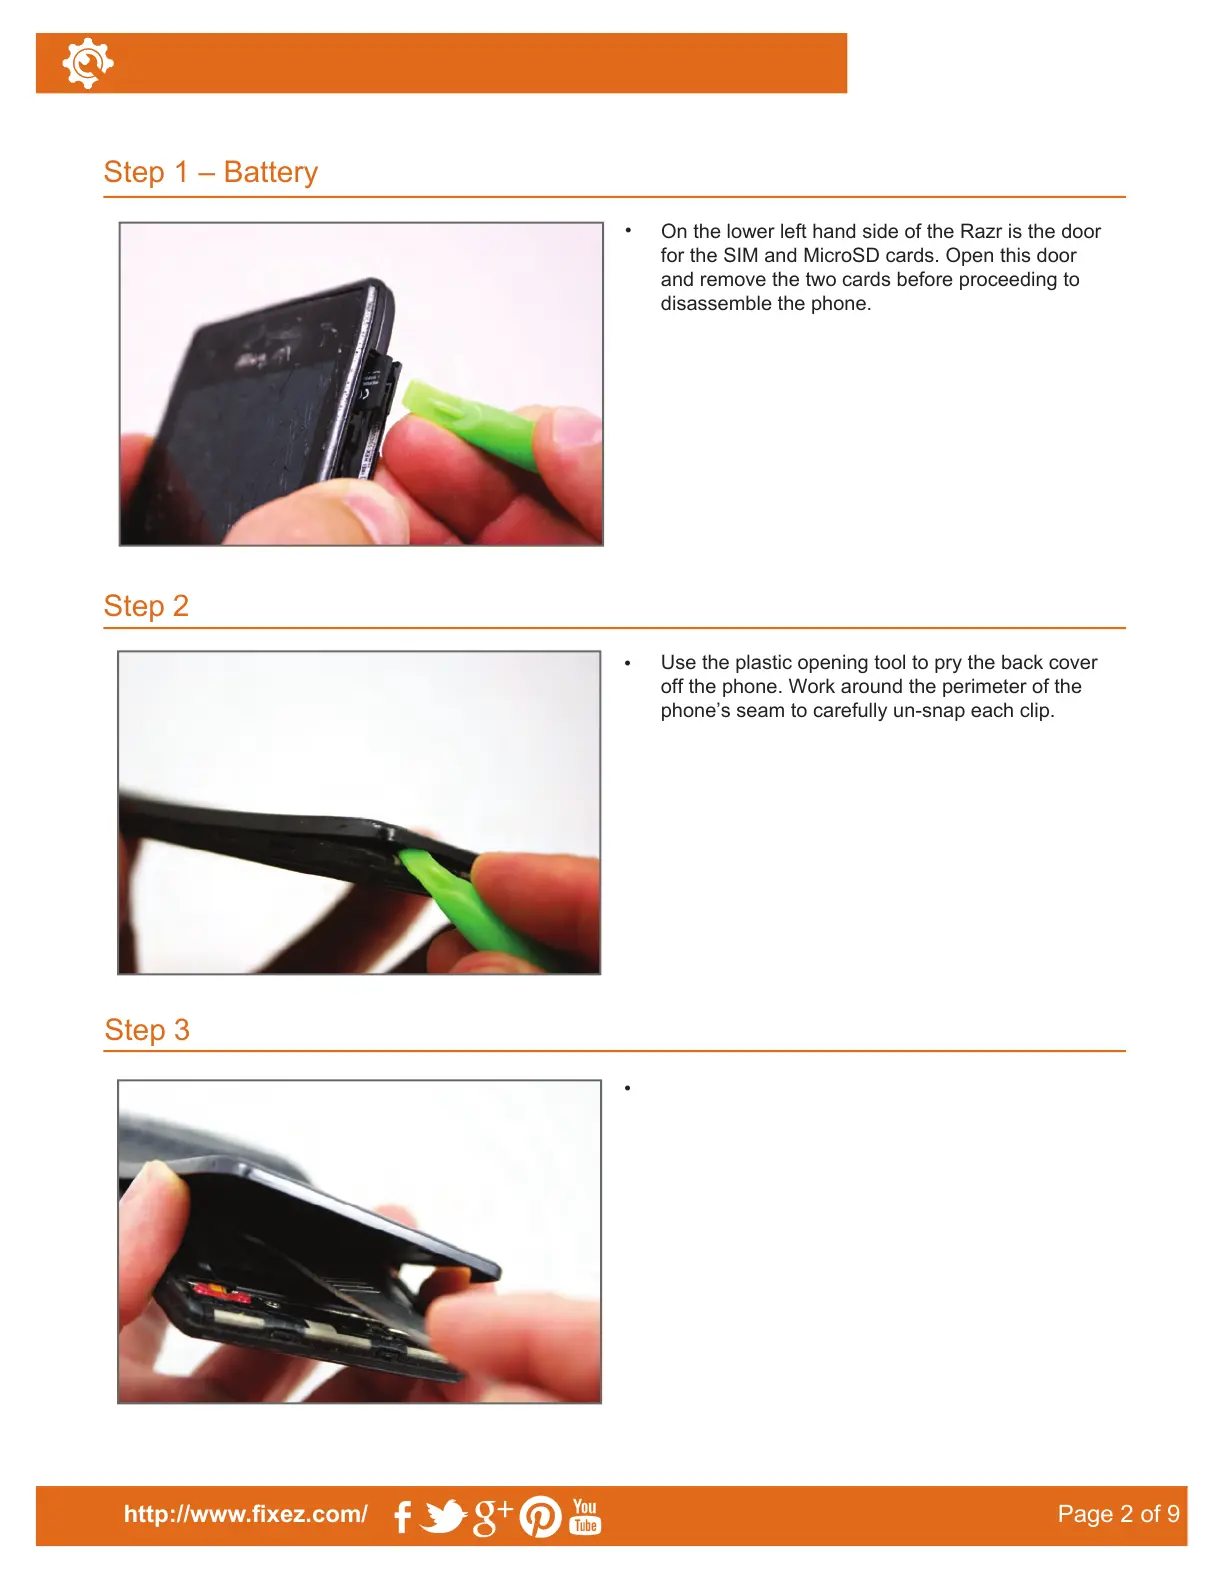
On the lower left hand side of the Razr is the door
for the SIM and MicroSD cards. Open this door
and remove the two cards before proceeding to
disassemble the phone.
•
Use the plastic opening tool to pry the back cover
off the phone. Work around the perimeter of the
phone’s seam to carefully un-snap each clip.
Step 3
•
Step 1 – Battery
Step 2
http://www.fixez.com/
Page 2 of 9
Motorola Droid Razr–Disassemble Guide
There is a small amount of adhesive in the center
of the back cover attaching it to the battery. Using
the metal spudger, separate this adhesive.

 Loading...