4
English
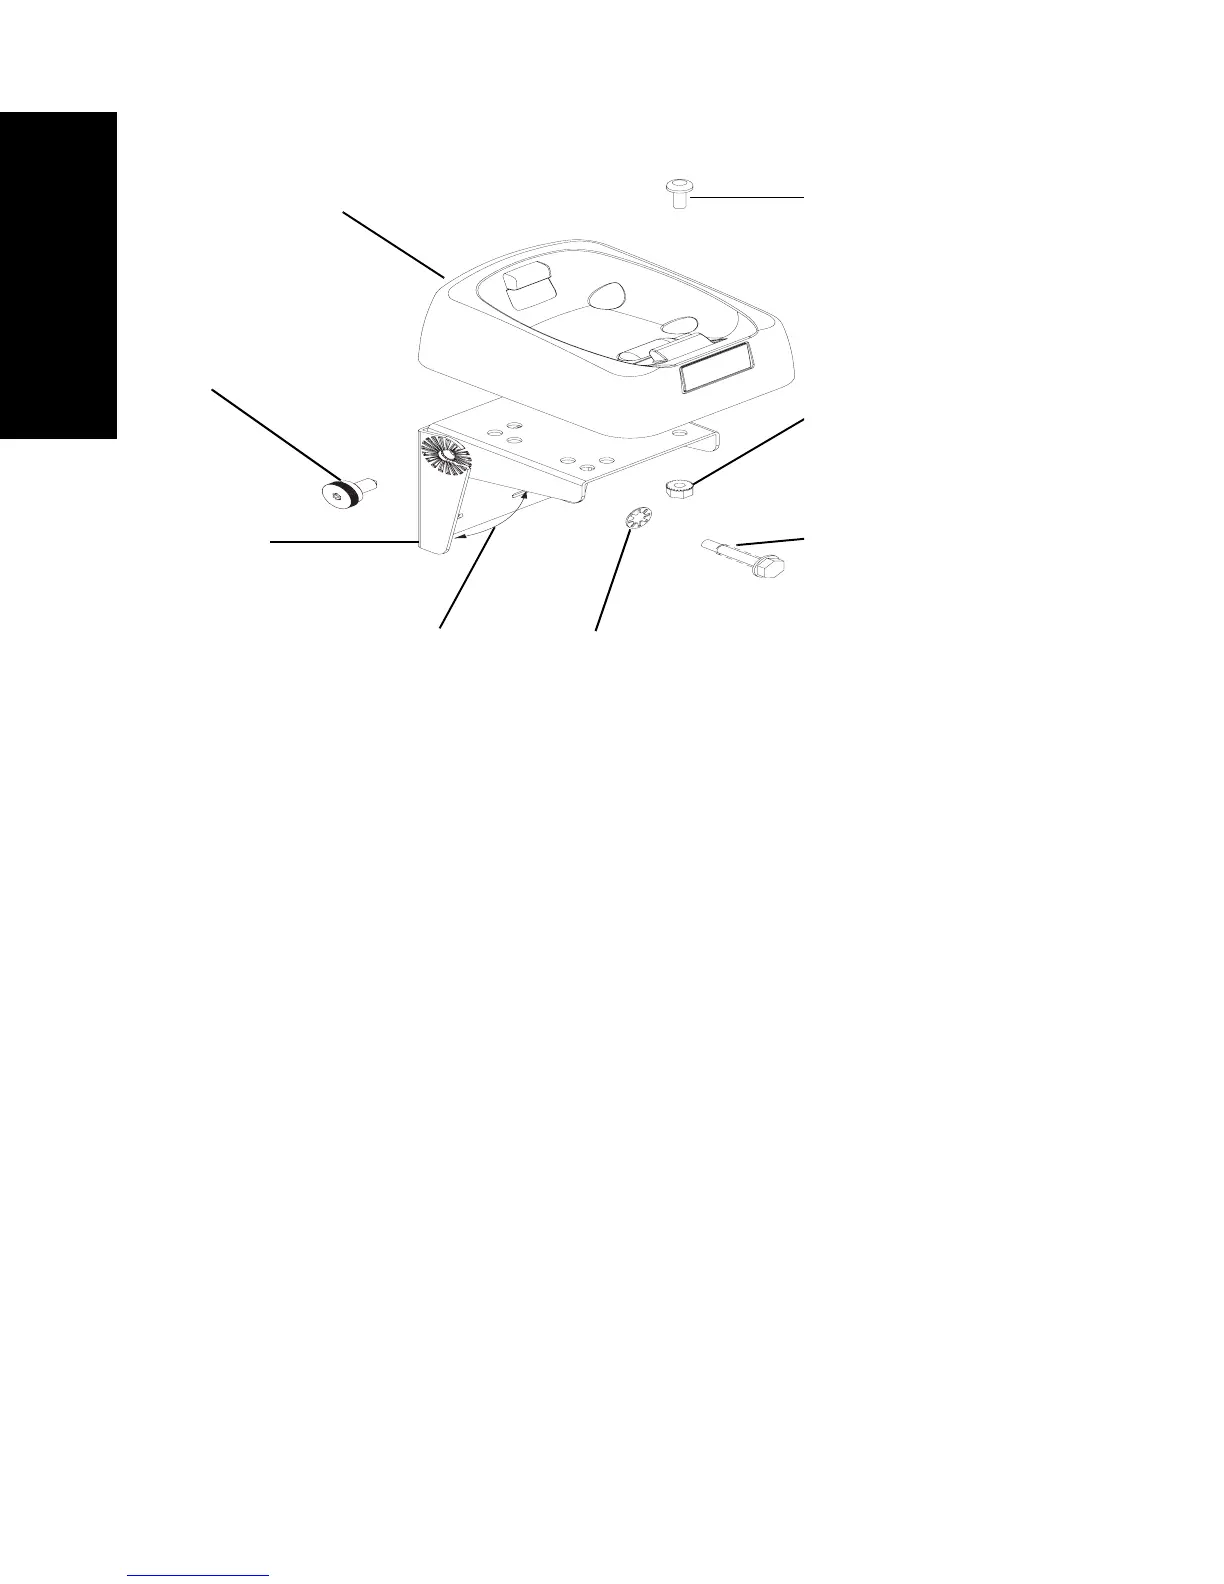
Figure 1. Adjustable Angle Bracket
Making Final Connections
When the adjustable angle bracket and hang-up cup are
installed, secured, and adjusted:
1. Snap the handset into the hang-up cup.
2. Connect the handset’s coiled cord plug to the
microphone connector on the front of the terminal’s
Control Head and the receive audio is routed to the
terminal. Align the connector’s pin.
3. Turn the locking collar on the radio end of the handset
cord ¼ turn clockwise to secure it in place.
Hand Screw
(each side)
Adjusting Angle
0° to 110°
Bracket
Base
4mm Lock Nut (4)
Hang-up Cup
M4 x 10 mm LG
Torx-head Machine
Screw. A T-20 driver
is needed to locate
Internal Star
Lockwasher (4)
#10-16 Hex-Head
Cap Screw
Text(Eng)global.fm Page 4 Friday, May 4, 2007 10:12 AM
 Loading...