Do you have a question about the Motorola RMN5038 and is the answer not in the manual?
Details compatibility of the RSM with specific radio models for compliance.
Specifies submersible points of the RSM and compatible radios.
Instructions on how to securely connect the RSM to the radio.
Information on audio output and Push-to-Talk (PTT) operation.
Guide on activating the radio's emergency mode via the RSM.
Details essential radio programming for RSM emergency button functionality.
The Motorola RMN5038 is an Emergency Remote Speaker Microphone (RSM) designed for occupational use, ensuring compliance with FCC RF energy exposure requirements when attached to a compatible radio. It is crucial to read the accompanying Product Safety and RF Exposure booklet for safe usage and to understand RF energy exposure limits. For use in hazardous atmospheres, refer to the Factory Mutual (FM) Approval Product Listing.
The RMN5038 RSM is compatible with a range of Motorola radio models, including XTS 5000, XTS 3500, XTS 3000, XTS 2500, XTS 1500, HT1000, MTS2000, MT2000, GT900, and HT1100. It is important to note that this RSM is not compatible with JT 1000 or MTX 8000/9000 portable radios, as these models do not support the RSM's emergency features. The RMN5038 is submersible at the microphone head, including the strain relief mic head/cord interface. It is also submersible at the radio connector when used with Ruggedized radio models such as XTS 3000R, XTS 3500R, and XTS 5000R.
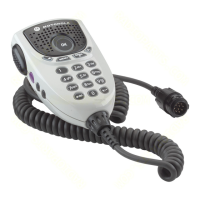
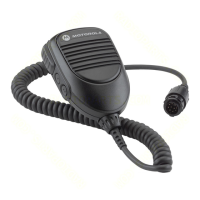
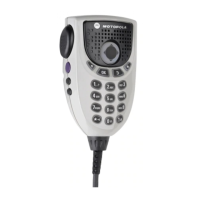
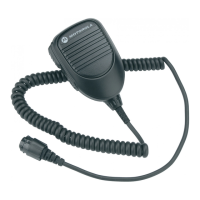
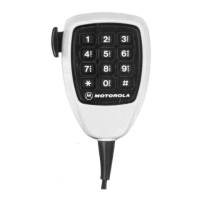
The RSM features a Push-to-Talk (PTT) button for transmitting, an orange Emergency Button for activating emergency mode, and Volume "+" and "-" buttons for adjusting audio levels.
To attach the RSM to a radio, align and connect the microphone's connector to the radio's side connector, then tighten the screw at the upper end of the connector to secure it.
When the RSM is connected, audio will only be heard from the microphone's speaker. To transmit, press and hold the PTT button, speak into the RSM, and release the PTT when finished. Connecting the RSM does not disable the radio's internal microphone and PTT.
The Volume "+" and "-" buttons allow users to adjust the audio level independently of the radio's main volume setting. Pressing "-" decreases the volume, while pressing "+" returns it to the radio's set level.
The orange Emergency Button activates the radio's Emergency mode. For XTS 3000 radios (host code 06.xx.xx) and all XTS 1500, XTS 2500, and XTS 5000 radios, press and release the orange button. The radio will activate the Emergency signal after programmed Pre-Alert and Post-Alert delays elapse. For all other compatible radios, press and hold the orange button, wait for the programmed Pre-Alert delay to elapse, listen for the two-beep Alert Tone, continue holding the button through the Post-Alert delay, and release it once the radio enters Emergency mode. If the radio is programmed for silent emergency, no alert tone will sound. Emergency mode is indicated by a short, medium-pitched tone, and display radios will alternate "emergency" with the zone/channel display. Silent emergency programming will suppress alert/emergency tones and display changes.
Proper operation of the RSM's Emergency button requires specific radio programming. Emergency activation from the RSM is delayed by programmed Pre-Alert and Post-Alert delays. Factory defaults or previous programming may set these delays to 8-120 seconds, so it is essential to check and program the radio appropriately using Radio Service Software (RSS) or Customer Programming Software (CPS). The programming of Pre-Alert and Post-Alert delays only affects the RSM's Emergency button, not the radio's internal Emergency button.
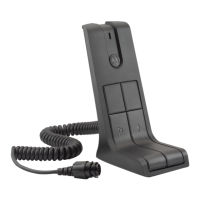
To attach the belt/swivel clip, slide it down the grooved rails on the back of the RSM until it clicks into place. To remove it, insert a small screwdriver (or similar instrument) between the release tab and the back surface of the microphone. While holding the screwdriver against the release tab, push the clip toward the top of the microphone until it moves up and off.
The RMN5038 Emergency RSM is not repairable and is covered by a standard Motorola one-year limited warranty. For detailed warranty information, contact your Motorola dealer or point-of-purchase. A replacement swivel clip (part number 4205823V01) can be ordered through your Motorola dealer or by calling Motorola Radio Products Services Division at 1-800-422-4210.
| Brand | Motorola |
|---|---|
| Model | RMN5038 |
| Category | Microphone |
| Language | English |