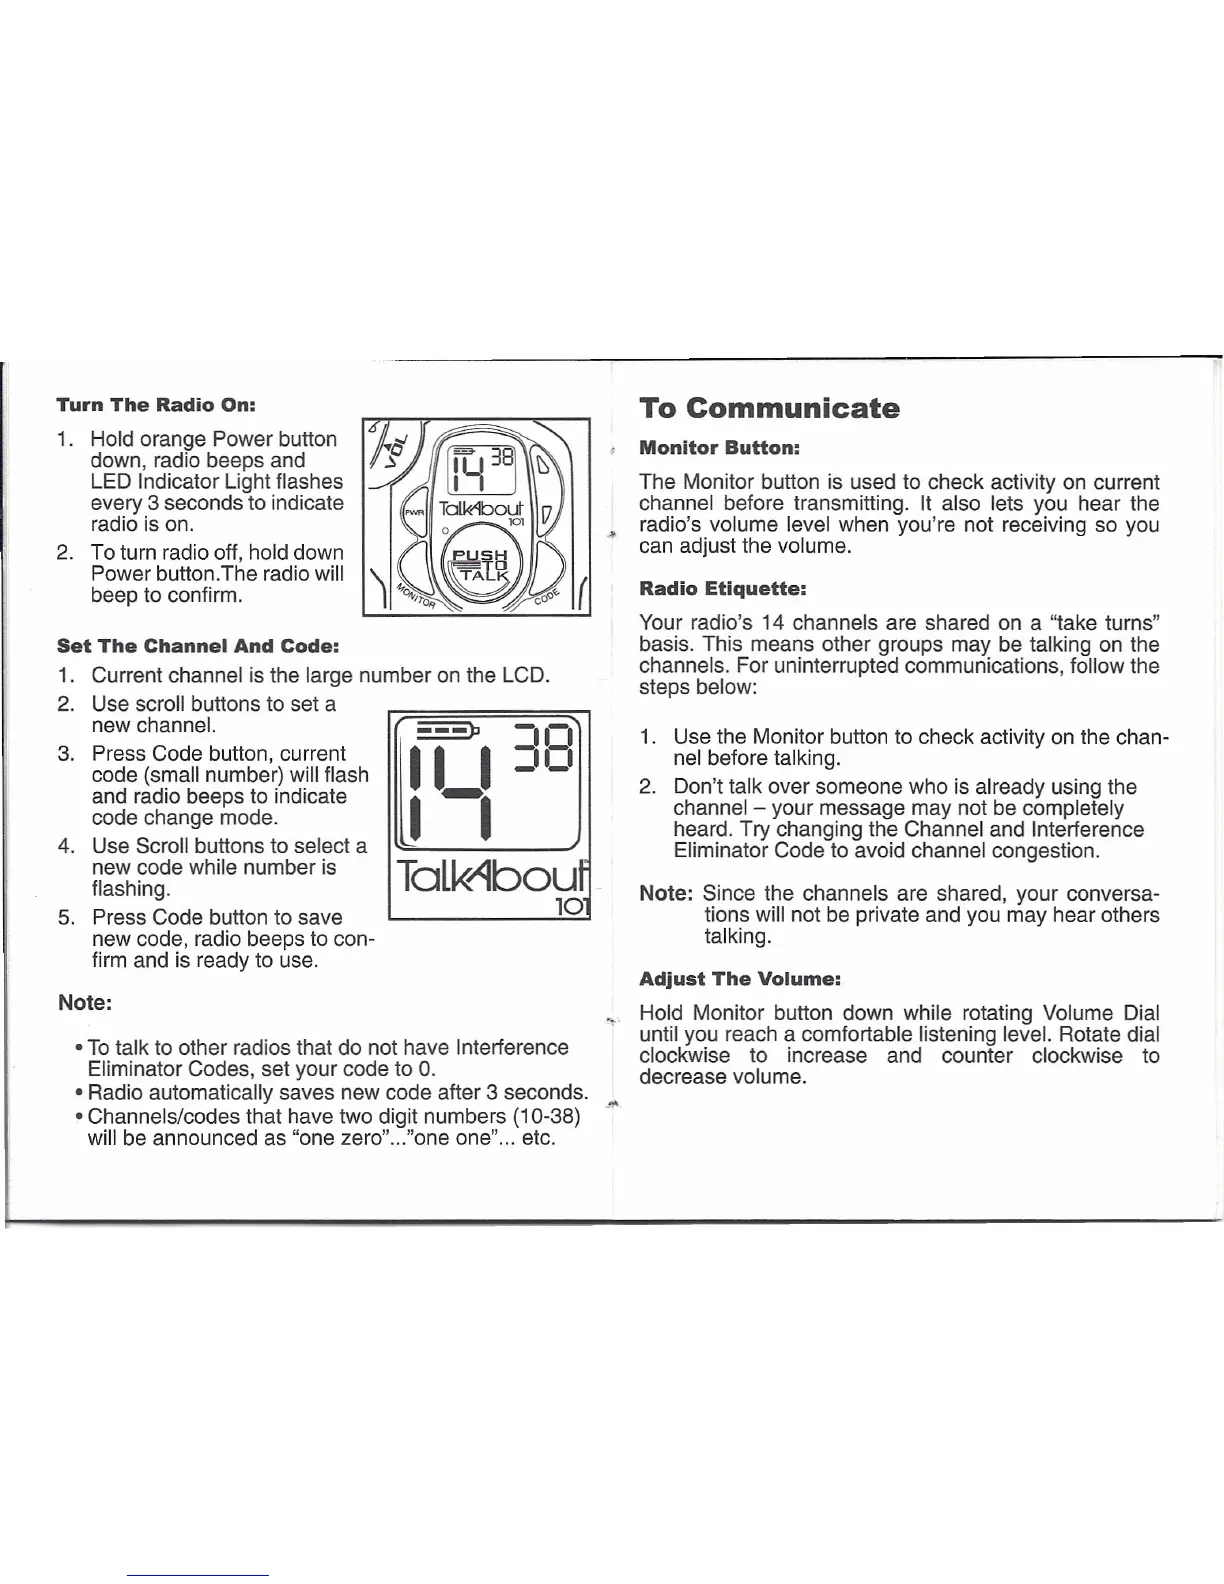
Turn The Radio On:
1. Hold orange Power button
down, radio beeps and
LED Indicator Light flashes
every 3 seconds to indicate
radio is on.
2. To turn radio off, hold down
Power button.The radio will
beep to confirm.
Note:
Talk~bouf
10
To Communicate
Monitor Button:
The Monitor button is used to check activity on current
channel before transmitting. It also lets you hear the
.• radio's volume level when you're not receiving so you
can adjust the volume.
Radio Etiquette:
Your radio's 14 channels are shared on a "take turns"
basis. This means other groups may be talking on the
channels. For uninterrupted communications, follow the
steps below:
1. Use the Monitor button to check activity on the chan-
nel before talking.
2. Don't talk over someone who is already using the
channel - your message may not be completely
heard. Try changing the Channel and Interference
Eliminator Code to avoid channel congestion.
Note: Since the channels are shared, your conversa-
tions will not be private and you may hear others
talking.
Set The Channel And Code:
1. Current channel is the large number on the LCD.
2. Use scroll buttons to set a
new channel.
3. Press Code button, current
code (small number) will flash
and radio beeps to indicate
code change mode.
4. Use Scroll buttons to select a
new code while number is
flashing.
5. Press Code button to save
new code, radio beeps to con-
firm and is ready to use.
Adjust The Volume:
"_ Hold Monitor button down while rotating Volume Dial
until you reach a comfortable listening level. Rotate dial
clockwise to increase and counter clockwise to
decrease volume.
• To talk to other radios that do not have Interference
Eliminator Codes, set your code to
o.
• Radio automatically saves new code after 3 seconds. .••
• Channels/codes that have two digit numbers (10-38)
will be announced as "one zero" ..."one one" ... etc.
 Loading...