EasyManua.ls Logo

Moultrie mcg-12688 User Manual

Moultrie mcg-12688
2 pages
To Next Page IconTo Next Page
Page #1 background imageLoading...
Page #1 background image
10s
30s
1m
5m
SET TIME
ENTER
SET DATE SET CAMERA ID
ENTER
SET MULTI-SHOT*
ENTER
ERASE IMAGES/FORMAT SD CARD
ENTER
ENTER
HIGH
LOW
VIDEO
AM
PM
• ON
• IRAIM
• SETUP
OFF
ON
IRAIM
SETUP
OFF
ON
IRAIM
SETUP
OFF
ON
IRAIM
SETUP
OFF
10
88:88
ON
IRAIM
SETUP
OFF
11:11
AM
SET CAMERA TIME & DATE SET CAMERA ID SET MULTI-SHOT ERASE IMAGES / FORMAT SD CARD
ENTER ENTER ENTER
ENTER
Setting Time and Date
While the camera is in the Setup mode,
the LCD display will show the time.
Press the Enter button and the selection
will ash. Use the UP/Down buttons
to change the selection. Press the Enter
button to lock in the selection and move
to the next selection. Repeat the process
to set the year, month and day.
Setting Time Delay
To set the time delay, slide the
Delay switch to the desired time.
There are 4 time delay settings:
10 seconds
30 seconds
1 minute
5 minutes
Setting Camera ID
Use the Up/Down buttons to choose
between nine dierent numbers
(1-9) to help identify your cameras
(i.e. “CAMERA 3”
will be marked on the
info strip given 3 was selected). Press
Enter to lock in your selection and
move to the next selection.
Setting Image Quality or Type
Slide the Resolution switch to the
desired setting.
Choose one of 3 settings:
High Photo
Low Photo
Video
Reset Picture Count/Erase Images/Format Card
After Multi-Shot has been set, you can reset the picture
count on the camera. Use the Up/Down buttons to choose
between Yes or No. Press the Enter button to conrm the
selection.
“Yes” will reset le number to start from 0001 and erase
all images stored on the SD card.
NOTE: This will also format your SD card for use in
your camera.
Setting Multi-Shot
Use the Up/Down buttons to choose between settings.
Choose how many pictures you would like captured in a
sequence when the camera is triggered (1 or 3).
Available options are:
1 (OFF) - Single photo taken per event.
3 PHOTO - Three photos are captured per event with an
approximate one second delay between each capture.
Press Enter to lock in your selection and move to the
next selection.
UP Button - Increase individual value
ENTER Button - Conrm a selection
DOWN Button - Decrease individual value
A-SERIES DIGITAL GAME CAMERAS
IV
ON - A countdown from 10-0 will apper on the display.
After countdown, the camera will enter Capture Mode
based on user settings.
10s
30s
1m
5m
SET TIME
ENTER
SET DATE SET CAMERA ID
ENTER
SET MULTI-SHOT*
ENTER
ERASE IMAGES/FORMAT SD CARD
ENTER
ENTER
HIGH
LOW
VIDEO
AM
PM
ON
IRAIM
SETUP
OFF
• ON
• IRAIM
• SETUP
OFF
• ON
• IRAIM
• SETUP
OFF
• ON
• IRAIM
• SETUP
OFF
10
88:88
• ON
• IRAIM
• SETUP
OFF
11:11
AM
AIM - Use this setting to nd your desired detection area.
Display will show “lr” indicating that IR AIM test mode is
active. The red Status Indicator will light when motion
is detected.
SETUP - Slide switch here to begin the setup process.
The display will show currently set time. To setup
the camera, follow the Menu Flow Chart below.
OFF - No camera or display activity.
Question and Answer IconNeed help?

Do you have a question about the Moultrie mcg-12688 and is the answer not in the manual?

Moultrie mcg-12688 Specifications

General IconGeneral
Trigger Speed0.5 seconds
Recovery Time1 second
Memory Card TypeSD/SDHC
Video Resolution720p
Detection Range80 ft
Flash Range80 feet
Flash TypeLow Glow
Battery TypeAA
StorageSupports up to 32GB

Summary

A-Series Digital Game Cameras

Setting Camera Time and Date

Configure the camera's current time and date settings for accurate event logging.

Setting Camera ID

Assign a unique ID to each camera for easy identification in the field.

Setting Multi-Shot

Choose the number of photos captured sequentially per trigger event.

Erase Images and Format SD Card

Reset picture count, erase stored images, or format the SD card.

Camera Overview

Front View Components

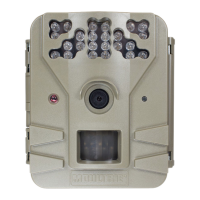
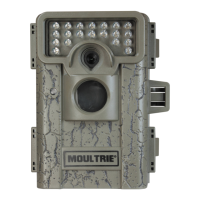
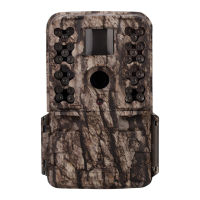
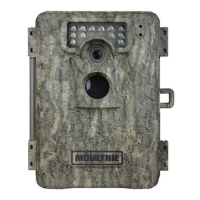
Identifies key components visible from the front of the camera, including lens and motion sensor.

Side View Components

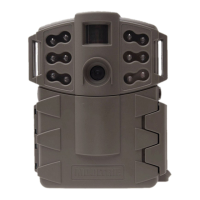
Details the ports and controls located on the side of the camera.

Bottom View Components

Highlights the mounting point and external power/data ports on the bottom of the camera.

Camera Setup

Powering On and Inserting SD Card

Instructions for powering up the camera and correctly inserting the SD memory card.

Battery Installation

Guidance on the proper installation of AA batteries, including polarity.

Memory and Storage

Information on SD card compatibility and usage for storing photos and videos.

Camera Specifications

Operational Modes and Resolution

Details the camera's operational modes, still resolution, and video resolution capabilities.

Power Supply and Memory Card

Specifies the required power source and maximum supported SD memory card size.

Image Capacity Estimates

Provides estimates for the number of photos and videos that can be stored on various SD card sizes.

Important Information

Mounting Instructions

Guidance on how to properly mount the camera using the strap for optimal positioning.

Important Battery Information

Recommendations for battery usage, including types, mixing, and removal when not in use.

Moultrie Limited Warranty

Details the product warranty period, coverage, and registration requirements.

Troubleshooting and Support

Information on where to find troubleshooting tips and contact customer support.

Related product manuals