This manual describes a Tilting Wall Mount designed for various TV models, including MD2165-LK, MD2263-LK, MD2263-XLK, MD2268, MD2268-32, MD2268-LK, MD2268-MK, MD2268-S, MD2268-XL, and MD2868-LK, as well as other mounts of similar design. It serves as a troubleshooting guide for common installation and usage issues.
Function Description:
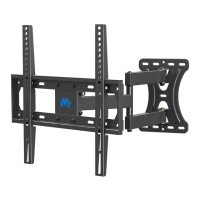
The primary function of this device is to securely mount a television to a wall, offering a tilting capability to optimize viewing angles. The tilting mechanism allows users to adjust the TV's vertical angle, which can be particularly useful for reducing glare or achieving a comfortable viewing position from different heights. The design aims to provide a stable and adjustable mounting solution for a range of television sizes and VESA patterns.
Usage Features and Troubleshooting:
TV Bottom Hitting the Wall / Limited Tilting Angle / Limited Operation Space:
- Issue: The TV's bottom edge makes contact with the wall, preventing the desired tilting angle or limiting the space behind the TV for cable management or access.
- Solution 1 (Spacers and VESA Holes):
- Step 1: Enlarge Space: Add spacers between the mounting bracket and the TV back. This increases the distance between the TV and the wall, providing more room for tilting and operation.
- Step 2: Adjust VESA Hole Usage (for VESA under 400x400): If the TV's VESA pattern is small (under 400x400), use the upper VESA holes (labeled 'B' in the diagram) on the TV instead of the lower ones (labeled 'A'). This effectively raises the TV's position relative to the wall mount, creating more clearance at the bottom. The diagram illustrates a 200mm difference in height when using the upper holes.
Cables Blocked by Mount/Bracket:
- Issue: The mounting bracket or the TV itself obstructs access to the TV's cable ports, making it difficult to plug in cables.
- Solution 1 (Plug in Cables First): Add spacers between the bracket and the TV back to create more space. Then, plug in all necessary cables before hanging the TV on the wall mount.
- Solution 2 (Adjust Bracket Position): If the TV's VESA pattern is smaller than the mount's maximum line, it may be possible to move the bracket away from the cable ports. This suggests that the bracket might have multiple mounting positions to accommodate different VESA sizes, allowing for strategic placement to avoid cable interference.
- Solution 3 (Contact Support): If the above solutions are insufficient, users are advised to contact customer support with detailed information, including pictures of the TV's back, VESA dimensions, and TV weight, for a tailored solution.
Brackets Cannot Clip into Wall Plate / Hard to Adjust Tilting Angle / Hard to Take Off TV:
- Issue 1 (Clipping/Adjustment): The TV brackets struggle to engage with the wall plate, or adjusting the tilting angle is difficult.
- Solution 1 (Reduce Tilt First): Reduce the tilting angle of the TV to 0° (flat against the wall) first. Then, fasten the tilting bolt to some extent. Hang the TV onto the wall plate, ensuring the bracket clips in. Finally, adjust to the desired tilting angle.
- Issue 2 (Removing TV): It is difficult to remove the TV from the wall mount.
- Solution 2 (Pull Down Strap): Pull down the release straps to disengage the TV from the wall mount.
TV Not Level:
- Issue: The mounted TV appears crooked or not perfectly horizontal.
- Solution 1 (Check Wall Plate Level): Use the provided bubble level to check if the wall plate itself is level. If not, adjust the wall plate until it is level.
- Solution 2 (Adjust Bracket on Wall Plate): Use bolt holes at the same level on the wall plate. Pull the bracket upward to reduce any gap between the bolt and the hole, then fasten them securely. This suggests that there might be some play in the bolt holes that can be used for fine-tuning the level.
- Solution 3 (Contact Support): If leveling issues persist, contact customer support.
Lag Bolt Difficult to Screw into Stud:
- Issue: The lag bolt encounters resistance or difficulty when being screwed into the wall stud.
- Solution (Proper Installation Technique):
- Step 1 (Pre-drill): Ensure pilot holes are pre-drilled to the required length as specified in the installation instructions.
- Step 2 (Tool Usage): Use an open wrench or a socket wrench for tightening. Avoid using electronic tools, as they can damage the lag bolt due to excessive torque or improper application.
- Replacement: If a lag bolt is damaged, contact customer service for a replacement.
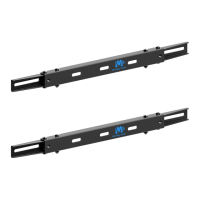
Brackets Stick Out the TV:
- Issue: The mounting brackets are visible beyond the edges of the TV.
- Solution (Adjust Bracket Position): Move the brackets downward on the TV and use the upper bolt holes to attach the TV. This effectively lowers the brackets relative to the TV's top edge, making them less visible.
Strap Sticks Out of TV:
- Issue: The release straps are visible below or beside the TV.
- Solution (Shorten/Conceal Straps): Use the slide buckle to shorten the straps. If they are still too long, tape them up onto the back of the TV or cut off the excess length.
Bolts Longer Than Bolt Hole on TV:
- Issue: The provided bolts are too long for the TV's VESA mounting holes, preventing a secure fit.
- Solution 1 (Add Spacers/Washers): Add spacers and/or steel washers between the bolt head and the bracket, or between the bracket and the TV, to take up the excess bolt length.
- Solution 2 (Add Plastic Washers): If Solution 1 is insufficient, add additional 2.5mm plastic washers (provided in the shipping box) along with the steel washer and spacer to further accommodate the bolt length.
- Solution 3 (Local Hardware Store): If all other solutions fail, visit a local hardware store to purchase bolts and washers that are specifically sized to fit the TV's holes.
Maintenance Features:
The manual implicitly suggests that proper installation and the use of correct tools (e.g., open/socket wrench instead of electronic tools for lag bolts) are key to maintaining the integrity and functionality of the mount. The provision of replacement parts (lag bolts) and the recommendation to contact customer service for defective products or complex issues highlight a support structure for product longevity. The ability to adjust components like spacers and VESA hole usage also contributes to the mount's adaptability and potential for long-term use with different TVs or in varying installation scenarios.
Important Note: The manual states that the "Mount shown here is indicative only. If there is any inconsistency between the image and the actual product you received, the actual product will govern." This is a crucial disclaimer, indicating that while the principles and solutions apply broadly, minor visual differences in the product may exist.