limpe a oleosidade das roscas do pedivela e dos pedais e aplique
uma gota de Trava química de média resistência somente na rosca do pedal antes de monta-lo.
TRAVA
QUÍMICA
Faça uma limpeza suficiente para
remover a oleosidade (óleo protetivo)
na rosca do pedal ou a trava química
pode não funcionar adequadamente.
Essa deficiência pode fazer o pedal se
soltar durante o uso, podendo ocasionar
acidentes.
AGUARDE 24 HORAS APÓS
O USO DA TRAVA QUÍMICA,
ANTES DE UTILIZAR O
EQUIPAMENTO!
Assembly
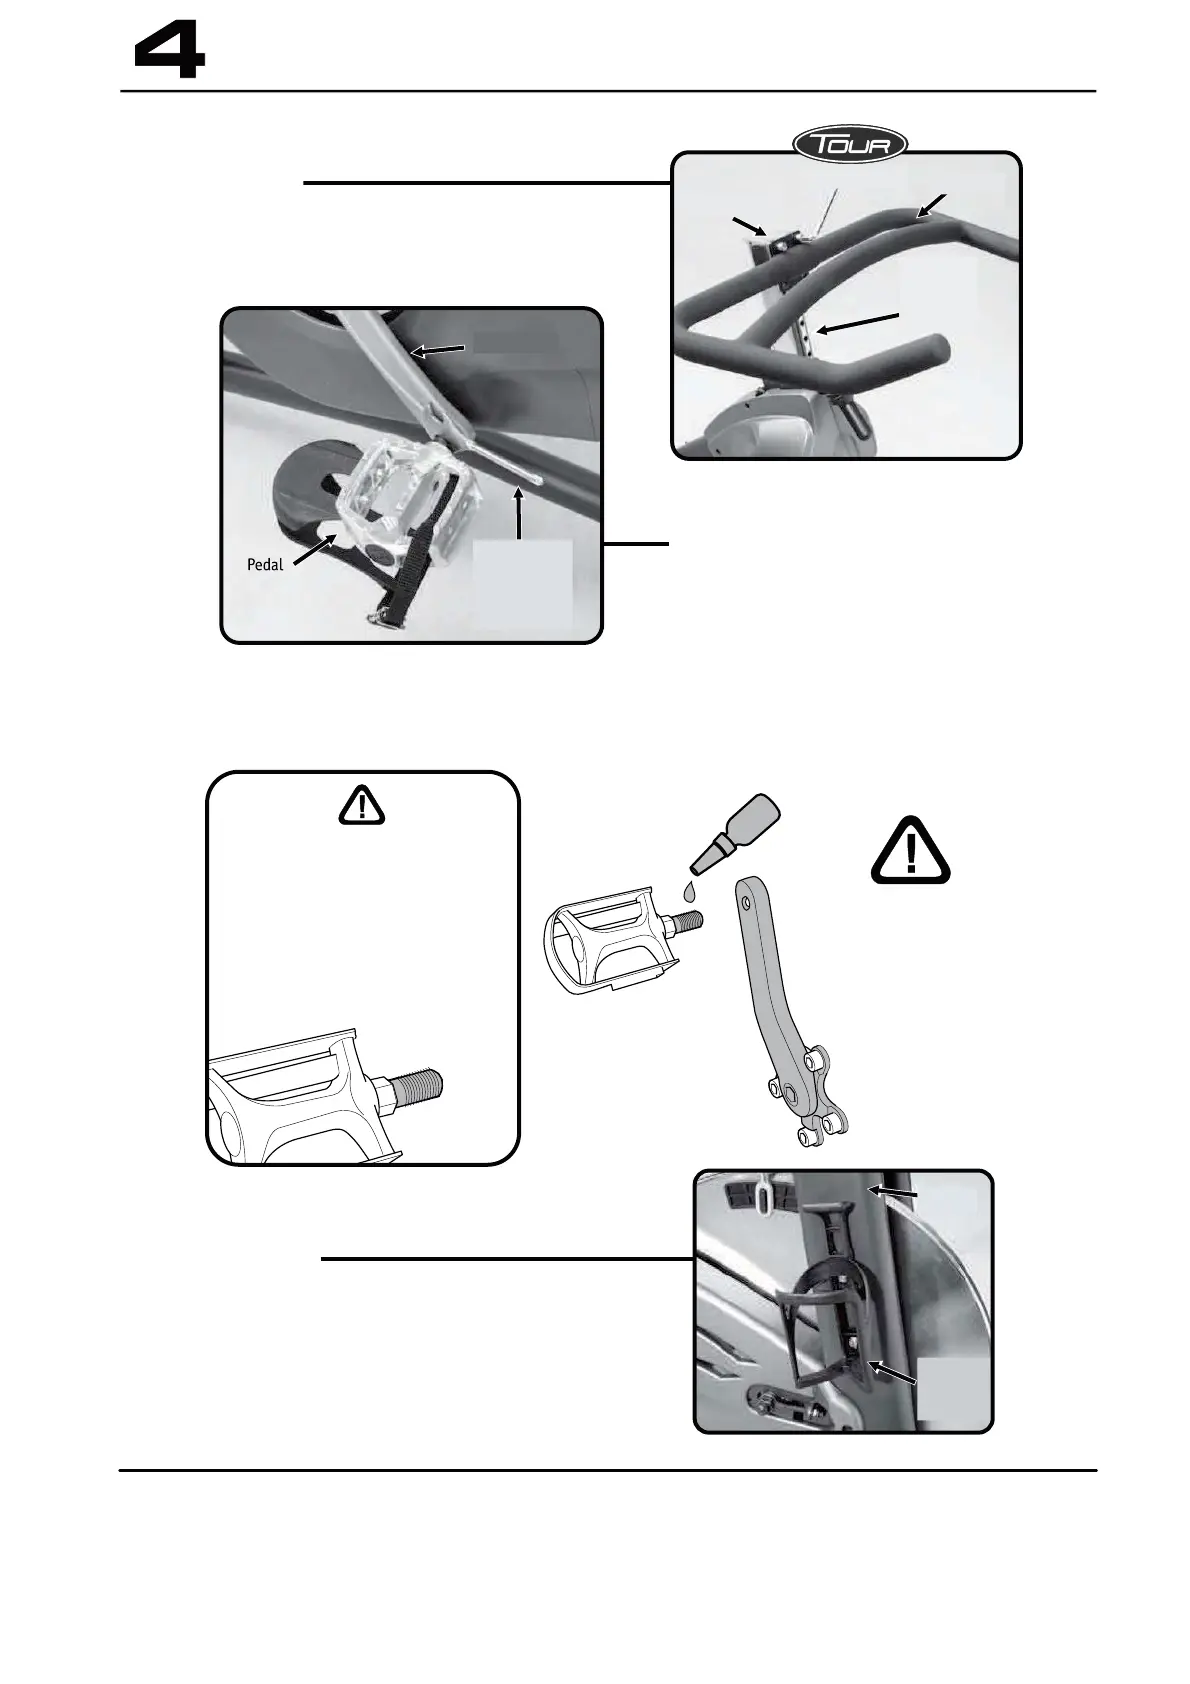
Bolt the bottle holder to the fork of the bicycle. Then
place the bottle in the holder.
Mount the pedals on the crankset.
Check the letters L for the left pedal and R
for the right pedal.
Attach the Handlebar to the Handlebar hei-
ght adjuster using the bolts and washers as
shown in the figure.
WAIT 24 HOURS AFTER USING
THE CHEMICAL LOCK BEFORE
USING THE EQUIPMENT.
LOCK
LOCK
When mounting the pedals on the crank, clean the grease from the threads of the crank and the pedals and apply
a drop of medium-resistance chemical lock only on the thread of the pedal before mounting it.
Clean sufficiently to remove the grea-
se (protective oil) on the thread of the
pedal or the chemical lock may not
function properly. This deficiency can
cause the pedal to come off during
use, which can cause accidents.
STEP 8
STEP 7
STEP 6
Assembly 4-3
Crankset
(Tool for
assembly)
Bottle
support
fork
screw
key
handlebar
Height
adjustable
handlebar