2
Installation Guide
04
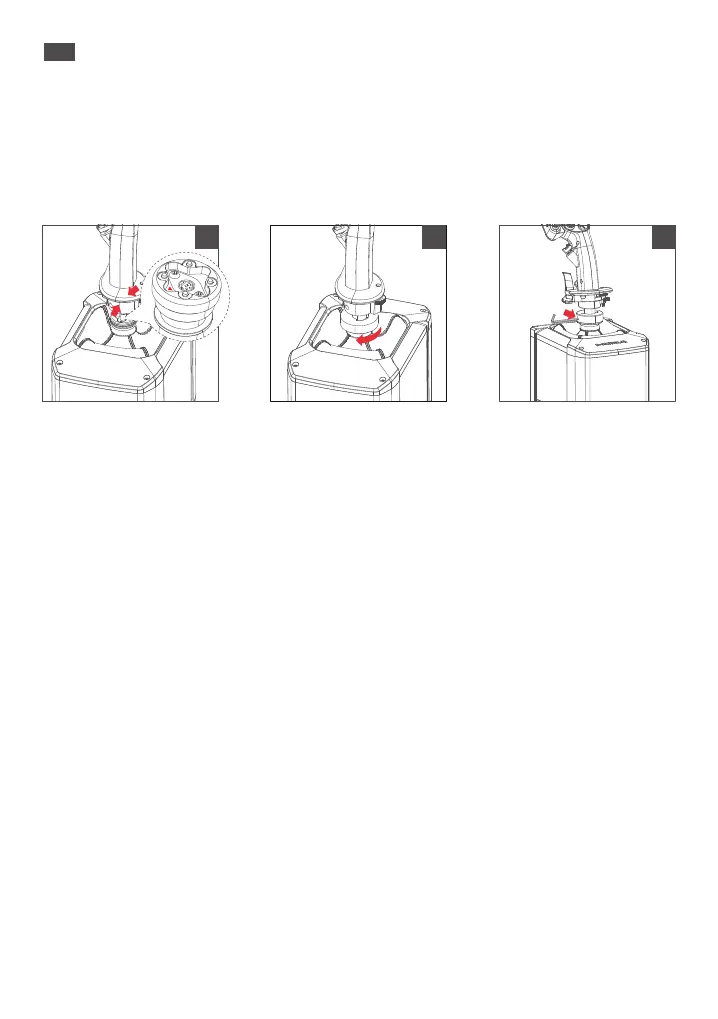
Installing the Flight Stick
1. Connect the flight stick to the base aviation connector in the direction indicated by the forward
facing arrow (refer to diagram1).
2. Rotate the nut ring on the flight stick clockwise to tighten (refer to diagram2).
3. Use the provided wrench to further tighten until the flight stick is securely connected to the
base (refer to diagram3).
Mounting the Base
1. Desktop Clamp Mode (Desk clamp requires separate purchase):
a. Secure the MOZA AB9 base to the desktop clamp using 4-6 screws at the bottom.
b. Place the desktop clamp on the desk and tighten the star-shaped handle until the clamp is
securely attached to the desk.
2. Desktop Clamp Hanging Mode (Desk clamp requires separate purchase):
a. Adjust the height as desired, then secure the desktop clamp's 4 screws onto the nuts on the
AB9's side groove.
b. Tighten the star-shaped handle of the desktop clamp until it is secure.
3. Alternative Installation Methods:
The base can also be secured to some pre-made simulator brackets using the screw hole
spacing at the bottom.
Using the Product
1. Connect the power cable and USB Type-B cable to their respective ports at the back of the
AB9 Force Feedback Base. Plug the power cable into a 220V outlet. Press the switch briefly to
power on (short press for on, long press for off). A quick flashing of the power indicator
confirms successful power connection.
2. Connect the USB Type-A end to your PC. Once connected, the power indicator will remain lit.
Visit www.mozaracing.com to download and install the MOZA software from the help center
to begin your flight experience. For additional information and tutorial videos, please visit the
official website.
1 2 3
 Loading...