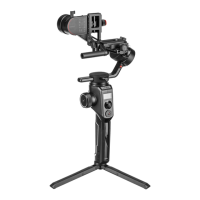
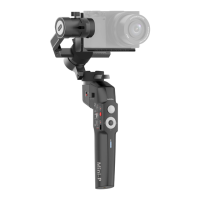
4. Attaching the Dual Handle.
Insert the handle bar into the side handles and tighten the lock-screw on each side. Loosen the lock-screw in the
middle of the handle bar. Attach the handgrip to the handle clamp and then adjust it properly, tighten the lock-screw.
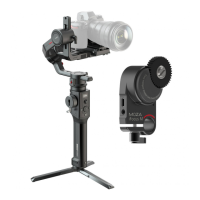
5. How to connect Camera Control Cables.
Connectthe camera to the Mini-USB port on the tilt motorwith the control cable,Plug the
L-shaped end of the control cable into the USB output port, and plug the other end into t
he camera USB port or the shutter port. Please make sure the gimbal motor is not blocked
by the control cable. Press the On/Off button
on the handgrip to start or stop recording.
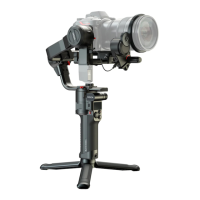
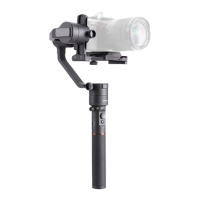
1. Balance the Tilt Axis.
(1) Put the MOZA Air upright, lock the yaw axis and roll axis. Rotate the tilt axis with your hand so that the
camera lens faces downwards.
If the camera lens rotates forward, loosen the
lock-screw on the tilt adjustment arm, move the tilt arm
backward till the lens is downward and not rotating due
to the gravity.If the camera lens rotates backward, loosen the
lock-screw on the tilt adjustment arm, move the tilt arm
forward till the lens is downward and cannot rotate.
Tighten the lock-screw after tilt balance is finished.
(2)Move the camera forward or backward
If the camera lens tilts up, loosen the camera
lock-knob, move the camera forward till the camera lens holds.
If the camera lens tilts down, loosen the camera
lock-knob, move the camera backwardtill the camera lens is
forward and holds still.
2. Balance the Yaw Axis.
Hold the MOZA Air in the way as shown in the picture below.
Then release the yaw arm.
If the roll motor descends and the camera ascends, loosen
the
lock-screw in the yaw axis adjustment arm and move the yaw
arm towards the camera till the yaw axis holds still.
If the roll motor ascends and the camera descends, loosen
the lock and move the yaw arm towards the roll motor till the yaw
axis holds still.After the yaw axis is properly balanced, tighten the
lock-screw.
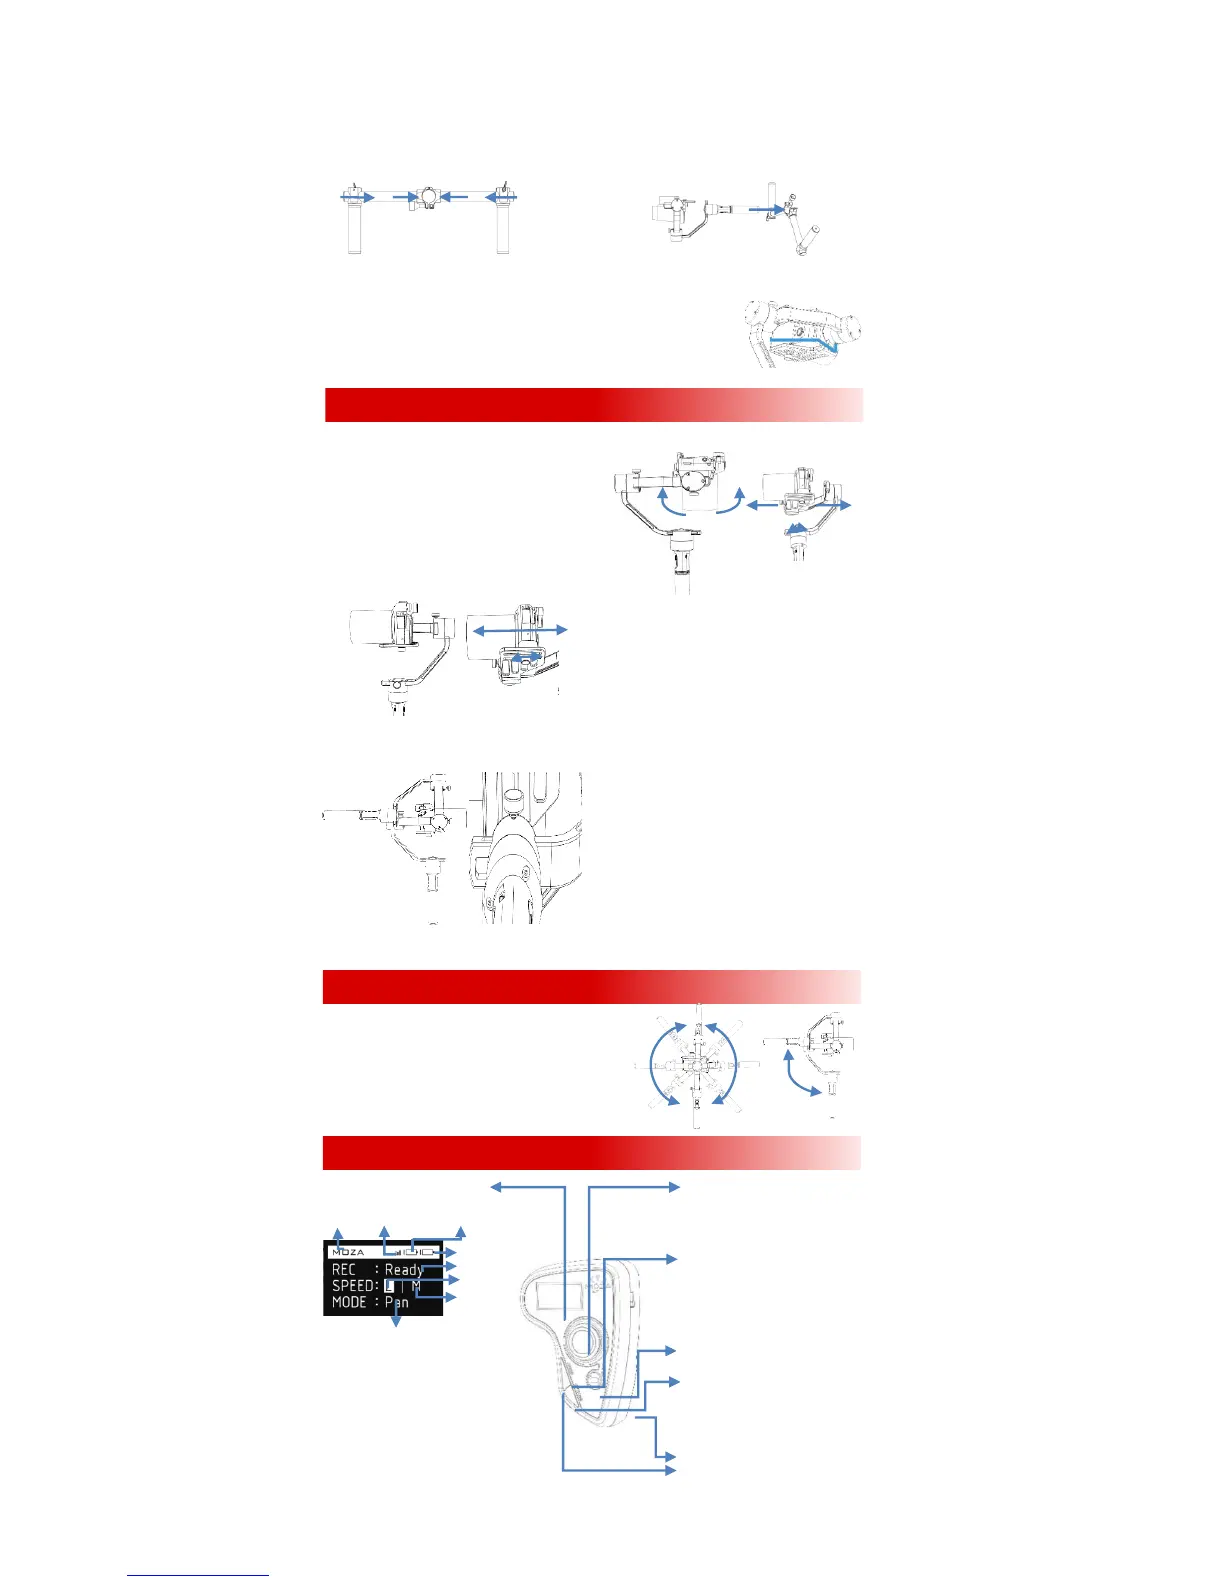
Underslung Mode: Rotate the handgrip around the roll
motor till 180 degrees above the camera. If the roll axis
adjustment arm is to far out to the right, the tilt motor will not
rotate. The gimbal may shake when rotating to 90 degrees
. Do not stay too long in the 90-degree rotation.
Flashlight Mode: Rotate the handgrip around the tilt
motor by 90 degrees. Switching into the flashlight mode may fail
if the tilt axis adjustment arm is excessively upward.
OLED Screen
LOGO ConnectionGimbal Battery
Controller Battery
Recording Status
Focusing Speed
Gimbal Speed
Follow mode
REC:Ready: Ready to record;
Recording: recording。
SPEED: L Low;
MMedium;
H High。
FOLLOW MODE:Pan: Yaw Follow;
Tilt: Tilt Follow;
EAdjust Balance
FChanging Operating Modes
GWireless Thumb Controller (Optional)
Joystick:
Up: Move upward
Down: Move downward
Left: move the gimbal left; cancel
Right:move the gimbal right;OK
SPEED:
Single press: switch speed
Long press: switch between focus
adjustment/control
Press and hold to enter the DFU
upgradingmode with USB connection.
On/off Button: Single Press: start/stop
recording Long press: Turn on/off
OPTIONS:Single press: Switch follow
modes
Long press: Enter the menu Press and
hold to enter the DFU upgrading mode
with USB connection.
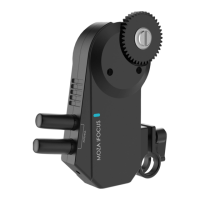
Roller: Control the focus adjustment
USB:Charging;Firmware upgrading
 Loading...