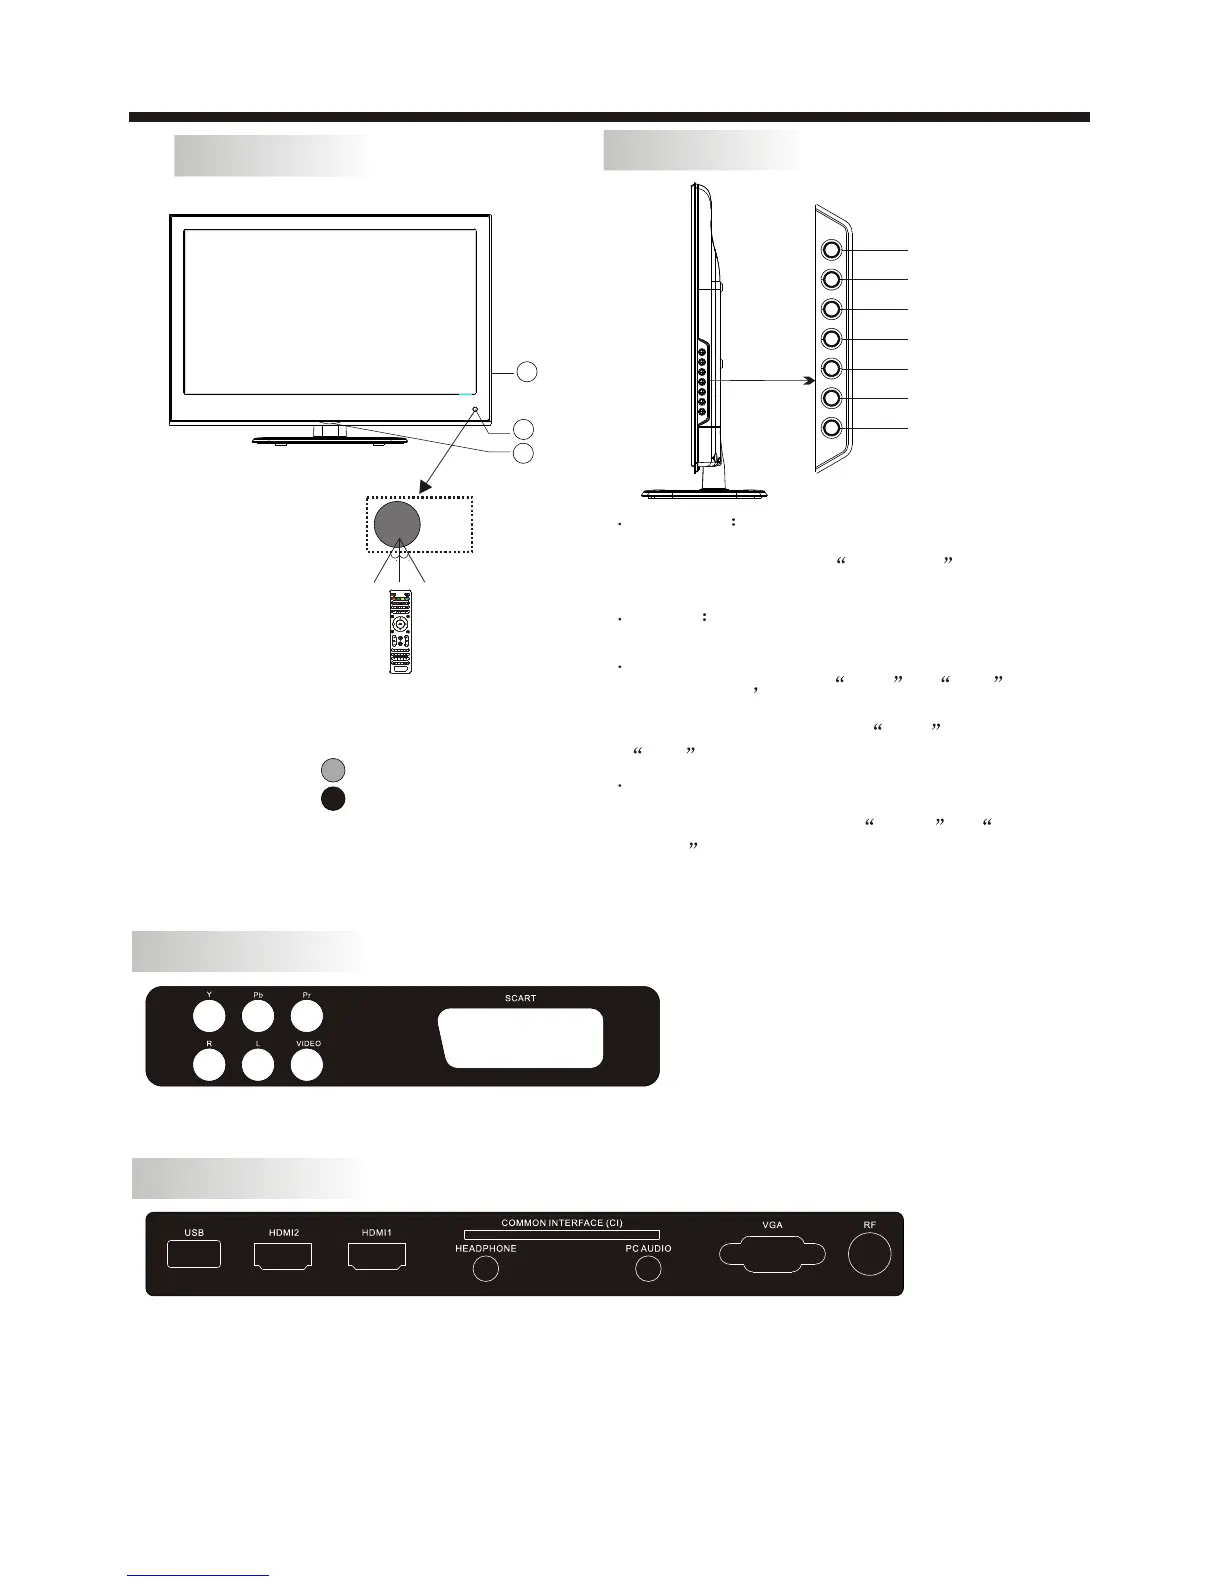
1: Remote Control Sensor.
2: Indicator LED:
BLUE POWER ON.
RED STANDBY.
3: Side buttons
INSTALLATION
KEYBOARD
-6-
Front panel
1 SOURCE
Display the input source menu.In
MENU mode,press SOURCE to
confirm the selected item.
CH+ or
CH- to select items .
press VOL+ or
VOL- to
STANDBY
Press this button to turn the unit ON from
STANDBY mode.
Press it again to turn the set back to STANDBY.
2 MENU
Display main MENU.
3 CH+/CH-
In TV mode press CH+ or CH-
to change the channel up and down.
In MENU mode, press
4 VOL+/VOL-
Adjust sound level.
In MENU mode,
adjust the item that you selected.
5.
SOURCE
MENU
CH+
CH-
VOL+
VOL-
ST ANDBY
REAR AV Connections
All the terminals are(from left to right):YPbPr INPUT,AUDIO INPUT,VIDEO,SCART
Note: VIDEO and YPbPr share one audio channel.
REAR AV Connections(SIDE)
All the terminals are(from left to right):
USB, HDMI2, HDMI1, HEADPHONE, PC AUDIO, CI, VGA, RF.
Note: 1.When HDMI1 port get DVI signal ,the audio signal receives from the PC Audio channel.
2.When HDMI2 port get DVI signal ,the audio signal receives from the VIDEO/YPbPr
Audio channel.
3.Insert the plug of the earphone into the earphone jack on the unit HEADPHONE.
The speakers are now muted.
1
3
2
30 30