5 | P a g e
Installer’s Tips:
Tip #1 – Where Everything Goes
1. Remote start module – the wiring for the module is done under the dash on the driver’s side, so you’ll want to install the
module in that general area. Before you start wiring, look for a location where there’s some open space that will fit the
module. Pay attention to moving parts like the pedals, e-brake and steering column. Be sure to route your wiring away
from those areas. Bypass module –can be stowed along with the remote start.
2. Antenna –If equipped, the antenna mounts to the windshield in one of the top corners or behind the rearview mirror.
3. Programming button – Requires a ¼” hole. Usually put in the driver’s kick panel (that’s the area forward of the door), the
driver’s side of the center console, or the underside of the dash.
4. Status LED –Requires a ¼’ hole. Usually put in visible spot in dash. Find a location with clearance and is within its wire reach.
5. Hood Pin Switch –An important safety component! Requires a 3/8” hole. Find a location in the engine compartment to
mount the switch where the closed hood will keep the plunger in the switch depressed. This is what prevents the car from
starting when the hood is open.
Tip #2 – How to make your wiring connections
It’s very important that all your wiring connections be solid and secure. All remote start connections are “tap on” connections. This
means that you do not need to cut the wires in the car. You simply need to “tap on” to the wires in the car to make your connections.
Here are three different ways to do this:
Method 1 – Solder and tape
This is the method preferred by the best professional installers. It makes for the most reliable connections, but it is also the most
difficult to do. Sometimes there isn’t enough room in the wiring harness to safely solder a wire without damaging adjacent wires,
but if you have the soldering skills, go for it. To make a connection, strip back a section of the insulation on the wire in the car. On
heavy gauge wires, 1” is about the right amount. On lighter gauge wires, ½” is fine. Strip 1” of insulation off the end of the remote
start wire. Tin the bare section of wire in the car. Wrap the remote start wire around the tinned section and then carefully solder
it in place. Wrap the splice tightly with electrical tape.
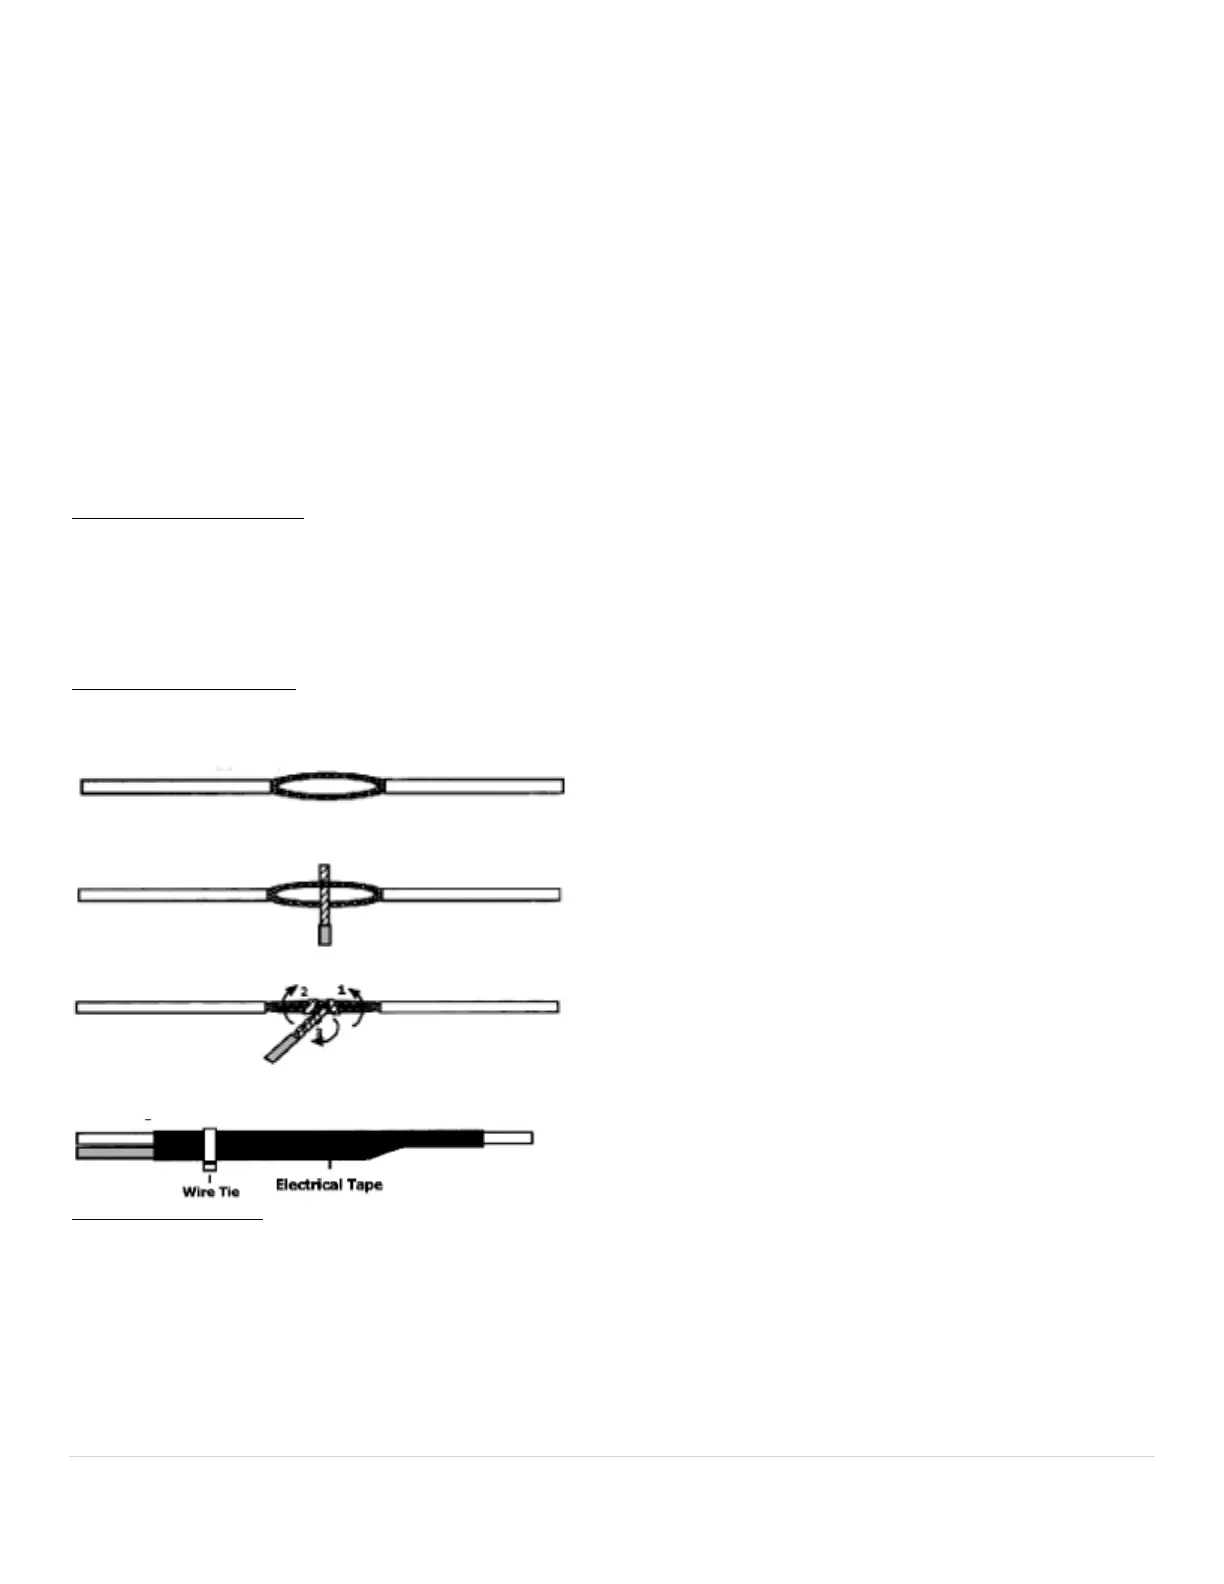
Method 2 – Wrap and tape
This is the most popular method and is also very reliable. Strip back a section of the insulation on the wire in the car. On heavy
gauge wires, 1” is about the right amount. On lighter gauge wires, ½” is fine. Strip 1” of insulation off the end of the remote start
wire. Separate the strands of the wire like this:
Pass the wire from the remote through the opening as shown below
Wrap the remote start wire around both sides of the car wire, then back around itself as shown below
Use electrical tape to wrap the connection and secure the wires together. A wire tie will help prevent the tape from unraveling in the
future.
Method #3 – “T-Taps”
T-taps are plastic clips that are squeezed onto the wires in the car. The wire from the remote start goes into the tap and the whole
thing is crimped together. T-taps come in different sizes for different size wires. Use yellow t-taps for the larger wires in your main
power harness. Red t-taps are good for the smaller wires. Tape and wire tie the connections as shown in the “wrap and tape”
section above – that will prevent the t-taps from ever opening up.
We now have a “tap kit” available for purchase for those who prefer to use this method. The kit consists of two types of connectors
- The taps and insulated male spade connectors that plug into them. The taps attach to the wires in the car and the spade
connectors attach to the wires on the remote start. The spades then plug in to the taps. A crimping tool is required.
Copyright 2014 Digitel LLC

 Loading...