13
GB
-
CAUTION! Wait for the cuer to stop before pouring out the
jug contents!
-
WARNING! Do not exceed the permissible operang me
show on the rang plate. Wait for the device to cool before
restarng.
-
This appliance shall not be used by children. Keep the appliance
and its cord out of reach of children.
-
Appliances can be used by persons with reduced physical, sen-
sory or mental capabilies or lack of experience and knowledge
if they have been given supervision or instrucon concerning
use of the appliance in a safe way and if they understand the
hazards involved.
-
Always disconnect the appliance from the supply if it is le
unaended and before assembling, disassembling or cleaning.
-
This appliance shall not be used by children. Keep the appliance
and its cord out of reach of children.
-
Always disconnect the appliance from the supply if it is le
unaended and before assembling, disassembling or cleaning.
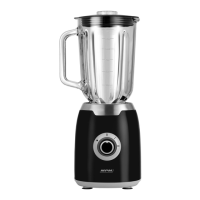
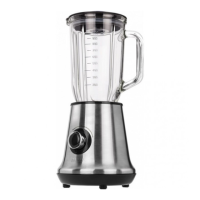
APPLIANCE DESCRIPTION
1. Blender housing
2. ON/OFF knob – two-speed opera-
on and PULSE funcon
3. Jug mounng socket
4. Knife base
5. Stainless steel cuer
6. Rubber seal
7. Jug base ring
8. 1500 ml glass blender jug
9. Jug handle
10. Jug cover
11. Jug cover cap
12. Non-slip feet
ASSEMBLY OF THE BLENDER JUG
1. Make sure that a rubber seal seal is properly installed inside the jug base ring (7) (larger diameter
pointed towards the thread inside the ring).
2. Put the knife (5) on the jug base ring (7) and slightly rotate its plasc base counter-clockwise so
that the four protrusions on the knife base catch the protrusions inside the base ring (g. 1).
CAUTION! The blades are sharp. Handle with care. Handle the knife only by its plasc base.
3. Turn the blender jug (8) so that the opening for screwing the base on is pointed upwards.
4. Put the knife pointed towards the inside of the jug onto the jug base ring (7), and turn it clockwise,
while ensuring that the thread is aligned properly.
In case of deinstallaon of the blender knife, act in a reverse order.
USING CUP BLENDER
Cauon! Do not use the blender without a properly installed jug or without a jug cover. Do not
remove the jug while the device is turned on.
1. Place the blender housing (1) on a dry, hard and even surface.