water. Never use chemically decalcified water or any other liquids. The water tank features an anti-calc car-
tridge which reduces scale forming within the appliance.
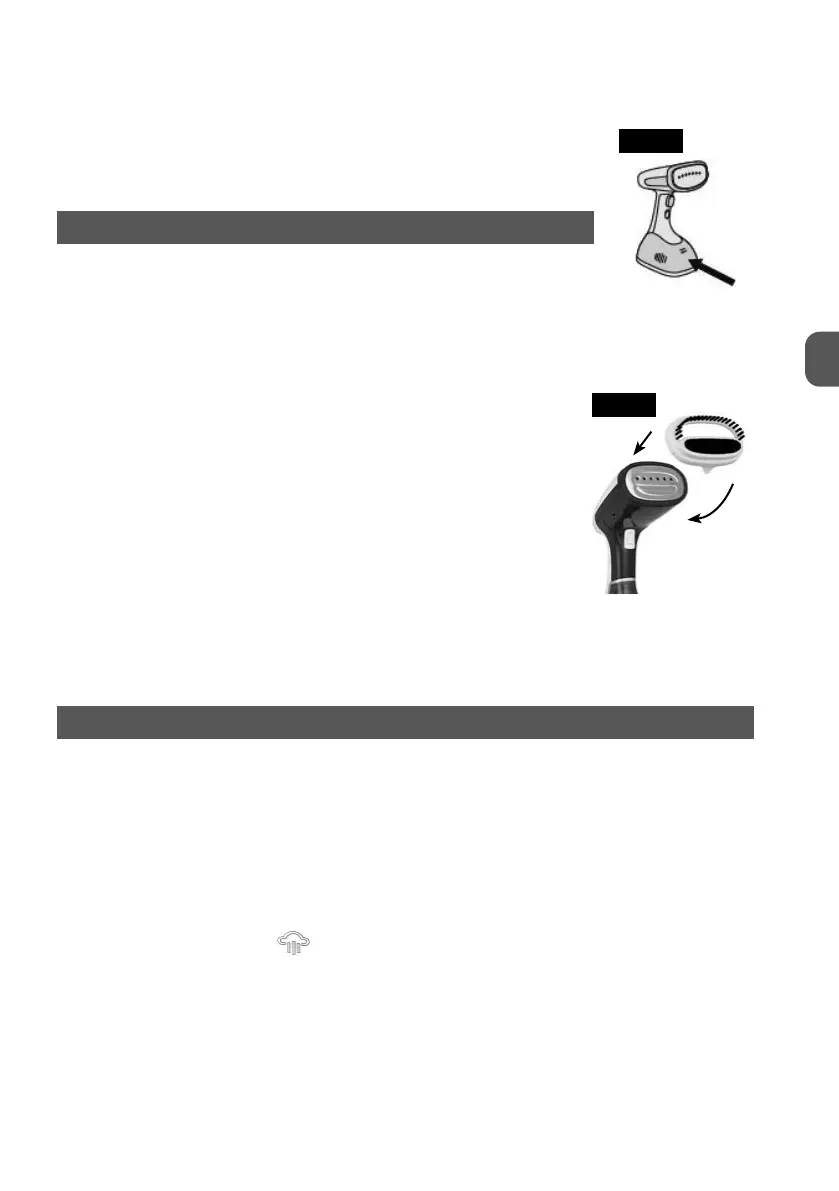
5. Close the fill port with the water tank plug (6).
6. Reattach the water tank to the clothing steamer. Make sure that the
latches (7) are secured on the water tank (Fig. 2).
INSTALLING THE BRUSH ATTACHMENT
The brush attachment for soft and heavy textiles features two types of bristle. The
rough bristle at the top of the brush attachment improves steam penetration of
heavy textiles, from which overcoats are made, for example. The soft bristle at the bottom of the brush
attachment is great for swift removal of loose threads, human and animal hair, and fluff from soft textiles,
including velour, velvet or wool.
1. Before using the brush attachment, always disconnect the clothing
steamer from the mains and wait for the appliance to cool down
completely.
2. Next, hold the clothing steamer firmly by the grip with one hand
and install the brush attachment (8) on the steamer sole (2). Have
the brush attachment engage the steamer sole at the top first and
press down the bottom to secure it (Fig. 3). It will click when secured
in place.
CAUTION! Always unplug the clothing steamer from the mains and wait for it to
cool down completely before installing or removing the brush attachment. Be
careful: the steamer sole can be hot!
3. To remove the brush attachment, hold the clothing steamer firmly by the grip and pull away
the latch at the bottom of the brush attachment.
USING THE CLOTHING STEAMER
1. Fill the water tank (5).
2. Plug the power cord to a mains outlet with a PE pin.
3. Press and hold the Power switch (3a) for 3 seconds. The clothing steamer will be powered on
and start preheating. The preheating process is in progress while the Power LED indicator (3a)
is flashing. Once the preheating process is complete (which takes approx. 40 seconds), the
Power LED indicator is continuously on. Now the clothing steamer is hot and ready for use.
4. Operate the button (3b) or (3c) to choose the ECO mode or the steam blast mode, respectively.
-
ECO is a mode with a low steam blast for longer operation and lower power consumption.
-
The steam blast mode gives much more steam at the cost of a higher water and
power consumption.
When enabled, the chosen mode’s LED indicator is lit on (3b) or (3c). The steam blast mode
is selected by default.
CAUTION! Hold the clothing steamer upright during use. Do not steam textiles with the steamer sole directed
downward. Do not turn the clothing steamer upside down.
Fig. 2
Fig. 3
A
B
13
GB