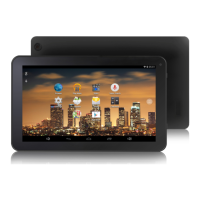
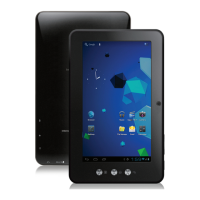
This document describes the MPQC1030 tablet, an Internet Mobile Device with Android OS. It covers its physical components, basic operation, connectivity, and troubleshooting.
Tablet Part Description and Functions:
- Power Button: This button serves two primary functions. Keeping it pressed for approximately 5 seconds will turn the tablet on or off. A short press will activate standby mode.
- Reset Button: Located on the back of the tablet, this button forces a shutdown of the device.
- Earphone Jack: This is a standard 3.5mm jack for connecting earphones.
- USB Port: This port has multiple uses. It allows for PC connection via a USB cable, connection of USB devices (such as a keyboard), and battery charging using the supplied adapter.
- HDMI Port: This port enables connection to an HDMI device, allowing the tablet's display to be mirrored on an external screen.
- ESC Button: The function of this button is not explicitly defined in the provided text, but it is listed as a component.
- Mic: The microphone is a component of the tablet, but its specific function (e.g., for voice recording, calls) is not detailed.
- Micro SD Port: This slot allows for the insertion of a micro SD card, supporting capacities up to 32GB, for expanded storage.
Getting Started and Usage Features:
Battery Charging:
The tablet is equipped with a built-in rechargeable Li-polymer battery.
- To charge, connect the AC power adapter to the micro USB jack located on the right side of the tablet.
- The battery icon on the screen will indicate the current battery status and charging progress.
- The tablet can be used even while it is charging.
- The icons on the screen display different levels of remaining battery power.
Power ON/OFF:
- To turn ON: Press and hold the power button for 5 continuous seconds until the tablet turns "ON".
- To turn OFF: Press and hold the power button for 5 continuous seconds. A prompt will appear, and you should select "OK" to power off the tablet.
Screen Lock:
This feature locks the screen and simultaneously turns off the screen's backlight after a few seconds of inactivity.
- Screen locks when:
- The system is idle for a period.
- It is manually activated by pressing the Power button once.
- To unlock the screen: A visual representation shows a lock icon that needs to be interacted with (typically by dragging or tapping) to unlock.
Home Screen:
The Home screen is the primary interface of the tablet.
- It consists of five distinct screens, each capable of holding different icon layouts.
- To navigate between these screens, slide your finger left or right across the display.
- The status bar and navigation buttons remain visible regardless of which Home screen is currently being viewed.
- The Desktop contains shortcuts to frequently used applications and widgets.
- Touching the screen icon allows for quick searches on the World Wide Web using Google.
- The "::: " icon launches the Application menu, providing access to all installed applications.
- The status bar displays system information such as current time, wireless connectivity, and battery level. Touching it expands to show more detailed information.
- Navigation Buttons:
- The "back arrow" button moves back one step to the previous menu or page.
- The "square" button returns immediately to the Android desktop.
- The "two overlapping rectangles" button displays a menu of recently opened applications.
The settings menu allows for adjustment of the tablet's system configuration.
- Touch the "Settings" icon on the Application menu to open it.
- Guide your finger up or down the left side of the screen to scroll through the list of available categories.
- Touch a category title on the left to view further options on the right side of the screen.
- Wi-Fi: Connect to/disconnect from wireless networks, view connection status.
- Data usage: Enable/disable mobile data, view current usage, set mobile data limit (note: this function is only available on devices with a 3G card).
- Sound: Change volume, touch sound, screen lock sounds, etc.
- Display: Change brightness, wallpaper, sleep settings, daydream, font size, etc.
- HDMI: Turn on HDMI, set HDMI resolution, and screen zoom.
- Screenshot Setting: Set up delay time, storage location, and whether to show the screenshot button in the status bar.
- Storage: Manage NAND and Micro SD card, view available capacity, etc.
- Battery: See battery status and powered-on time.
- Apps: Manage applications, running services, etc.
- Accounts: Manage accounts, etc.
- Location services: Change approximate location detection, improve search results.
- Security: Change screen lock type, encryption, password, credential storage, etc.
- Language & input: Select language, add to the dictionary, edit on-screen keyboard settings, vocal search, etc.
- Backup & reset: Backup & restore data, perform factory reset, etc.
- Date & time: Set date, time zone, time, clock format, etc.
- Accessibility: Set up large text, auto-rotate screen, speak password, etc.
- Developer options: Advanced functions for Android developers, including debugging, HDCP check, etc.
- About tablet: Information about your Android device.
How to Use TF Card (Micro SD Card):
- Insertion: Insert the TF card into the TF card slot, gently pushing until it clicks into place.
- Recognition: A prompt "Preparing SD card" will appear on the screen.
Removing TF Card:
- Close all applications and documents that were opened from the TF card.
- Go to "Settings" and find "Storage," then click "Unmount SD card."
- A prompt "SD card safe to remove" will appear.
- Gently press the TF card to remove it from the slot.
- Note: Always insert the TF card in the correct position to avoid damaging the card or the slot.
Software Keyboard:
The tablet features a software keyboard that automatically appears when you tap on a screen area where text or numbers need to be entered.
Touch Screen Interaction:
The touch screen responds to finger touch.
- Note: Avoid placing any objects on the touch screen to prevent damage or crushing.
- Single Click: A single tap on an icon selects it or an option.
- Long Press: Press and hold an icon to make a menu related to its function appear (if available).
- Drag: Dragging on the screen allows you to move between "magic cube sides" (likely referring to home screens or application pages) or drag application icons into the shortcut bar.
How to Connect with Computer:
- Note: Ensure your tablet is turned on before connecting it to a PC via a USB cable.
- Go to "Settings" and click "developer options," then choose "USB debugging" and click "OK."
- Use the USB cable to connect the tablet to the computer; the tablet should connect automatically.
Connection to Internet (Wireless):
- Go to "Settings."
- Select "Wi-Fi" and slide the toggle from "OFF" to "ON."
- All detected wireless networks in the area will be listed. Click to select your desired wireless connection.
- Once connected, the network settings will be saved.
- A wireless icon will appear on the taskbar, indicating a successful connection.
- Note: The tablet will automatically connect to the same wireless network in the future if it detects it and has the password record saved.
Web Browsing:
Connect to the internet and launch the browser application to access websites.
Camera:
Touch the camera icon to enter camera mode.
- Taking a photo: Touch the icon in the middle of the screen.
- Switching to video recording: Move the icon at the bottom of the screen.
- Viewing/Managing photos: Touch the icon on the top right to see previous pictures. From there, you can delete, share, or set a picture as wallpaper. Click the return button to exit the camera interface.
Maintenance Features:
Trouble Shooting - Close Application:
Running applications consume system memory and can slow down the tablet's response.
- To improve performance, shut down idle applications.
- To close an application:
- Click the "gear" icon on the shortcut bar to enter the system configuration interface.
- Select "Application" → "Running services."
- Tap the application you wish to close. A pop-up window will appear.
- Tap "Stop" to close the application.
Mandatory Power Off:
- Press and hold the power button for 5 seconds to power off the device.
- Alternatively, press the reset button on the back of the device to force a power off.
Restore Default Setting (Factory Data Reset):
- If you wish to reset the factory settings and erase all data:
- Press "Settings" → "Backup & reset" → "Factory data reset."
- Warning: Performing a factory data reset will delete all your data and configurations, as well as applications downloaded to the system. Use this function carefully.
Battery Maintenance:
- No unauthorized replacement: Do not replace the battery without authorization, as this could lead to an explosion hazard.
- Recharge after long idleness: If the tablet has been idle for a long time and fails to start, recharge it for at least half an hour.
- Regular recharging: Recharge the tablet at least once a month.
- Optimal temperature: The optimum temperature for battery recharging is between 5°C and 40°C. Charging outside this range might slightly deteriorate battery performance.
Disposal:
- The battery may contain polluting materials. Dispose of it at an official recycling station. Do not litter.
- The device itself should also be disposed of at a recycling station.
General Notes:
- Prolonged listening at full volume on the player may damage the user's ear.
- For more information, check the website: www.mpmaneurope.com.