This document is an instruction manual for the Luci® Pro Series, a portable, inflatable solar-powered light with USB charging capabilities. The manual details the device's components, charging methods, usage instructions, and frequently asked questions.
Function Description:
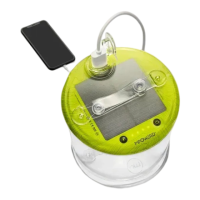
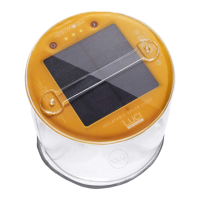
The Luci® Pro Series is a versatile, portable light designed for various uses, including camping, outdoor activities, and emergency situations. It functions as both a light source and a power bank, allowing users to charge small electronic devices via its built-in USB port. The device is primarily solar-powered, making it an eco-friendly and self-sufficient lighting solution, but it also offers faster charging via USB. Its inflatable design contributes to its portability and compact storage.
Important Technical Specifications (derived from the manual):
- Power Source: Solar panel and USB port.
- Charging Time (Solar): Up to 14 hours for a full charge in direct sunlight.
- Charging Time (USB): 2-3 hours for a full charge.
- Battery Level Indicator: 4 LED lights indicating charge levels:
- 1 light: 0-20%
- 2 lights: 21-40%
- 3 lights: 41-60%
- 4 lights: 61-100%
- Light Modes: Low, Medium, High, Flashing.
- Durability: Durable and completely waterproof.
- Temperature Limit: Maximum 122°F (50°C) for operation and charging.
- USB Port: Two-way, allowing for both charging the light and charging external devices.
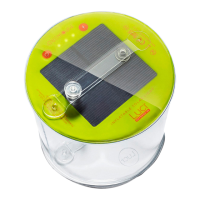
- Lumen Output (Pro Outdoor 2.0): 150 lumens (cool white light).
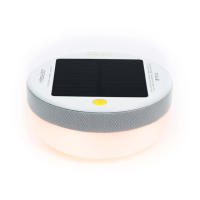
- Lumen Output (Pro Lux): 135 lumens (warm white light, matte finish).
Usage Features:
- Inflation: The device features a 2-way valve. To inflate, firmly pinch the valve and pull it away from the base for 50% inflation, then blow into the nozzle until fully inflated. Push the valve back in to seal.
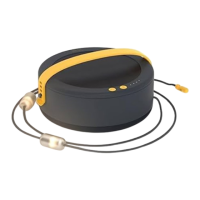
- Deflation: To deflate, pull out the valve, firmly pinch it, and simultaneously collapse the light towards the base. Twisting the light gently during deflation helps achieve a flatter, more compact shape. A tab on the valve closes it when fully deflated.
- Power On/Off: Press the power button to turn the unit on.
- Light Mode Selection:
- 1 click: Low mode
- 2 clicks: Medium mode
- 3 clicks: High mode
- 4 clicks: Flashing mode
- 5 clicks: Turn off
- Hold for 2 seconds: Turn off at any time.
- Charging the Light (Solar): Place the device with the solar panel facing up in direct sunlight for up to 14 hours.
- Charging the Light (USB): Insert the provided USB cord into the light's USB port and the other end into a USB outlet for 2-3 hours. Flashing battery level indicator lights confirm charging.
- Charging External Devices: Insert your device's charging cable into the light's USB port and the other end into your device.
- Battery Level Check: Press the battery level indicator button at any time to check the current charge level.
- Outdoor Use: The device is designed to be left outside, as it is durable and waterproof.
Maintenance Features:
- Cleaning: While not explicitly detailed, the waterproof nature suggests it can be easily wiped clean.
- Storage: The inflatable design allows for compact storage when deflated.
- Temperature Awareness: Users are advised against charging the device on a car dashboard due to high temperatures that can exceed the product's operating limit, which could potentially damage the device.
- Charging Practices: The manual encourages solar charging as a natural power source but highlights USB charging for faster results when needed.
- Simultaneous Use: It is possible to charge an external device while the light is in use, but users should monitor the light's battery level as this will deplete its charge.
- Cloudy Weather Charging: The light will still charge on cloudy days, but at a slower rate, as it relies on red and violet frequencies of visible light, with charge times varying based on UV index.
- Indoor Lighting Charging: The manual advises against charging under ordinary indoor lights, as they emit significantly less UV compared to direct sunlight. For best results, charging should occur outdoors or on a windowsill in direct sunlight.