Installation
Position
Determine the best position to drop down the drain
hose, making best use of available break-outs.
A template is provided for your convenience.
Allow 3 cm clearance for service access.
SAFETY: READTHISBOOKLET
WARNING: RISKOFELECTRICSHOCK.
beforeinstallationofthisproduct.
InstallationistobecarriedoutonlybycompetentEngineers.
Retainthisbookletasitcontainsimportantinformationforthesafeandproperuseofthisproduct.
AllelectricalwiringmustcomplywithNationalandLocalElectricalCodes.
ThisproductcomplieswiththeEuropeanDirectiveonLowVoltageSafety,andcontainscomponentsdesignedtopromotecompliancewith
theEuropeanEMCDirective.
Ensurethepumpisdisconnectedfrompowersuppliesbeforecarryingoutanyadjustmentsorservicing.
ThemeansofisolationmustbeincorporatedinthefixedwiringinaccordancewithLocalNationalwiringregulations.
Thispumpisnotsuitablefordirtyenvironments. Thispumpisintendedforusewithcleancondensatewateronly.
Thispumphasnotbeeninvestigatedforuseinswimmingpoolormarineareas. Thisproductisnotsubmersible.
Thesupplycordcannotbereplaced.Ifthecordisdamagedthepumpshouldbereplaced.
Thispumpisintendedforindooruseonlyinadrylocation.
Thepumpunitcontainsnoserviceableparts.
Thepumpcovermustbefittedinplaceafterinstallationandservicing.
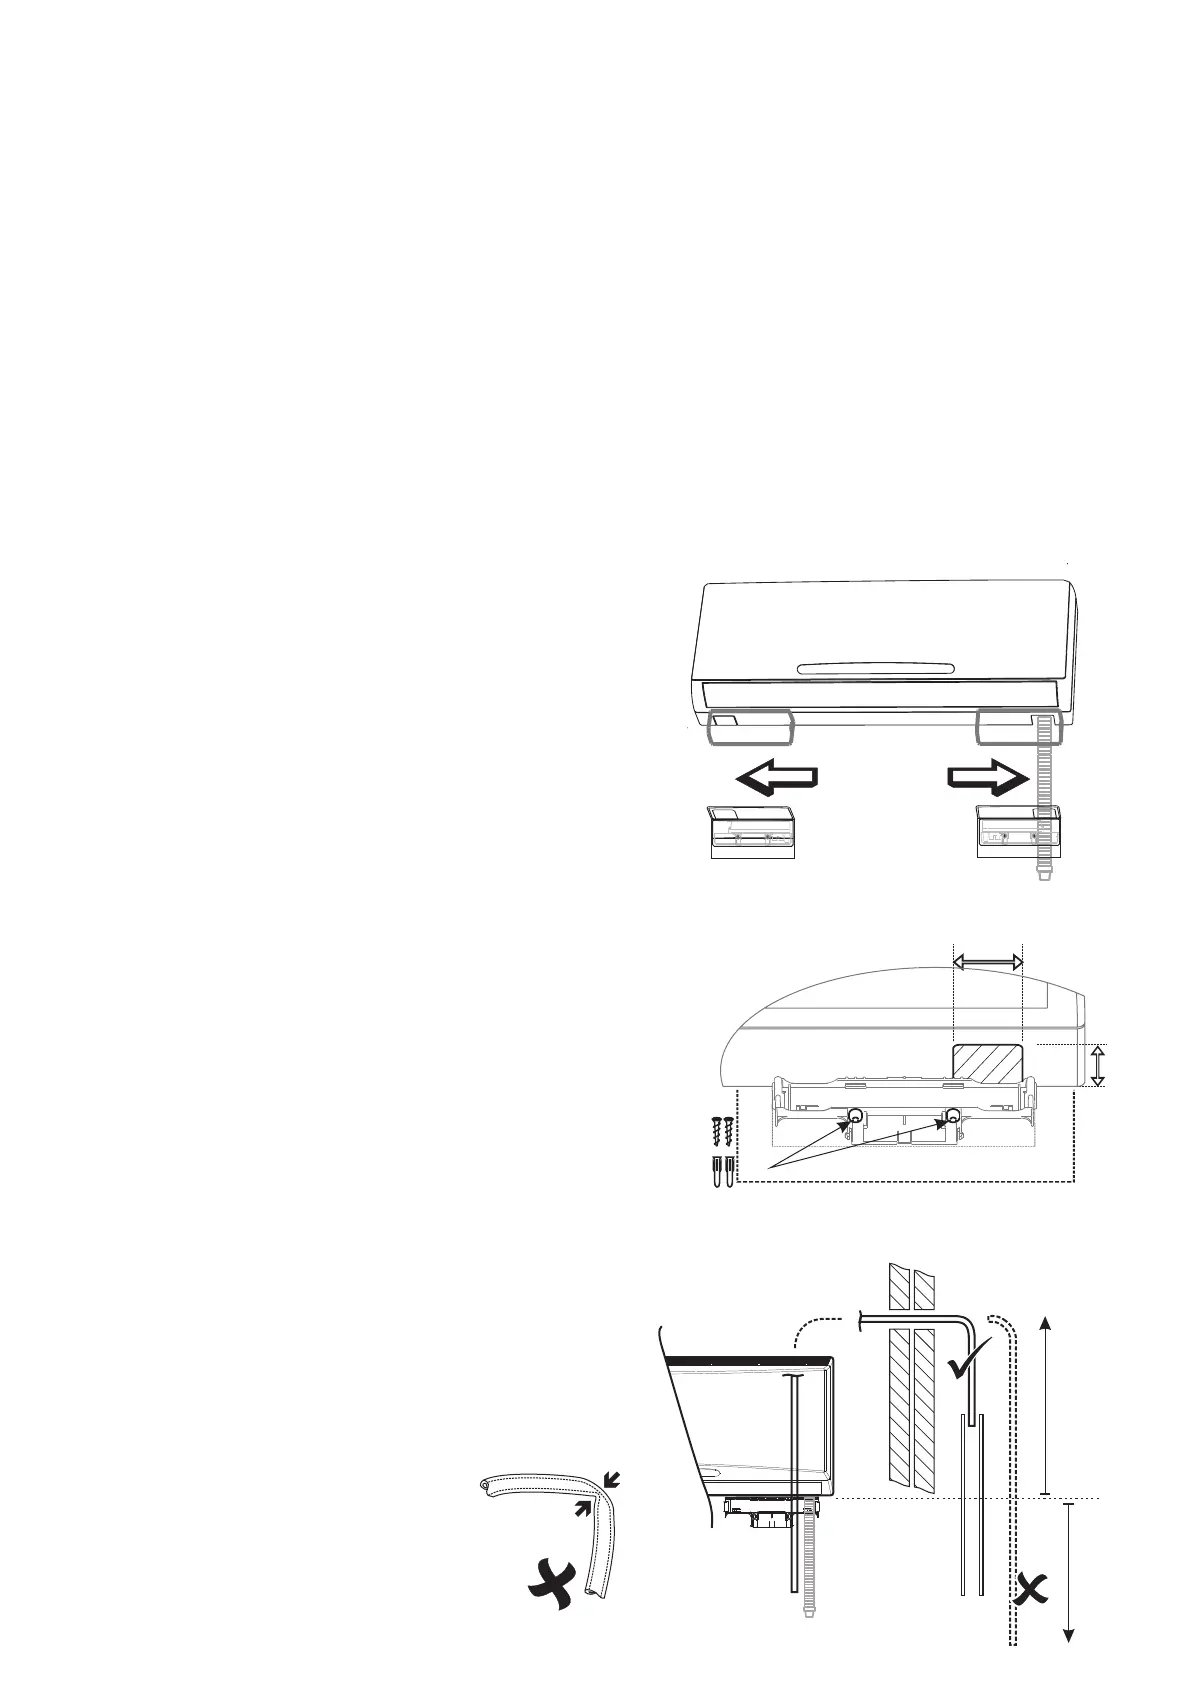
Cut-out
Mark out the fixing holes and cut-out hole. The Wall
Bracket must overlap the hole.
Remove the cut-out to provide a hole 58 x 42mm
minimum.
Drill, mount and fix the Wall Bracket in position.
Make sure the bracket is level.
Fixing
The screws and wall fixings are supplied. The installer
should use fixings suitable for use with the type of
Discharge Tube
Drop down the drain hose.
Fit and route the discharge tube to a suitable drain,
avoiding flow restrictions.
Avoid potential siphoning which will result in excessive
noise.
58 mm
42 mm
6 m max.
 Loading...