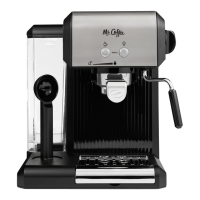
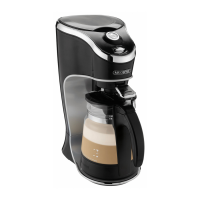
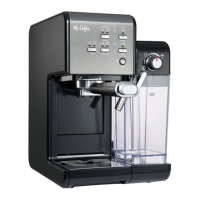
The Mr. Coffee® One-Touch CoffeeHouse + (BVMC-ECM-PMPAT Series) is an espresso, cappuccino, and latte maker designed for quick, convenient, and automatic beverage preparation. It features a one-touch control panel for easy drink selection and a 19-bar Italian pump for optimal flavor extraction. The appliance also includes an automatic milk frother that easily creates light, creamy froth, and removable milk and water reservoirs for easy filling and cleaning.
Technical Specifications:
The device operates with a 19-bar Italian pump. It is designed to be used with ground coffee and E.S.E. pods (45 mm). The water reservoir has a "MAX" fill line, and the milk reservoir also has a "MAX" level indicator. The appliance is intended for household use and North American models come with polarized plugs.
Function Description:
The Mr. Coffee® One-Touch CoffeeHouse + allows users to prepare espressos, cappuccinos, and lattes with a single touch.
- Espresso: A unique brewing method where hot water is forced through finely ground coffee, resulting in a rich, full-bodied brew. Espresso is typically served in 45 to 60 ml (1.5 to 2 oz.) portions.
- Cappuccino: A drink consisting of approximately 1/3 espresso, 1/3 steamed milk, and 1/3 frothed milk.
- Latte: A drink consisting of approximately 1/4 espresso and 3/4 steamed milk.
The control panel features buttons for single (1) and double (2) espresso, small (1) and large (2) latte, small (1) and large (2) cappuccino, manual espresso brew, manual milk frothing, and clean. A progress bar illuminates during the heating process and brewing cycles.
Usage Features:
- Priming the Unit: Before first use, the unit must be primed by filling both water and milk reservoirs with water, placing a filter in the porta-filter, and running a manual espresso cycle followed by a manual froth cycle.
- Selecting the Right Coffee: Freshly ground, dark roasted coffee is recommended. The grind should be fine, resembling table salt. Too fine a grind will prevent water flow, while too coarse a grind will result in fast flow and poor extraction.
- Filling the Water Reservoir: The water reservoir can be filled using a pitcher or by removing it and filling under the tap, up to the "MAX" line. Only cold water should be used.
- Filling the Milk Reservoir: For cappuccino or latte, remove the milk reservoir, fill with cold milk up to the "MAX" level, and slide it back into place until it locks. Any type of milk (whole, low-fat, organic, soy) can be used.
- Placing the Filter on the Porta-Filter: Insert the desired filter (single or double shot) into the porta-filter, aligning the dimple with the notch, and turning to lock.
- Filling with Coffee: For ground coffee, fill the filter with fine ground espresso coffee about 3mm from the rim (do not overfill). Use the tamper to compact the grounds evenly and clean any excess from the rim. For E.S.E. pods, simply place the pod in the filter, ensuring any loose paper is folded inside for a good seal.
- Placing the Porta-Filter: Position the porta-filter under the brew head, align the handle with the open lock icon, and turn to the right until it aligns with the closed lock symbol.
- Placing the Cup(s): Adjust the drip grid height for small demitasse cups or keep it on the drip tray for larger cups. When brewing with milk, ensure the frothed milk dispensing tube points inside the cup.
- Turning the Unit On: Plug the unit into an electrical outlet and turn it on using the "I/O" switch. The progress bar will illuminate, indicating heating.
- Preparing Espresso: Press the espresso button once for a single shot or twice for a double shot. The unit will automatically brew and stop. For manual espresso, press the manual espresso button once to start and again to stop.
- Preparing Cappuccino/Latte: Adjust the froth level using the Froth Control Knob (right for more foam, left for less). Press the cappuccino or latte button once for a small cup or twice for a large cup. The unit will automatically brew and stop.
- Preparing Frothed Milk: Press the Manual Foam "Froth" Button to prepare frothed milk alone, and press it again to stop.
Maintenance Features:
- Cleaning After Beverages with Milk: After preparing milk beverages, perform a clean cycle. Place a large empty cup under the frothing tube, turn the Froth Control Knob to the clean position, and press the Clean button. The unit will dispense water until clear or the cycle completes automatically.
- Cleaning the Drip Tray: Empty the drip tray when the red Water Level Indicator appears. Clean weekly with warm water and mild detergent, then rinse and dry.
- Cleaning the Milk Reservoir and Frothing Tube: Remove the milk reservoir and its lid. Dispose of any leftover milk, then wash the reservoir and lid thoroughly with warm soapy water. Rinse and dry well. The milk reservoir is dishwasher safe (top rack), but the lid is not.
- Deep Cleaning the Filters: Deep clean filters every 90 days. Remove the detachable bottom covers by rotating counterclockwise, wash covers and filters with warm soapy water, rinse, dry, and reassemble by rotating clockwise until they click.
- Froth Milk Dispensing Tube Cleaning (Without Affecting Milk in Reservoir): Ensure the milk reservoir and lid are inserted, place a mug under the tube, turn the Froth Control Knob to the clean position, and press the Clean button.
- Cleaning the Brew Head, Porta-Filter, and Filters: Turn off and unplug the unit. Allow metal parts to cool. Remove the porta-filter, discard coffee grounds/pod, and wash porta-filter and filter with warm soapy water (not dishwasher safe). Wipe the brew head with a damp cloth. Place the porta-filter (without filter) back in the brew head. Place a large empty cup under the porta-filter, plug in, turn on, and run an espresso cycle with water.
- Cleaning the Water Reservoir: Dispose of remaining water by removing and emptying the reservoir. Wash the reservoir and lid with warm soapy water, rinse, and dry (not dishwasher safe). Do not immerse the main body of the appliance or power cord in water.
- Cleaning the Unit: Wipe the housing with a soft wet cloth. Do not use abrasive cleaners. Do not store porta-filters in the brew head as it can affect the seal.
- Descaling: Descale the appliance when brewing time increases, excessive steaming occurs, or white deposits appear on the brew head. Frequency depends on water hardness (every 80 brew cycles for soft water, every 40 for hard water).
- To Descale Water Reservoir: Fill with undiluted white vinegar, let sit overnight, discard vinegar, and rinse thoroughly with tap water twice.
- To Descale Internal Parts: First descale the water reservoir. Turn off and unplug the unit. Fill the reservoir with undiluted white vinegar. Insert the porta-filter (with filter, no coffee), place a large empty cup under it. Plug in and turn on the unit. Press the automatic espresso button twice. Let vinegar flow, fill a cup, then stop. The progress bar will cycle. Place a large empty cup under the frothing tube, fill the milk reservoir with water, turn the Froth Control Knob to the clean position, and press the Clean button. Let the cleaning cycle run until no milk comes out. Repeat steps with tap water to rinse.
- Cleaning Notification: After 200 cycles, the Cleaning Indicator Light will illuminate. It will flash after a brew cycle or turn off when the unit is powered off or enters sleep mode.
- Cleaning Procedure (Deep Clean): Pour a 50% white vinegar and 50% clean water solution into the water tank. Rotate the milk tank knob to the clean position. Place a large cup under the frothing tube. Press the clean button for 5 seconds to activate deep clean mode. The progress bar will cycle, and the pump will turn on/off for about 7.5 minutes. The cleaning light will turn off when complete. Discard solution, refill with clean water, and run a manual espresso cycle. Rotate the milk tank knob to clean position and press clean button for normal clean mode. Press espresso button and steam function to flush the system out.