4.
Place
the filter
retainer clip in the
release
position by
pulling
the
clip back toward you hand. Place the
filter
holder
underneath the brew
head so
that
the handle is positioned
to the
left of
Center
Lift the filter
holder up
and insert into the brew head between the ‘min” (minimum)
mark at
the
farthest and
the
“max"
(maximum). Make
Sure
the filter
hold
er is secure.
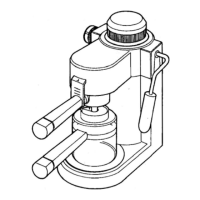
See figure 2.
5.
If you wish,to brew espresso directly into the espresso cups, clip the
2 cup adaptor to the filter
basket. The
clip will
fasten to the handle of the
filter holder. Place the cups beneath the
outlet openings
of the adaptor.
In this case the machine may only
be
filled
with water, for a maximum of
2.
cups.
Brewing Espresso...
1.
2.
3.
4.
5.
6.
7.
6.
Make sure the drip
grate
on
the
drip tray is
in place.
Place
the
cover on the glass carafe
so the
Iid
opening
faces the
Spout,
and
set It on the drip tray,
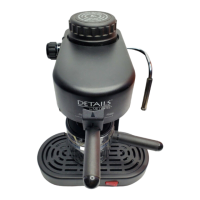
Make sure. the steam control
knob
is in
the
center "off”
position.
Plug
the
power
cord into an electrical
outlet. Turn the switch on. The
Iight
will illumi-
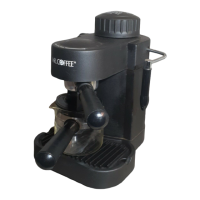
nate to let you know the machine is on. See
figure 3.
Rotate the selector
control
knob to the cup position.
Espresso
will begin
to flow Into the carafe in about two minutes.
When the espresso
has stopped
flowing into the carafe, turn the
power off by moving the control knob back
at
the
“0”
position and
turn off switch. Unplug the power cord and
allow
the
machine to cool.
Do not remove boiler cap until the pressure
in
the machine has
been released. See section
"CAUTlON
PRESSURE”.
After the machine has cooled down and
all.
pressure
has been relieved,
remove the filter holder from the
brew
head. Using the filter retainer clip
to
secure
the filter basket in the
filter holder,
turn
the filter
holder upside
down to empty. Rinse the
filter;
basket
and
holder
with water.
CAUTION:
The metal
parts of the
filter
holder might still be very hot.
Make sure to
use
the filter
retainer clip when discarding the grounds.
Cool down these parts by running under
cold
water.
See instructions
for cleaning on page
10.