Do you have a question about the Mr. Heater MH40LP and is the answer not in the manual?
Failure to follow manual instructions exactly may result in fire, explosion, damage, injury, or death.
Heater installation must conform with local codes and National Fuel Gas Code, ANSI Z223.1a/NFPA54, and ANSI/NFPA 58.
Contact factory for high-altitude conversion kits, instructions, and data plates.
Do not exceed 1/2 PSI inlet pressure to heater.
Maintain minimum clearances to combustibles as shown in Table 3 for servicing and ventilation.
Minimum 8' above floor for public garages per ANSI/NFPA No. 409 or Table 3.
Ensure openings do not violate clearances or contact heater components.
Heater must be fixed securely using four mounting holes, independent of gas/electric lines.
Provide adequate gas supply per American Standard, ANSI Z223.1a/NFPA 54, and LP gas capacity charts.
Disconnect heater for pressure testing; cap outlets. Check all connections for leaks with soap solution.
Use pipe compound resistant to gases; leave first 2 threads bare; do not use Teflon tape.
Male threads must meet Figure 2 requirements to avoid valve distortion or malfunction.
Install sediment trap per Figure 3 and a dedicated shutoff valve in the gas supply line.
Install a separate regulator if main line pressure exceeds recommended maximum.
Contact factory for proper gas pressure reducing design for multiple installations.
Never connect gas valve or thermostat to line voltage or a transformer.
Match thermostat electrical characteristics. Position 5 ft above floor, in free air circulation, away from drafts/cold walls.
Use appropriate screws for stud/wallboard or brick/masonry mounting.
Provide 400 CFM/100,000 BTU intake/exhaust; infiltration area may count towards intake.
Openings above heaters, distributed; not less than 300 sq. in./100,000 BTU for gravity exhaust.
Open gas supply, set thermostat to OFF, then pilot. Depress knob, light pilot, hold for 30s.
Release knob, turn to ON. Reset thermostat. Allow 5 mins for gas accumulation to clear.
Temporary odor/vapor from gasket binder material will dissipate after ~20 minutes.
Turn thermostat to OFF, gas knob to PILOT, then OFF. Close gas supply valves.
Refer to Table 4 for common malfunctions, causes, and solutions.
Adjust pilot flame to cover 3/8 to 1/2 in. of thermocouple tip per Figure 7.
Remove wires, unscrew old valve, reconnect new valve and wires to terminals.
Check appliances before shutdown and again before next use for seasonal operations.
Check more often in dusty, wet, or corrosive environments to prevent deterioration.
Replace if malfunctioning, knob is stiff, or fails to pop back up.
Accessories may be purchased at local dealers or direct from the factory.
Call Toll-Free 800-251-0001 for service, providing model number and purchase date.
One-year warranty against defects in material/workmanship; repair or replace if proven defective.
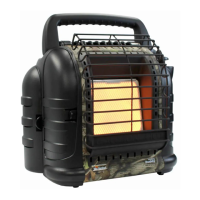
| Model | MH40LP |
|---|---|
| Type | Portable Propane Heater |
| Heating Capacity | 40, 000 BTU |
| Fuel Type | Propane |
| Heating Area | 1, 000 sq ft |
| Weight | 11 lbs |
| Ignition | Piezo ignition |
| Heater Type | Radiant |
| Gas Connection | 1 lb propane cylinder |
| Safety Features | Tip-over switch, safety shut-off |
| BTU Output | 40, 000 BTU/hr |