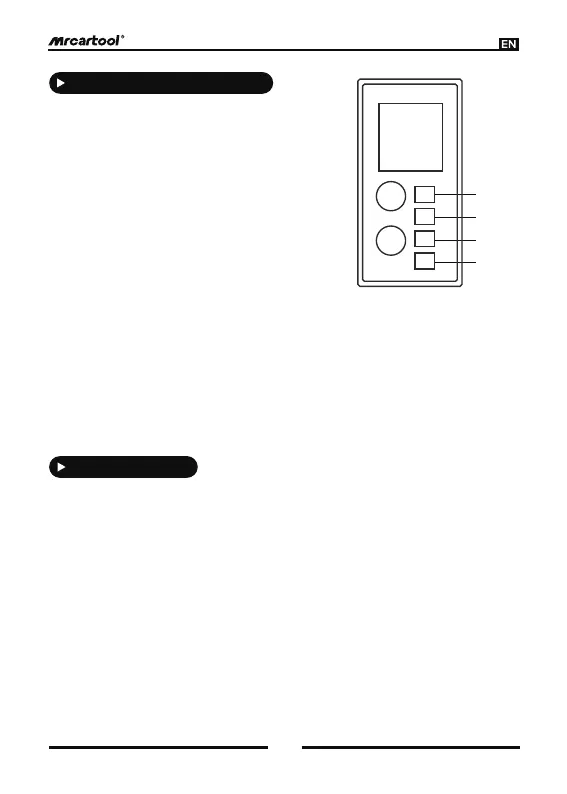
[1] Power Indicator
Green light stays on indicating normal
connection of input power.
[3] Fault 1 Indicator
Red light is on for 1S/off for 1S in cycle, which indicates overcurrent, leakage.
Red light stays on, which indicates power-on self-test failure, over-voltage and
under-voltage, over-temperature protection.
[4] Fault 2 Indicator
Red light stays on, which indicates power-on self-test failure, communication
abnormal.
Red light is on for 1s/off for 1s in cycle, which indicates Not connected to ground wire
and leakage current.
[2] Status Indicator
The green light flashes to indicate that the
device is properly connected to the vehicle
socket and is charging pro- perly.
Green light flashes to indicate that the
device is connected to the vehicle socket
and charging is complete and over-tem-
perature protection.
2
3
4
1
Definition Of Indicator Lights
3
Function Settings
1) Press and hold “SET” for 3 seconds to enter the settings menu.
2) In the settings menu, press “SET” briefly to select a setting item. There are three
main setting items:
- Set Current (Current Setting)
- Set Timer (Timer Setting for Scheduled Charging)
- Earth (Ground) (Ground Detection Setting)
3) Current Setting: Press “SET” shortly to highlight “Set Current” (the font will
enlarge), then press “OK” to enter the current setting interface.
- Press “SET” shortly to select the current rating. Options include 8A, 10A, 12A,
14A, and 16A, with the default being 14A.
- After selecting the desired current rating, press “OK” to confirm and exit the
current setting interface, returning to the settings menu.