EasyManuals Logo

MrCool Universal Series User Manual

MrCool Universal Series
44 pages
To Next Page IconTo Next Page
To Previous Page IconTo Previous Page
Page #14 background imageLoading...
Page #14 background image
Page 13 mrcool.com
Unit Installation
1.
2.
3.
4.
5.
If the outdoor unit is installed on a solid surface such as concrete, use M10 screw bolts and nuts to
secure the unit. Make sure the unit stands erect and level.
Do not install it on top of a building.
If the unit vibrates and generates noise, add rubber cushions between the unit’s feet and the
installation surface.
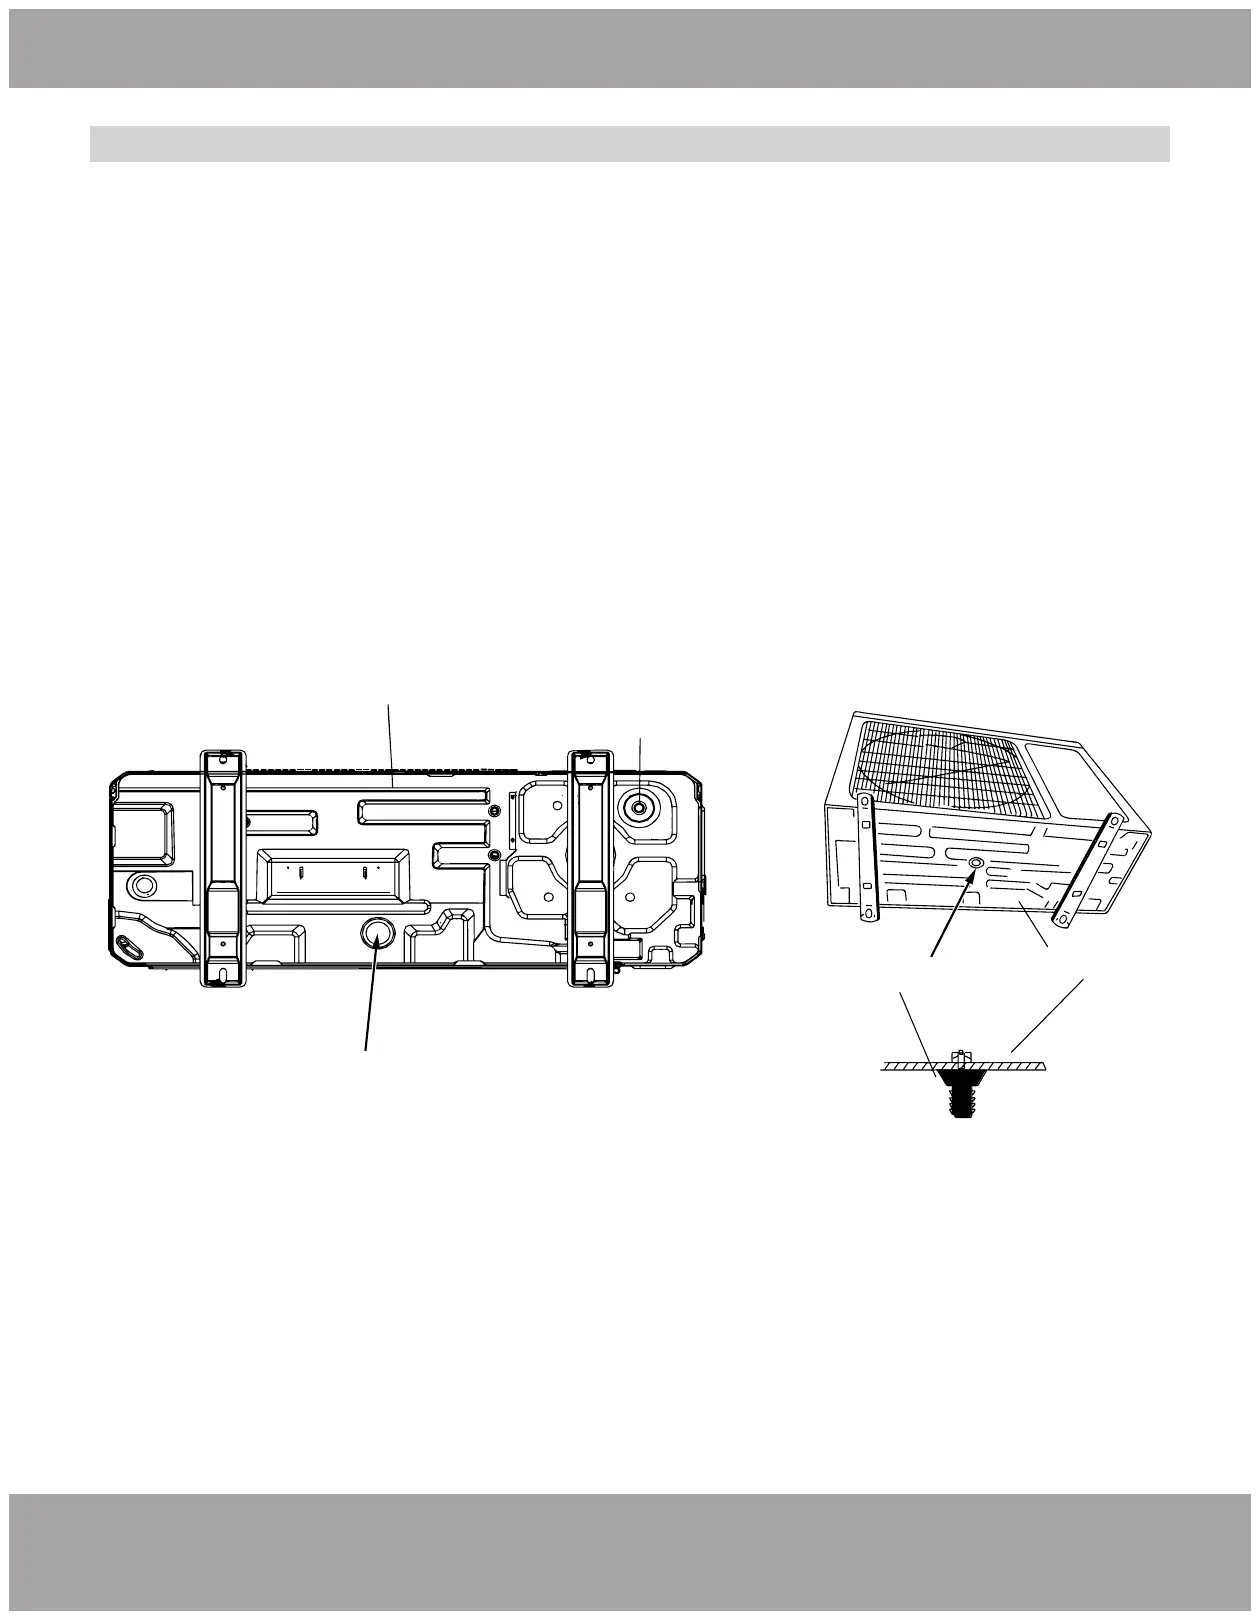
When the outdoor unit is in heating or defrosting mode, it must drain water. When installing the
drain pipe, plug the accompanied drainage connector to the drainage hole on the chassis of the
outdoor unit. Then, connect the drain hose to the drainage connector. If the drainage connector is
used, the outdoor unit should be at least 10cm from the ground.
Plugs and drainage connector are not recommended if there is an electrical heater of the chassis.
Refer to Fig. 2.5 for details.
Bottom
Drain cap
Drain pipe mounting hole
Chassis
Drain
connection
Fig. 2.5
Outdoor Unit Installation

Other manuals for MrCool Universal Series

Questions and Answers:

Question and Answer IconNeed help?

Do you have a question about the MrCool Universal Series and is the answer not in the manual?

MrCool Universal Series Specifications

General IconGeneral
TypeInverter
BrandMrCool
SeriesUniversal Series
RefrigerantR410A
Phase1
Heating CapacityVaries by model
Cooling CapacityVaries by model
CompatibilityUniversal
HSPF Rating10
Voltage208/230V
Operating Temperature (Cooling)Varies by model
Operating Temperature (Heating)Varies by model
Indoor Noise Level (dB)Varies by model
Outdoor Noise Level (dB)Varies by model
Indoor Unit Dimensions (H x W x D)Varies by model
Outdoor Unit Dimensions (H x W x D)Varies by model
Indoor Unit WeightVaries by model
Warranty5 years

Related product manuals