4 INSTALLATION INSTRUCTIONS
MSD • WWW.MSDPERFORMANCE.COM • (915) 857-5200 • FAX (915) 857-3344
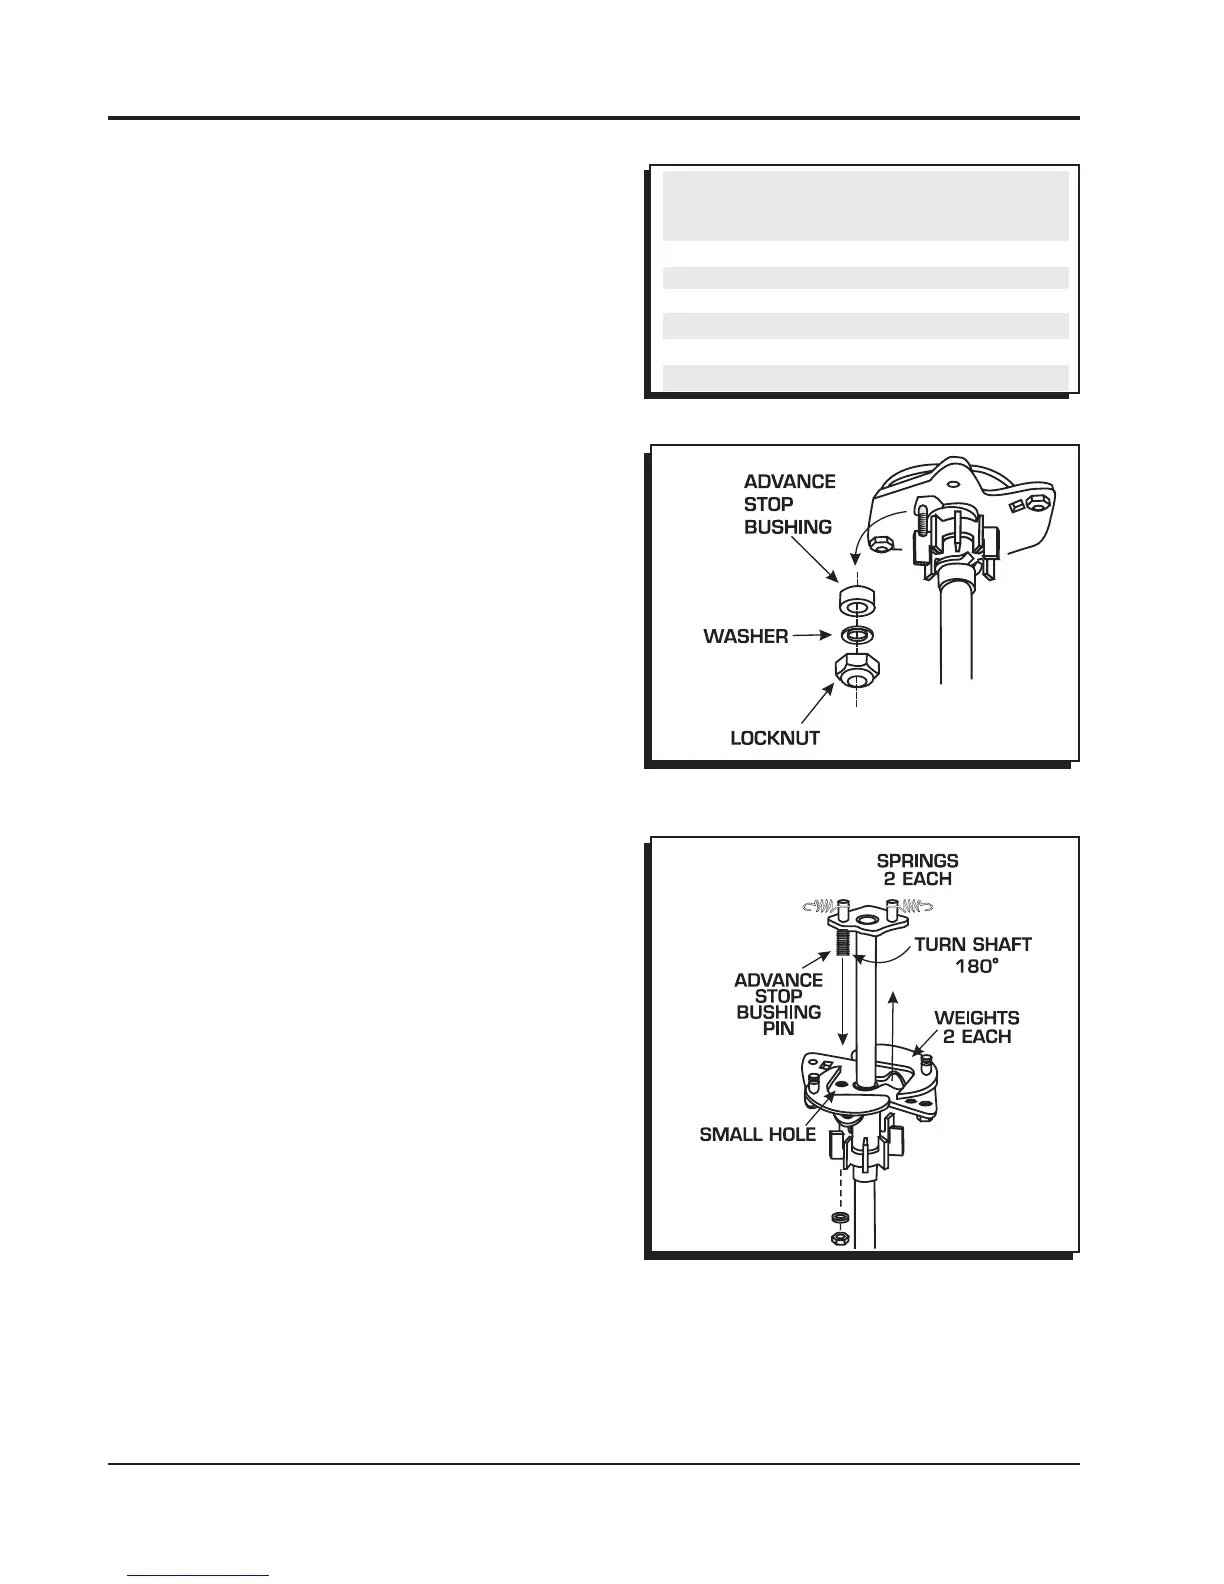
Figure 6 Changing the Advance Stop Bushing.
SELECTING THE ADVANCE STOP BUSH-
ING
Five different advance stop bushings are supplied
in the distributor kit. The distributor comes with a
Blue (21°) bushing already installed. If a different
amount of centrifugal advance is desired, follow the
next procedure to change the bushings. The chart
in Figure 5 gives the size and approximate degrees
for the corresponding bushings.
CHANGING THE ADVANCE STOP BUSH-
INGS
1. Remove the distributor cap and rotor.
2. Remove the locknut and washer on the bottom of
the advance assembly (Figure 6).
3. Remove the bushing and install the new one.
Install the washer and locknut. Do not overtighten.
LOCKING OUT THE CENTRIFUGAL
ADVANCE
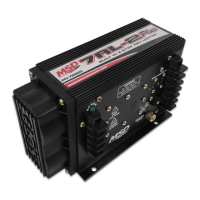
1. Remove the advance components including the
springs, weights and the advance stop bushing
from the advance assembly.
2. Remove the roll-pin from the drive gear and
remove the gear from the shaft.
3. Slide the shaft two inches out of the housing.
4. Rotate the shaft 180° and insert the advance stop
bushing pin into the small hole on the advance
plate (Figure 7).
5. Install the locknut and washer to the advance stop
bushing pin. This locks the advance in place. Do
not overtighten.
6. Install the drive gear and roll-pin.
Figure 6 Locking Out the Centrifugal Advance.
Figure 7 Locking Out the Advance.
Figure 5 Advance Stop Bushing Chart.
BUSHING SIZE APPROXIMATE
CRANKSHAFT
DEGREES
Red-Smallest 28
Silver 25
Green 23
Blue 21
Purple 19
Black-Largest 18