EasyManuals Logo

MSI A68HM-E33 V2 Series User Manual

MSI A68HM-E33 V2 Series
170 pages
To Next Page IconTo Next Page
To Previous Page IconTo Previous Page
Page #15 background imageLoading...
Page #15 background image
English
15

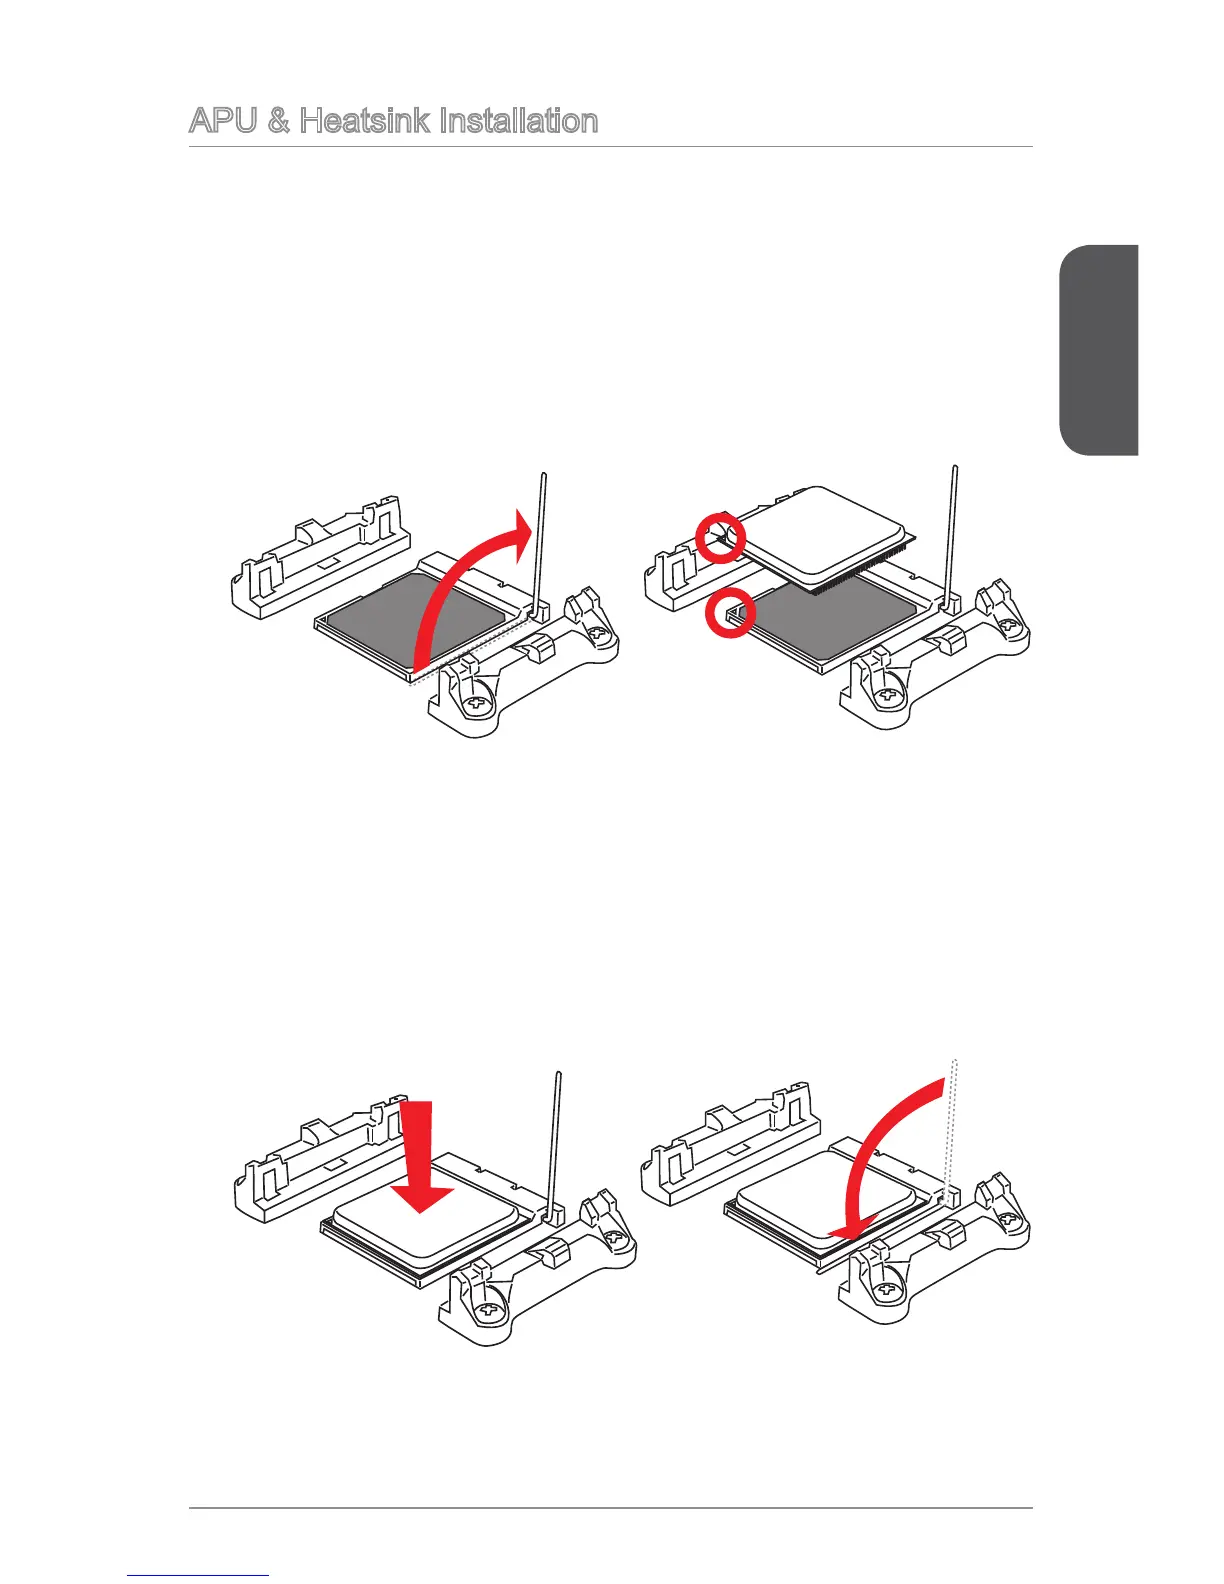
When installing a APU, always remember to install a APU heatsink. An APU heatsink
is necessary to prevent overheating and maintain system stability. Follow the steps
below to ensure correct APU and heatsink installation. Wrong installation can
damage both the APU and the motherboard.
1. Pull the lever sideways away from the socket. Make sure to raise the lever up to
a 90-degree angle.
2. Look for the gold arrow of the APU. The gold arrow should point as shown in the
󰘰 
3. If the APU is correctly installed, the pins should be completely embedded into
the socket and can not be seen. Please note that any violation of the correct
installation procedures may cause permanent damages to your motherboard.
 󰘰
likely to move while the lever is being closed, always close the lever with your
󰘰
completely embedded into the socket.

Questions and Answers:

Question and Answer IconNeed help?

Do you have a question about the MSI A68HM-E33 V2 Series and is the answer not in the manual?

MSI A68HM-E33 V2 Series Specifications

General IconGeneral
ChipsetAMD A68H
CPU SocketFM2+
Memory SupportDDR3
Memory Slots2
Max Memory32GB
Form FactorMicro ATX
PCIe x16 Slots1
PCIe x1 Slots1
SATA Ports4 x SATA 6Gb/s
AudioRealtek ALC887
RAID SupportRAID 0, 1, 10
Memory StandardDDR3 1600/1333 MHz
USB Ports2 x USB 3.0
Audio Channels7.1 Channel
LANRealtek RTL8111G

Related product manuals