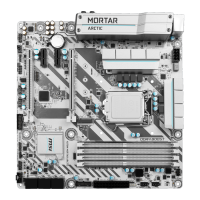
Do you have a question about the MSI B250M MORTAR ARCTIC and is the answer not in the manual?
Step-by-step guide for safely installing the CPU onto the motherboard socket.
Instructions for correctly installing DDR4 memory modules into the motherboard slots.
Details on connecting front panel connectors like power/reset switches and LEDs to the motherboard.
Guide on physically mounting the motherboard inside the computer chassis.
Steps for installing SATA DVD drives and SATA hard disk drives into the system.
Procedure for installing a graphics card into the PCIe expansion slot.
Shows how to connect the main ATX and CPU power connectors from the PSU to the motherboard.
Steps to power on the computer system for the first time after assembly.
Detailed explanation of the CPU socket and safe installation procedures for LGA 1151 CPUs.
Information on motherboard DIMM slots, memory installation recommendations, and important notes.
Details on PCIe slots, their configurations (x16, x1, x4), and installation advice.
Instructions and important notes for installing an M.2 SSD module into the M.2 slot.
Information on SATA connectors, their usage, and combination possibilities with M.2 slots.
Pin definitions and connection details for front panel connectors like power, reset, and LEDs.
Pinout and connection details for ATX and CPU power supply connectors.
Explains PWM and DC fan connector types and pin definitions for CPU and system fans.
Instructions for clearing CMOS memory and resetting BIOS to default values using the JBAT1 jumper.
Explains the function of EZ Debug LEDs for diagnosing boot process issues.
Methods to access the BIOS setup utility during system boot.
Guides on updating the BIOS using M-FLASH and Live Update 6.
Sets the sequence of system boot devices and logo display.
Sets the DRAM frequency for memory overclocking.
Steps to install necessary hardware drivers from the MSI Driver Disc.
User-friendly software for adjusting system settings and monitoring status.
Guide on entering the IRST Option ROM to create, delete, or reset RAID volumes.
Step-by-step instructions for creating a RAID volume using the IRST Option ROM.
Steps to handle a failed hard drive member and rebuild the RAID array.
Troubleshooting steps for when the computer does not power on.
Steps to resolve issues with no display signal despite the system powering on.
Solutions for boot problems occurring after a BIOS update.
| Form Factor | Micro ATX |
|---|---|
| Chipset | Intel B250 |
| Socket | LGA 1151 |
| Memory Slots | 4 x DIMM |
| Max Memory | 64 GB |
| Audio | Realtek ALC892 |
| PCIe Slots | 1 x PCIe 3.0 x16, 2 x PCIe 3.0 x1 |
| Storage Interface | 6 x SATA 6Gb/s, 1 x M.2 |
| USB Ports | 6 x USB 3.1 Gen1, 6 x USB 2.0 |
| LAN | Realtek 8111H Gigabit LAN |
| Memory Speed | 2400/ 2133 MHz |
| Video Outputs | 1 x DVI-D, 1 x HDMI |
| RAID Support | 0, 1, 5, 10 |


 Loading...