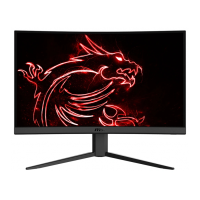
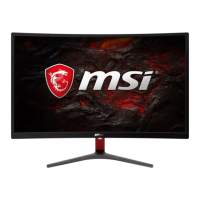
This document provides a comprehensive guide for the Optix Series LCD Monitor, specifically covering models Optix G241V (3BA7) and Optix G241V E2 (3BA7). It details the monitor's functions, usage features, and maintenance instructions to ensure optimal performance and user experience.
The monitor is designed to provide a high-quality visual experience, suitable for various applications including gaming, professional work, and general media consumption. Its core function is to display visual output from a connected computer or other video sources.
Getting Started
The manual begins with essential information for setting up the monitor. The package contents typically include the monitor itself, a stand, a stand base with a screw, four stand screws, a VESA cover, a power adapter and power cord, and a Quick Start Guide. Depending on the region, an HDMI Cable or DisplayPort Cable may also be included. Users are advised to contact their place of purchase or local distributor if any items are damaged or missing, as package contents can vary by country.
Installation
Installing the monitor stand is a straightforward process. Users are instructed to place the monitor on a soft, protected surface to prevent scratching the display panel. The installation involves aligning the latches of the stand to the monitor, tightening the stand with the provided screws, and then connecting the base to the stand, securing it with the base screw. Finally, the VESA cover is aligned and placed. The manual highlights that the holes for installing the stand can also be used for wall mounting, and users should contact their dealer for a proper wall mount kit if needed.
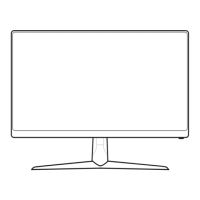
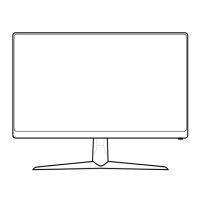
Adjusting the Monitor
The Optix Series monitor is designed for user comfort, offering adjustment capabilities. The primary adjustment feature is tilt, allowing the screen to be angled from -5° to 20°. Users are cautioned to avoid touching the display panel when adjusting the monitor to prevent damage.
Monitor Overview and Connectivity
The monitor features a clean design with clearly labeled ports and controls. Key components include the Power Button, Power Jack, DisplayPort, HDMI Port, Headphone Jack, Navi Key, and Kensington Lock.
Connecting the monitor to a PC involves a few simple steps:
- Turn off the computer.
- Connect the HDMI or DisplayPort cable from the monitor to the computer.
- Assemble the monitor power adapter and power cord.
- Connect the power adapter to the monitor power jack.
- Plug the power cord into an electrical outlet.
- Turn on the monitor.
- Power on the computer; the monitor will automatically detect the signal source.
OSD Setup
The On-Screen Display (OSD) menu is a crucial feature for customizing the monitor's settings. The monitor utilizes a multi-directional Navi Key for navigation.
The Navi Key, located on the monitor, serves as a central control for accessing and adjusting various settings. Its default settings provide quick access to common functions when the OSD menu is off:
- Middle Button: Opens the OSD Main Menu.
- Up: Game Mode.
- Down: Screen Assistance.
- Left: Alarm Clock.
- Right: Input Source.
When the OSD menu is active, the Navi Key's functions change:
- Middle Button: Enters submenus or confirms a selection/setting.
- Up/Down Buttons: Selects function menus/items or adjusts function values (upward/downward).
- Left Button: Cancels preview and exits without applying mode effect (for Game Mode), or exits the current menu (for Alarm Clock), or exits (for Input Source).
Users can also customize the Navi Key's hotkey options for Brightness, Refresh Rate, and Information on Screen. For example, pressing the Middle Button saves the value and exits, while Up/Down adjusts, and Left cancels. For Refresh Rate and Information on Screen, the Middle Button confirms, Right turns on, and Left turns off the function.
OSD Setup via Navi Key
Pressing the Middle button of the Navi Key launches the OSD main menu. The menu is organized into several categories: Gaming, Professional, Image, Input Source, Navi Key, and Setting.
- Game Mode: Offers preset modes like User, FPS, Racing, RTS, and RPG. Users can adjust these modes, and use Up/Down to select and preview effects, and the Middle Button to confirm.
- Night Vision: Optimizes background brightness for FPS games, with options like OFF, Normal, Strong, Strongest, and A.I.
- Response Time: Adjusts pixel response time with options like Normal, Fast, and Fastest. This setting is grayed out if Anti Motion Blur is enabled.
- Refresh Rate: Allows users to adjust the refresh rate in any mode. The default location is Left Top, but it can be adjusted in the OSD menu. The monitor follows the operating system's preset refresh rate.
- Alarm Clock: Users can set an alarm clock with various durations (15:00, 30:00, 45:00, 60:00) or a custom time (00:01-99:59). After setting, the Middle Button activates the timer. The default location is Left Top.
- Screen Assistance: Provides visual aids, with options like None and various icons. Default is None.
- FreeSync: Prevents screen tearing. It's OFF by default for DisplayPort and HDMI and can be toggled ON/OFF. If FreeSync is enabled, Anti Motion Blur will be disabled.
- Pro Mode: Offers modes like User, Reader, Cinema, and Designer. User is the default, allowing all items to be adjusted.
- Eye Saver: Protects eyes from blue light by adjusting screen color temperature to a yellow glow. It can be toggled ON/OFF and adjusted in any mode. When Pro Mode is set to Reader, Eye Saver is mandatory.
- HDCR: Enhances image quality by increasing contrast. It can be toggled ON/OFF. When ON, Brightness is grayed out. HDCR and Anti Motion Blur cannot be enabled simultaneously.
- Image Enhancement: Enhances image edges to improve acutance, adjustable in any mode.
- Brightness: Adjustable from 0-100 in User, RTS, RPG, and Reader modes. Grayed out if Anti Motion Blur or HDCR is enabled.
- Contrast: Adjustable from 0-100 in any mode.
- Sharpness: Adjustable from 0-5, improving clarity and details.
- Color Temperature: Default is Normal, with options like Cool, Normal, Warm, and Customization (R, G, B values from 0-100).
- Screen Size: Adjustable with Auto, 4:3, and 16:9 options, in any mode, resolution, and refresh rate. Default is Auto.
- Allows users to select the input source (HDMI or DP).
- Allows customization of the Up/Down/Left/Right hotkeys, with options like OFF, Brightness, Game Mode, Screen Assistance, Alarm Clock, Input Source, Refresh Rate, and Information on Screen.
- Language: Factory default is English, but users can select from various languages. Language setting is independent and overrides the factory default.
- Transparency: Adjustable from 0-5 in any mode.
- OSD Time Out: Sets the duration the OSD menu remains visible (5-30s).
- Power Button:
- OFF: Monitor turns off completely.
- Standby: Panel and backlight are off, but the monitor can be activated by OS detection, preventing desktop icon and screen refresh issues.
- Information on Screen: Displays monitor status on the right side of the screen, can be enabled or disabled. Default is OFF.
- Reset: Restores settings to original OSD default. Language settings are not changed upon reset.
Maintenance Features
The manual provides crucial safety instructions and maintenance guidelines to ensure the longevity and safe operation of the monitor.
- Safety First: Users are urged to read all safety instructions carefully, noting all cautions and warnings. Servicing should be referred to qualified personnel only. The User's Guide should be kept for future reference.
- Environmental Protection: The device should be kept away from humidity and high temperatures to prevent fire or shock hazards. It should be placed on a reliable flat surface.
- Power Management: Ensure the power voltage is within the 100~240V safety range and properly adjusted. The protective earth pin from the plug should not be disabled, and the device must be connected to an earthed mains socket-outlet. Always disconnect the power cord or switch off the wall socket if the device will be unused for a certain time to achieve zero energy consumption.
- Ventilation: The ventilator on the device is for air convection and to prevent overheating; it should not be covered.
- Storage and Operating Temperature: Avoid leaving the device in unconditioned environments with storage temperatures above 60°C or below -20°C, as this can damage the device. The maximum operating temperature is around 40°C.
- Cleaning: When cleaning, always remove the power plug. Use a soft cloth and avoid industrial chemicals. Never pour liquid into openings to prevent damage or electric shock.
- Power Cord: Place the power cord where people are unlikely to step on it and avoid placing anything on it.
- Magnetic/Electrical Objects: Keep strong magnetic or electrical objects away from the device.
- Troubleshooting: If issues arise (damaged power cord, liquid penetration, moisture exposure, device malfunction, physical damage), contact service personnel.
- Green Product Features: The monitor is designed for reduced energy consumption, limited use of harmful substances, easy dismantling and recycling, reduced use of natural resources, extended product lifetime, and reduced solid waste through take-back policies.
- Environmental Policy: The product is designed for proper reuse and recycling. Users should contact local authorized collection points for end-of-life products or visit the MSI website for recycling information.
- Eye Health: Overuse of screens can affect eyesight. Recommendations include taking a 10-minute break every 30 minutes of screen time. Children under 2 years should have no screen time, and for children aged 2 and over, screen time should be limited to less than one hour per day.
Troubleshooting
The manual includes a troubleshooting section for common issues:
- Power LED is off: Check the power button and power cable connection.
- No image: Verify graphics card installation, power connections to computer and monitor, monitor signal cable connection, and check if the computer is in Standby mode.
- Screen image not properly sized or centered: Refer to Preset Display Modes to adjust computer settings.
- No Plug & Play: Check power cable, signal cable, and Plug & Play compatibility of computer and graphics card.
- Fuzzy, blurry, or color problems: Avoid video extension cables, adjust brightness/contrast, adjust RGB color/color temperature, check signal cable connection, and look for bent pins on the signal cable connector.
- Monitor flickering or shows waves: Change refresh rate, update graphics card drivers, and keep the monitor away from electrical devices causing EMI.
This comprehensive guide ensures users can effectively set up, customize, and maintain their Optix Series LCD Monitor for an optimal and safe viewing experience.