EasyManua.ls Logo

MSI Optix G24 Series User Manual

MSI Optix G24 Series
10 pages
To Next Page IconTo Next Page
Page #1 background imageLoading...
Page #1 background image
All specifications and informations are subject to change without notice.
-1-
Please always place
this device on a stable
surface; otherwise,
it may fall and be
damaged.
The altitude and the
tropical environment
the adapter fits depend
on which adapter is
used for the device.
The rating plate on
the back of the device
with the above warning
sign indicates that
t h i s p r o d u c t i s
app lica ble for the
safe use of the region
w i t h a l t i t u d e o f
2,000m and below.
Do not hold the plug
w i t h w e t h a n d ;
otherwise, electric
shock may occur.
Make sure the plug
has a good touch
because poor touch
may cause fire.
Do not use a broken
power plug nor keep
a power cord near heat
source; otherwise,
e l e ct r i c s h oc k or
fire may occur.
When cleaning the
device, be sure to
remove the power
plug, use a piece
of soft cloth rather
t h a n i n d u s t r i a l
che mica l to cle an
the device, be sure
not to let water enter
the device.
Do not disassemble
this device without
permission. In case
of failure, be sure to
contact a professional
servicing person to
fix it. The unauthorized
disassembly of this
device may result
in electric shock or
fire.
In case of rare smell
or noise out of this
device, be sure to
immediately cut off
the power supply and
ask a professional
servicing person to
fix the problem.
When this device
is idle for long time,
be sure to power it
off; otherwise, electric
shock or fire may
occur.
I.Safety Prevention Measures
Note:
The device with AC switch may use such AC switch as cut-off component.
The device without AC switch may use power plug or coupler as cut-off component.
In case of the normal use of the equipment, make sure the cut-off component
can be accessed easily.
Question and Answer IconNeed help?

Do you have a question about the MSI Optix G24 Series and is the answer not in the manual?

MSI Optix G24 Series Specifications

General IconGeneral
Aspect Ratio16:9
Brightness250 nits
Viewing Angle178° (H) / 178° (V)
VESA Mount100 x 100 mm
Screen Size23.8 inch
Resolution1920 x 1080 (Full HD)
Response Time1 ms
Ports1x DisplayPort (1.2a), 2x HDMI (1.4b)
Adaptive SyncAMD FreeSync

Summary

I. Safety Prevention Measures

Safe Surface Placement

Ensures device stability to prevent falls and damage. Place on a firm, level surface.

Environmental and Altitude Limits

Product rated for altitudes up to 2,000m; adapter suitability depends on environment.

Power Plug Safety

Avoid wet hands when handling plugs. Ensure good contact to prevent electric shock or fire.

Power Cord Integrity

Do not use damaged power plugs or cords near heat sources to prevent hazards.

Cleaning Guidelines

Unplug device before cleaning with soft cloth. Avoid water and chemical solvents.

Disassembly Prohibition

Do not disassemble without authorization. Unauthorized disassembly risks electric shock or fire.

Responding to Malfunctions

If unusual smell or noise occurs, immediately cut power and seek professional service.

Idle Power Management

Power off the monitor when not in use for extended periods to prevent potential hazards.

II. Installation Instructions

Included Accessories List

Details the items provided with the monitor: cables, manual, stand, and warranty card.

Adjusting Screen Angle

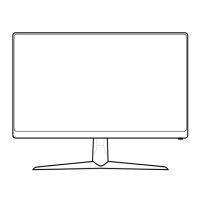
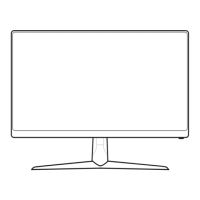
Guide on tilting the screen forward or backward, with precautions to avoid pressing the display.

III. Connect the Monitor to PC

Connecting Power Supply

Connect the monitor's power cord to the rear power port for operation.

VGA Input Connection

Connect a VGA cable from the PC's VGA output to the monitor's VGA IN port.

HDMI Input Connection

Connect an HDMI cable from the PC's HDMI output to the monitor's HDMI IN port.

IV. User Setup

Monitor Control Key Layout

Diagram illustrating the physical location and numbering of the monitor's control buttons.

Monitor Control Key Functions

Explanation of how each key operates the monitor menus and activates shortcut functions.

V. Operation Menu (OSD) Function Descriptions

Brightness and Contrast Control

Adjusts the display's brightness and contrast levels for optimal visual output.

Dynamic Contrast Ratio (DCR)

Enables or disables automatic adjustment of contrast based on screen content.

Preset Picture Modes

Select predefined visual settings for different content types like games or movies.

Color Temperature Tuning

Modify color temperature settings using presets or manual RGB adjustments.

Aspect Ratio Configuration

Set the display's aspect ratio to auto-detect, 16:9, or 4:3 for proper image scaling.

Input Source Selection

Switch between available video input signals, typically VGA and HDMI.

Image Adjustment Features

Utilize auto-adjust, auto-color, and gamma settings for image optimization.

VI. FAQ

VII. Product Specifications

Related product manuals