MUELLER
®
Centurion
®
Series Fire Hydrant
Adding an Extension
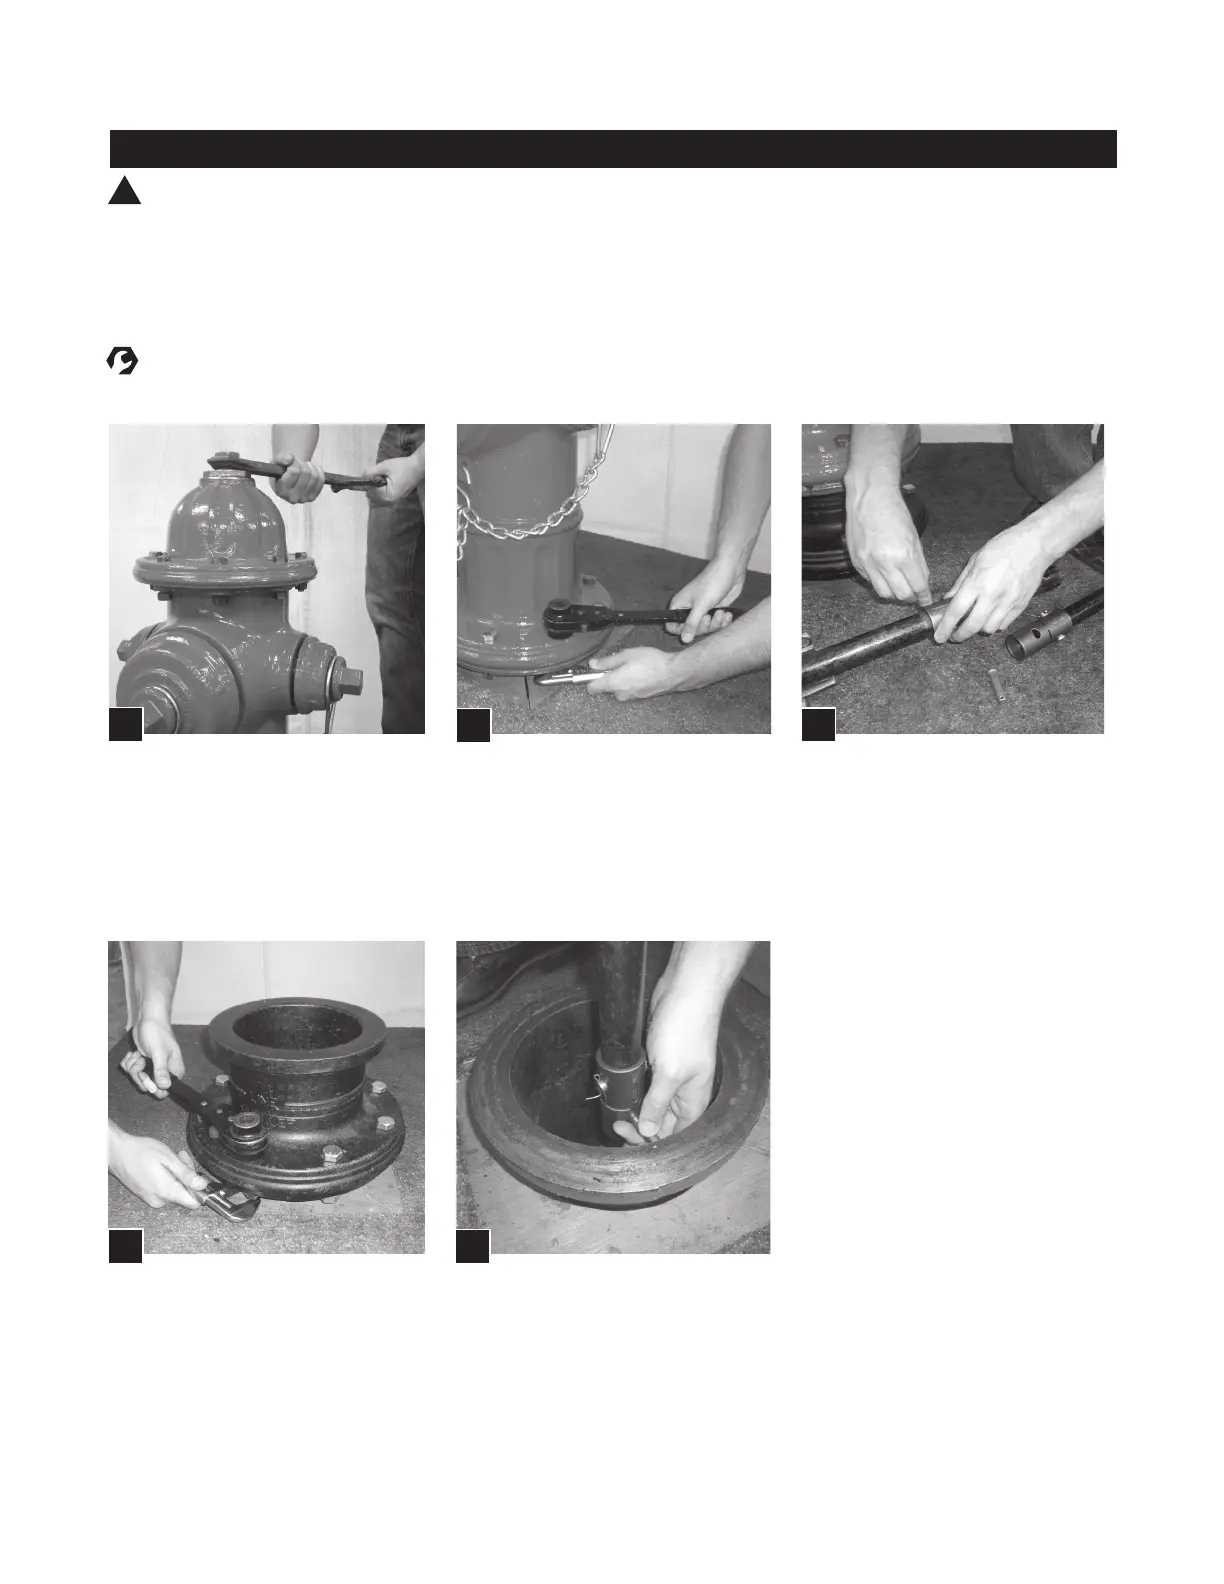
4.
Attach Extension Barrel to Lower
Barrel with solid Flange halves
(without groove) and Bolts, being
sure O-ring is in place.
WARNING: Before removing any bolt(s) holding the Hydrant together, shut off gate valve to isolate Hydrant from
main water source. Loosen (do not remove) one nozzle cap two turns and check for water under pressure inside Hydrant
– bleed off any pressure, then remove nozzle cap completely. Open Hydrant main valve completely. A continuous ow
of water, no matter how slight, indicates Hydrant is not properly isolated from the main water supply, and that problem
must be corrected before any Hydrant disassembly can proceed. Disassembly of Hydrant with pressurized water acting
against the main valve could result in unexpected ejection of Hydrant parts, debris or high-pressure water stream,
which could cause serious bodily injury.
2.
Unbolt Trafc Flange. Remove Upper
Barrel. Remove Upper Stem and
Stem Coupling by removing the lower
stainless steel Cotter Pin and stainless
steel Clevis Pin.
Place Extension Stem and Extension
Coupling on Lower Stem and retain
it with stainless steel Clevis Pin and
stainless steel Cotter Pin.
5.
Assemble Upper Stem and Stem Cou-
pling onto Extension Stem and retain it
with stainless steel Clevis Pin and stain-
less steel Cotter Pin.
NOTE: Make sure Stem Coupling is
installed with “This End Up” towards
the Upper Stem.
1.
Remove Hold-Down Nut, Anti-Friction
Washer and Operating Nut from
Bonnet. Lubricate outside of Brass
Sleeve and slide over threaded stem
end to prevent O-ring damage. Unbolt
Bonnet from Upper Barrel and remove.
Remove Brass Sleeve.
3.
!
2
EQUIPMENT & TOOLS NEEDED – PPE: Hard hat, safety shoes, safety vest, safety glasses, work gloves.
Tools: Wrench, A-311 operating wrench, pliers.