INSTALLATION
4
You will need the following:
– Drill
– (55 mm) hole saw or jigsaw
– Saw
– Measuring tape
– Asphalt sealant/adhesives
Also, check the floor space where the toilet should be placed so it is large enough. Required floor space is:
MullToa15e,25e and 55ai width 55 cm x length 110 cm (for the toilet and removal of the tray)
MullToa65ai width 65 cm x length 135 cm (for the toilet and removal of the tray)
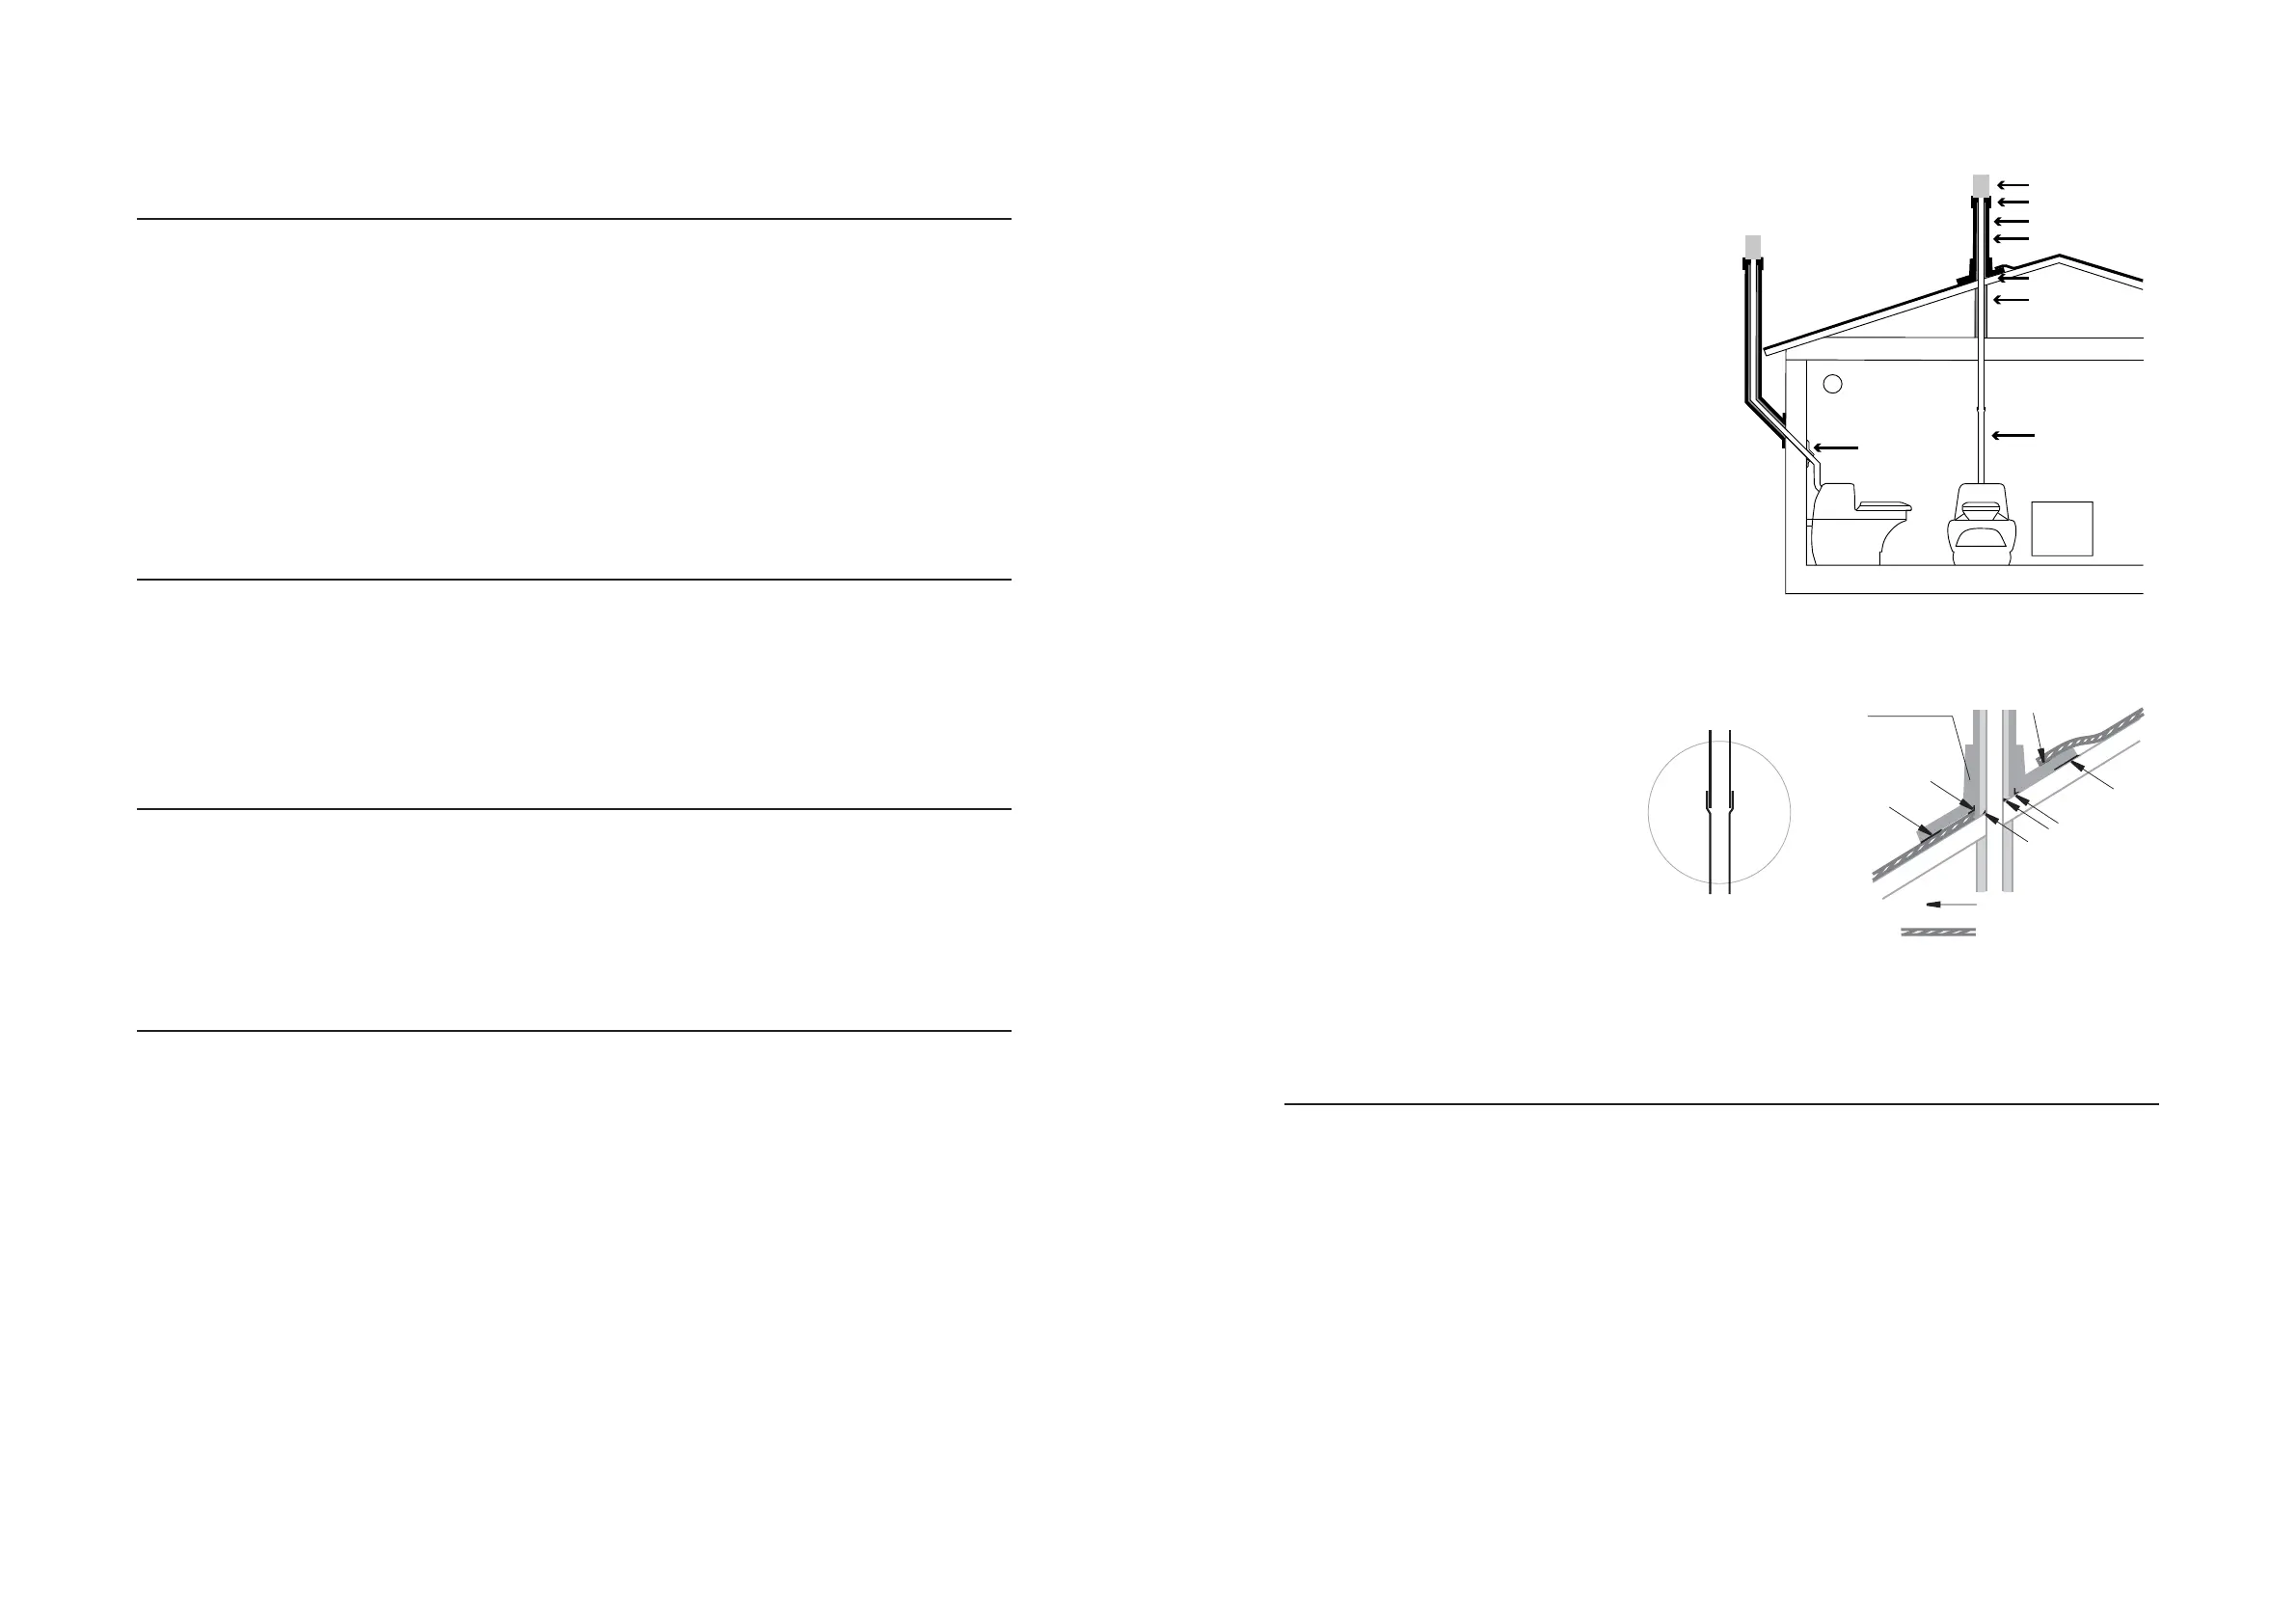
Pipe installation
The entire pipe, from ceiling and up through cold areas such as attic, must be insulated. This is to prevent
condensation in the ventilation pipe and to increase natural draught. Insulation is essential, no matter how
much or little the toilet is used, even if the toilet is used only in summer. Do not use bends over 45 °.
Do not use any rain cap on top of the ventialtion pipe, only use the included netting.
Temperature
The room in which the toilet is installed must be insulated. When the toilet is in use, room temperature
should be at least 18 ° C to ensure proper function. The best thing to do is to install a thermostatically
controlled heating element. During periods when the toilet is not in use the temperature in
the room can be low or even freezing without any damage to the unit.
Air supply
To ensure adequate air supply, a vent through the outer wall should be installed. (diame-
ter 100 mm). No extractor fan in the toilet room to avoid back drought, which can lead to odors in the room.
5
Assembly
1. Set the toilet in position against the wall.
The floor must be even and insulated.
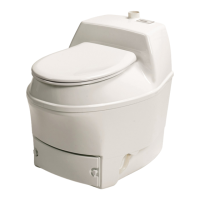
2. Measure and make a hole for the ventilation
pipe in the ceiling, 55 mm diameter. Install
the ventilation pipe with the non-sleeved end
down inside the rubber coupling on the toilet.
3. Measure and make a hole in the roof,
with 55 mm diameter.
4. Push the pipe up through the hole. Seal it well
using asphalt sealant between the pipe and the
roof to prevent any leaks.
5. Insulate the pipe from the ceiling up to the top.
All pipework in cold spaces must be insulated.
6. Cut the exterior pipe to fit the angle of the roof.
7. Place the roof flashing on to the exterior
pipe. (Use soapy water to make it easier).
If you have a tin roof, the best thing to do
is to get a sheet metal worker to create
a junction between the roof and the
exterior pipe.
8. Pass the exterior pipe over the ventilation
pipe's insulation. Put on the reduction
coupling.
9. Adjust the roof flashing and seal firmly with
asphalt sealant between the roof flasing and
the roof.
10.Fit the insect netting against the stop on the
reducing coupling.
Starting of empty toilet
1. Put about 2/3 of the bag of the MullToa humusstarter into the toilet, except to MullToa 65ai where the
whole bag should be used. About half of the Humusstarter falls directly through the grate into humus tray.
2. Connect the mains plug into an earthed wall socket. Lift the seatcover so the mixermotor automatically
starts and makes one turn, repeat this a couple of times.
MullToa 15e, turn the handle, several times. This will fill the tray and leave approx 5-10cm on top of the
grate.The tray will be full until you empty it for the first time.
3. On the MullToa 15e and 25e set the heating control (the recommended start setting step 2). This depends
on how many people are going to use the toilet.
18
°
C
Vent
25 mm Insulation
Pipe 110 mm
Reducing coupling
Insect netting
Roof flashing
25 mm
Insulation
Ventilation pipe
Radiator
55mm
Wall bracket
Nonsleeved end
Sleeved end
Roof flashing
seal of asphalt
Roof