This 4' x 8' QP-427 aluminum dock model meets the demand for lightweight, easy-to-install docks. It is sturdy, modular
and simple to assemble. It can be installed on piles or on wheels and you can quickly adjust its height. Its configuration
can evolve according to your needs and it can easily be expanded by adding sections. Note that this dock structure
cannot be installed with floats or used as a floating dock starter section. Although your QP-427 has many of the features
of the QP-427-D dock (which is 12' long), its width is different, which restricts combinations with it in straight lines.
Junction
Plate
x2
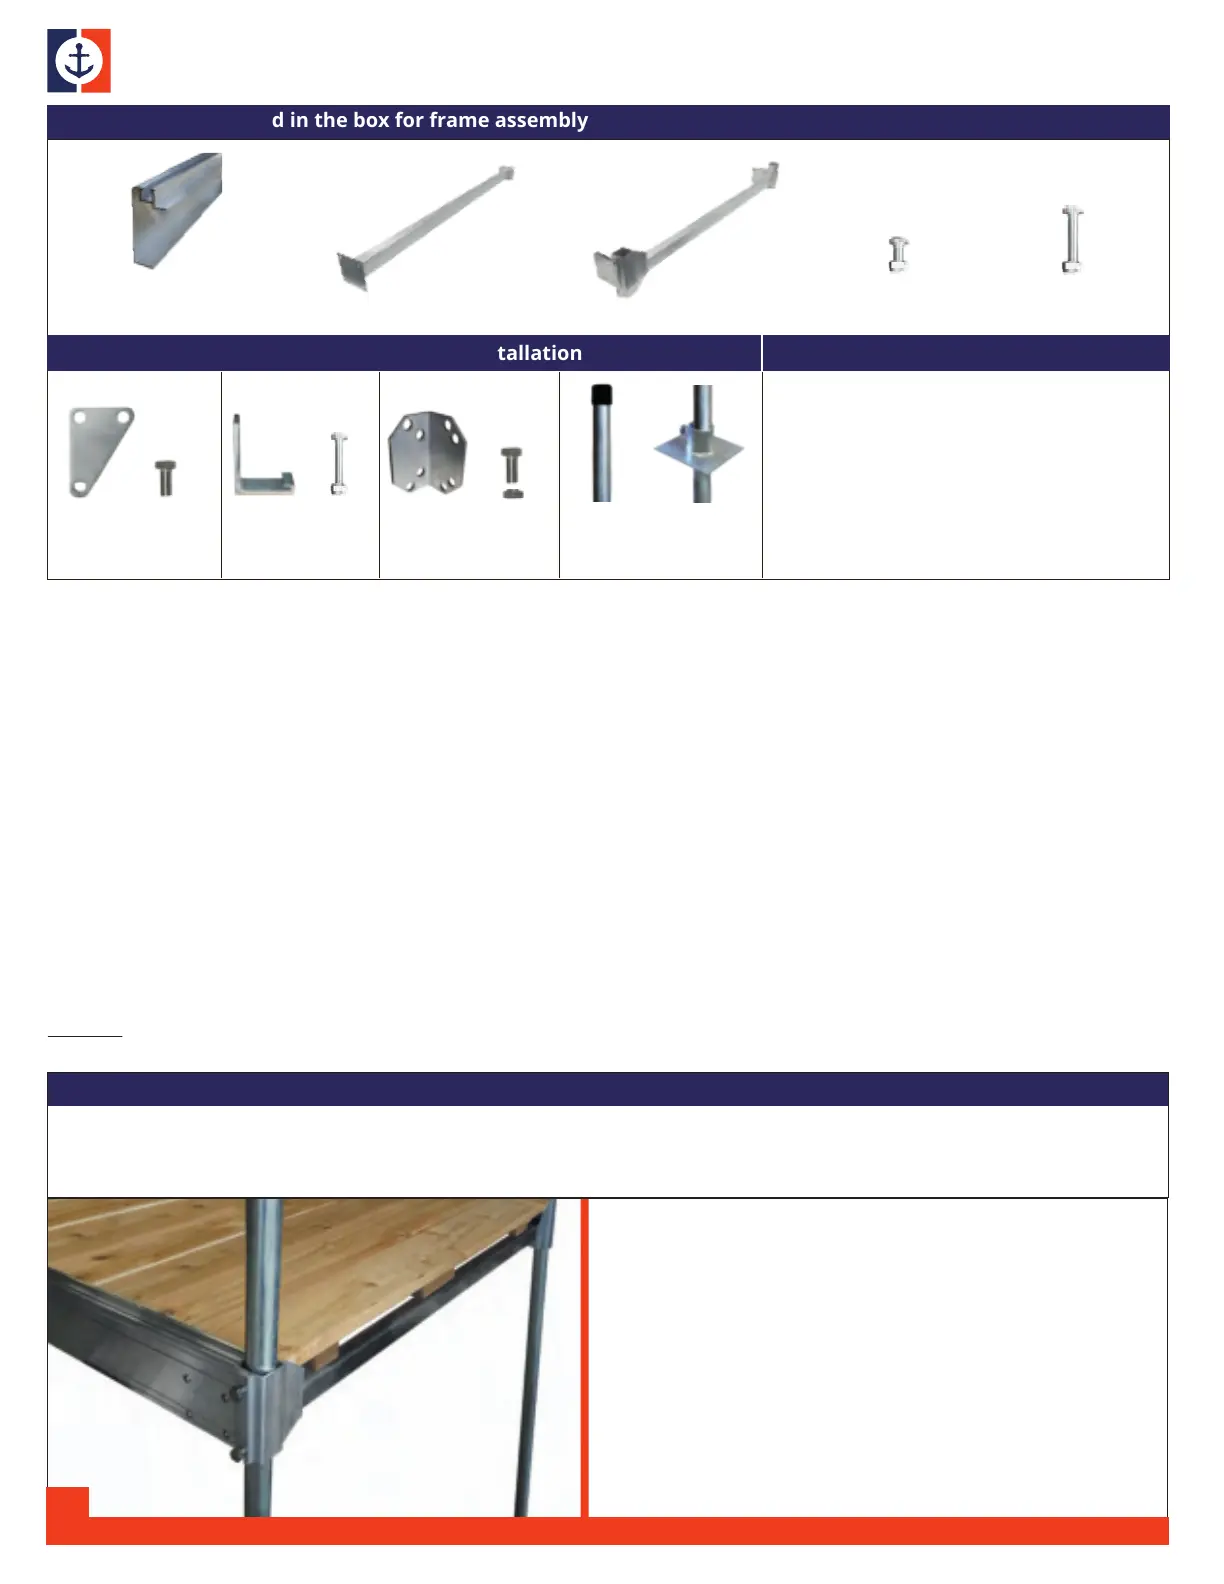
Components included in the box for frame assembly
CHARACTERISTICS OF A STATIONARY DOCK
>
This is the ideal option for shallow water. You can install a stationary dock in a maximum of about 4 feet of water
otherwise installation and removal will be difficult.
>
The stationary dock is usually installed without anchors and you should not rely on it to hold your boat during a storm,
or to protect it from large waves created by other boats.
>
A stationary dock is recommended if bad weather causes waves of up to 3 feet. If this is the case, you will have to moor
the boat away from the dock. Some people choose to install a boat lift or hoist it up a mooring ramp.
>
A post dock is not recommended in a body of water that often fluctuates more than 2 feet in a short period of time. A
floating dock would be more appropriate in this case, otherwise you may have to adjust its height several times during
the season.
>
Never leave a stationary dock in the water for the winter because of damage caused by spring ice movement and the
weight of snow. When storing, remove the posts and leave your decking in place. They can be stacked flat (upside down
to prevent wood fading from the sun) or vertically on their sides.
INSTALLATION TYPES
Parallel
Adapter
x1
6 ft post
& PVC Cap
2x
>
Wrench and ratchet 3/4" and 7/16"
>
Phillips screwdriver
>
Cordless drill with #2 square bit,
9/64'', 11/64'' (and optional 1/2’’ for
adaptor) drill bits
>
Measuring tape
>
Saw
>
Level
>
Sledgehammer
Corner
Adapter
x1
Base Plate
6 in x 6 in
2x
S.S. Hex bolt
1/2" x 1"
x8
Round head
1/4" x 2"
x2
S.S. Hex bolt
1/2" x 1"
x2
Components included in the box for the installation REQUIRED TOOLS
INCLUDED PARTS QP-427 # 21111
Round head
¼" x ⅝"
x 8
End piece
w/ leg holders
x 2
Aluminum
Side Beam
x 2
Round head
¼" x 1-¼"
x 16
Center piece
x 1
DECKING KITS FOR QP-427
TM
# 21176
2
The kit includes the premium quality Western Cedar boards,
kiln-dried and sanded, as well as the required screws.
You can purchase the optional pre-cut Western Cedar
Decking Kit to make your assembly even easier.
WOOD
>
15x boards : 5/4" x 6" x 44 7/8" (1" thick actual size)
>
2x boards : 5/4" x 6" x 44 7/8" (1" thick actual size)
with small cuts for leg holders
>
6x boards : 5/4" x 3" x 47 1/2" (1" thick actual size)
for decking strigners
H ARDWARE
>
120x #8 x 1 3/4" wood screws
>
8x #10 x 1 3/4" stainless steel screws
 Loading...