13
Working with Zacki ELAPOR®
Zacki ELAPOR® has been developed specically for glued joints in our models which consist of moulded ELAPOR®
foam parts.
Please observe the following points in order to obtain perfect joints:
• Avoid the use of activator. ‘Kicker’ signicantly weakens the joint. We advise leaving joined parts for 24 hours to obtain
maximum strength, particularly when the glued area is large.
• Activator should only be used for temporary, small-area joints (‘tacking’). Spray a little activator on one surface, and
allow it to air-dry for about thirty seconds.
• To obtain maximum joint strength you should lightly sand the surface with 320-grit abrasive paper before applying glue.
Bent parts - actually don’t exist. If you nd that a component has taken up a curve, perhaps after being trans-
ported, it is easy to straighten again. In this respect ELAPOR® behaves in a similar way to metal: bend the
component back slightly beyond the correct position, and the material will then spring back to its proper shape
when released, and maintain it. There are limits, however - don’t overdo it!
Bent parts - really do exist. If you wish to paint your model, apply MPX Primer # 60 2700 to the surfaces, wiping it on
very lightly as if you were cleaning the model. Paint must always be applied thinly and evenly, otherwise the component
will warp. Then you really will have bent parts, and they will also be heavy and perhaps even unusable. We have found
that matt-nish paints produce the best visual effect.
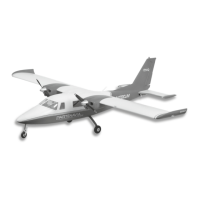
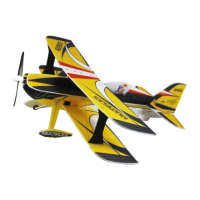
Specication:
Wingspan 975 mm
Overall length 1030 mm
All-up weight min. 550 g
Wing area approx. 29 dm² (FAI)
(FAI => wing + tailplane, excl. fuselage)
Wing loading min. 19 g/dm²
RC functions:
Elevator
rudder
ailerons
motor speed
The Centre of Gravity is located at a point 110-120 mm aft of the wing root leading edge (measured at the fuselage).
Note:
Please separate the pictorial pages from the centre of the building instructions before you start construction.
Tuning rewall
The carbon rewall (motor bulkhead) # 33 2609 is machined from high-quality carbon bre sheet material, and is
tted with accurately made aluminium threaded inserts. If you intend to install this bulkhead, please note that a drop of
thread-lock uid must be applied to the four thrustline adjustment screws (sidethrust and downthrust) once the correct
settings have been established.
1. Before assembling the model
Check the contents of your kit before you start working on it.
You will nd Figs. 1 + 2 and the Parts List helpful here.
2. Preparing the fuselage
To improve orientation in ight it is advisable to paint the
dummy canopy of the fuselage 3 a dark colour, and this is
the best time to do it: mask off the canopy area with adhesive
tape, and start by applying a thin coat of MULTIPLEX MUL-
TIprimer # 60 2700. Wipe the primer off after application,
then nish the job with MULTIPLEX ELAPOR Color Spray
paint, e.g. grey # 60 2710. Apply the paint is sparingly as
possible; several very thin coats are best.
3. Preparing the elevator
Pack up the elevator 9 on the workbench (e.g. using two
books of the same thickness), so that it lies completely at.
Glue the CFRP spar 16 in place, wiping off excess glue
immediately with a cloth. Use a balsa knife to cut slots at
the marked points for the hinges 22.
Fig. 3
Prepare the elevator horn 23 as shown in Fig. 4 before
gluing it in the recess in the elevator 9. Secure the hexagon
nut with a drop of glue.
4. Preparing the rudder
Use a balsa knife to cut the slots for the hinges 22 along
the centreline of the rudder leading edge.
Fig. 5
Prepare the rudder horn 23 as shown in Fig. 6 before gluing
it in the recess in the rudder 10. Secure the hexagon nut
with a drop of glue.
 Loading...