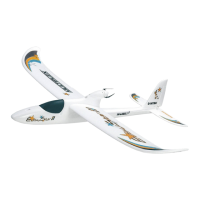
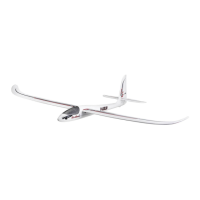
Building the model
1. Completing the canopy
Glue the canopy plate 67 to the rear face of the
canopy 11 in such a position that it fits neatly below
the front wing retainer plate 62, which is fitted later.
Place the canopy on the fuselage 10, apply glue to
the canopy plate and slide it into position using the
wing retainer plate 62 as a guide. Tape or clamp the
plate in place, taking care not to glue the wing
retainer plate 62 in place at the same time.
The canopy is retained at the front with a rubber
band, so it cannot be lost.
Fit the screw hooks 49 in the two screw hook support
blocks 68, and bend the fuselage-mounted hook to
shape using pliers or a vice. Slip a length of thread
through the screw hook and glue the block 68 in the
appropriate recess in the battery duct. Tie the rubber
band to the thread and pull it through the screw hook.
Glue the canopy-mounted screw hook in its recess
and wipe off excess glue.When the glue has set hard
connect the rubber band to the top screw hook (fig.
1). To fit the canopy first engage it at the rear and
then press it down at the front. To change the battery
open the canopy and swivel it to one side without
disconnecting the rubber band.
Tip: if the rubber band grows weaker you can „wind
up“ the band by rotating the canopy to increase the
tension.
2. Completing the tailplane
Attach the elevator 31 to the tailplane 30 using four
hinges 40. The slot for the elevator horn must be on
the underside. Secure the hinges with 5-minute
epoxy, but use as little adhesive as possible. Too
much doesn’t make a better job; it just looks messy
(fig. 2).
3. Completing the fin and rudder
Attach the rudder 33 to the fin 32 using two hinges
40, again using 5-minute epoxy (fig. 2).
4. Fitting the horns
Locate the elevator and rudder horns 41 and fit a
pushrod connector 43 into the outermost hole of
each. Slip the M2 washer 45 over the threaded shank
and screw the self-locking nut 46 on top to secure
the connector. Fit the socket-head cap screws 44 in
the threaded holes in the pushrod connectors. Glue
the horns 41 in the slots in the elevator and rudder
with the row of holes facing forwards (fig. 3).
5. Gluing the tail panels to the fuselage
Particular care is needed at this stage, as proper
alignment is crucial to the model’s flying
characteristics. We take the greatest care in
production, but there are always minor manufacturing
tolerances which have to be allowed for.
The first step is to cut down the bowden cable outer
tubes 80 and 81 to length: 320mm for the rudder,
480mm for the elevator. Insert the tailplane 30 into
the fuselage 10 „dry“, i.e. without glue. Adjust the
position of the tailplane until it rests snugly inside
the fuselage and no gaps are visible.
Lay the elevator bowden cable outer 81 in the longi-
tudinal channel in the fuselage and glue the tailplane
30 and fin 32 to the fuselage. Note that the bowden
cable outer should project from the front end of the
fuselage channel by about 10mm. While the glue is
still soft carefully align the tailplane and fin relative
to the wing saddle. This is done by placing a ruler
on the wing saddle and aligning the tailplane with it
(sight along the fuselage from the nose). Use pins if
necessary to hold the parts in place. The fin should
be exactly at right-angles to the tailplane (check with
a setsquare).
Lay the bowden cable outer 80 in the channel in the
fin strake 34 and glue both parts to the fuselage.
Position the elevator pushrod outer (left) and the
rudder pushrod outer (right - as seen from the tail),
and secure them with a little glue (fig. 4).
6. Installing the wing retainer plates in the
fuselage
Glue the wing retainer plate 62 in the fuselage with
the hole facing the tail, resting flush against the
canopy. Glue the retainer plate 63 underneath part
62 at the same time, and clamp the parts together
with clothes pegs. Check that the holes line up
exactly. Remove all excess glue as it is squeezed
out, especially any inside the hole (fig. 5).
The rear wing retainer plate is formed by gluing
together the three parts 64 with their edges flush.
The holes must line up accurately. Remove all excess
glue, especially inside the hole. Glue part 65 to the
underside of parts 64 ensuring that the hole is still
clearly visible. When the glue has set hard drive the
thread-cutting screw 47 through the front and rear
wing retainer plates to cut a thread for the wing
screws. This is done by positioning the thread-cutting
screw exactly at right-angles to the wing saddle
(foam) and driving it through the plywood about three
times using a screwdriver, repeatedly blowing out
the swarf (waste material) which results. Clamp the
rear wing retainer plate in a vice for the thread-cutting
process. It is glued in the fuselage permanently once
the wing has been completed (fig. 6).
7. Joining the wings
It is essential to glue the wing panels 20 and 21
together with the correct dihedral.
The wing roots are supplied pre-cut to the correct
angle. Lay the wings down flat, then pack up both
tips by about 20 mm (e.g. with books) until the wing
roots fit together snugly, with no gap. Note that the
motor nacelles must project over the edge of the table
when you do this. The spar slots in the two wing
panels must line up exactly, i.e. they must not be
offset relative to each other.
Glue the wings together with a simple butt-joint using
5-minute epoxy, and be sure to align the wings
carefully while the glue is still soft. Excess resin can
be wiped off the wings with methylated spirit, but
only while it is still soft (fig. 7).
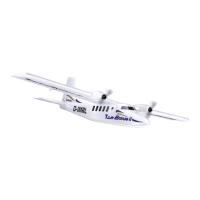
8. Deploying the power system cables
The cable set 92 for the electric motors 90 is supplied
 Loading...