27
MT100 LAWN TRACTOR
26
MT100 LAWN TRACTOR
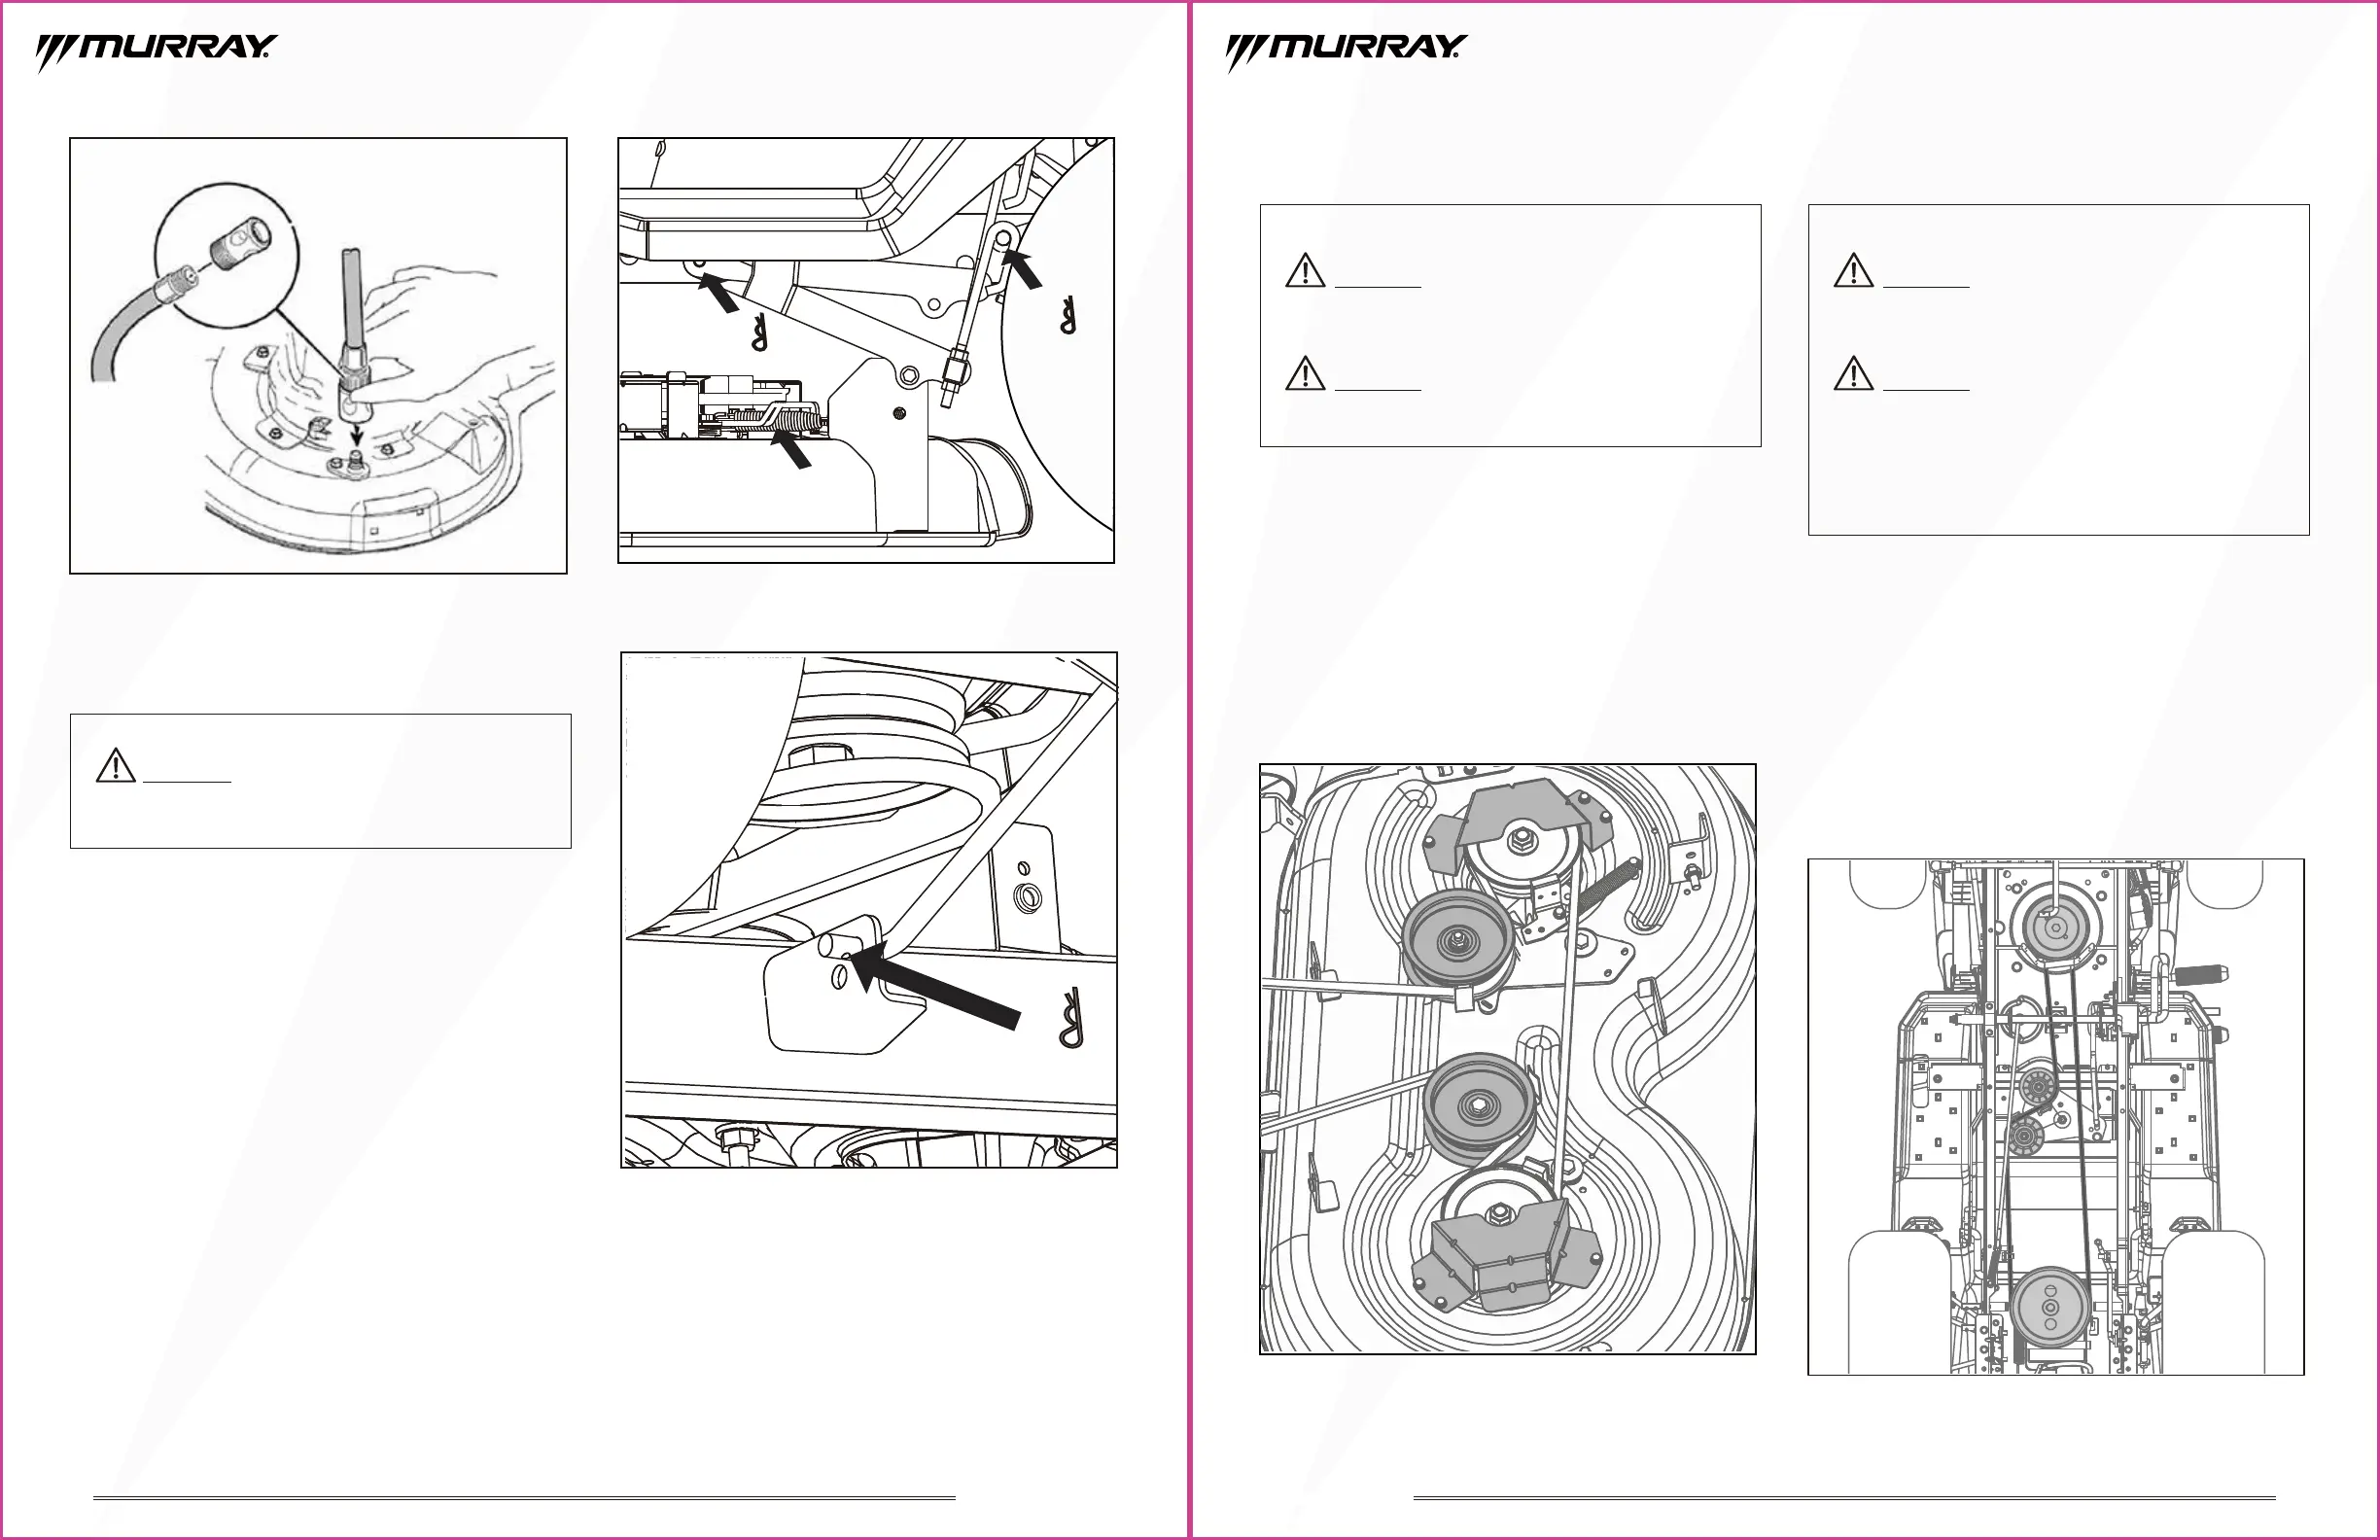
Fig. 23
Removing the Cutting Deck
• Removing the deck will make it easier to replace belts,
pulleys, and blades.
1. Make sure the tractor is in neutral.
2. Stop the engine, engage the parking brake, and remove
the key.
3. Lower the deck to its lowest position.
4. Disconnect the cable spring (a, Fig. 24) that connects the
deck to the tractor.
5. Remove the 5 hitch pins, 2 on the left (b and c, Fig. 24),
2 on the right (the same position as shown on left), and
1 on the front (d, Fig. 25) that secure the deck in place.
6. Slip the deck belt off the drive pulley assembly.
7. Slide the deck out from under the tractor.
8. Reverse the process to reattach the deck to the tractor.
Fig. 24
Fig. 25
Fig. 26
Fig. 27
WARNING:
Belts on your tractor are subject to wear
and should be replaced if any signs of wear are present.
WARNING:
Stop the engine, engage the parking
brake, and remove the key.
Changing the Deck Belt
1. Remove the deck. Refer to the “Removing the Cutting
Deck” section.
2. Remove the two belt protective covers (a, Fig. 26) by
removing the six screws that fasten them to the deck.
3. Remove the two pulleys (b, Fig. 26) by removing the
bolts that fasten them to the deck.
4. Carefully remove the deck belt from around the pulleys.
5. Reverse the process to reattach a new deck belt to the
deck.
WARNING:
If necessary, raise the tractor by placing
on a lift or using a jack and jack stands. Make sure the
tractor is properly secured and the parking brake is set
before proceeding. Failure to properly secure the tractor
could cause it to fall, resulting in death or possible serious
personal injury.
WARNING:
Stop the engine, engage the parking
brake, and remove the key.
Changing the Drive Belt
1. Remove the deck. Refer to the “Removing the Cutting
Deck” section.
2. Remove the drive pulley assembly (a, Fig. 27) by removing
the bolt that fastens it to the engine output shaft.
3. Remove the two pulleys (b and c, Fig. 27) by removing
the nuts that fastens them to the mounting bracket.
4. Slip the belt off the transmission pulley. (d, Fig. 27)
5. Reverse the process to reattach a new drive belt to the
tractor.
a
b
b
a
b
c
d
a
c
b
d
WARNING:Tractor blades are sharp. Wrap the blade
or wear gloves, and use extra caution when servicing
them.