28
MT100 LAWN TRACTOR
29
MT100 LAWN TRACTOR
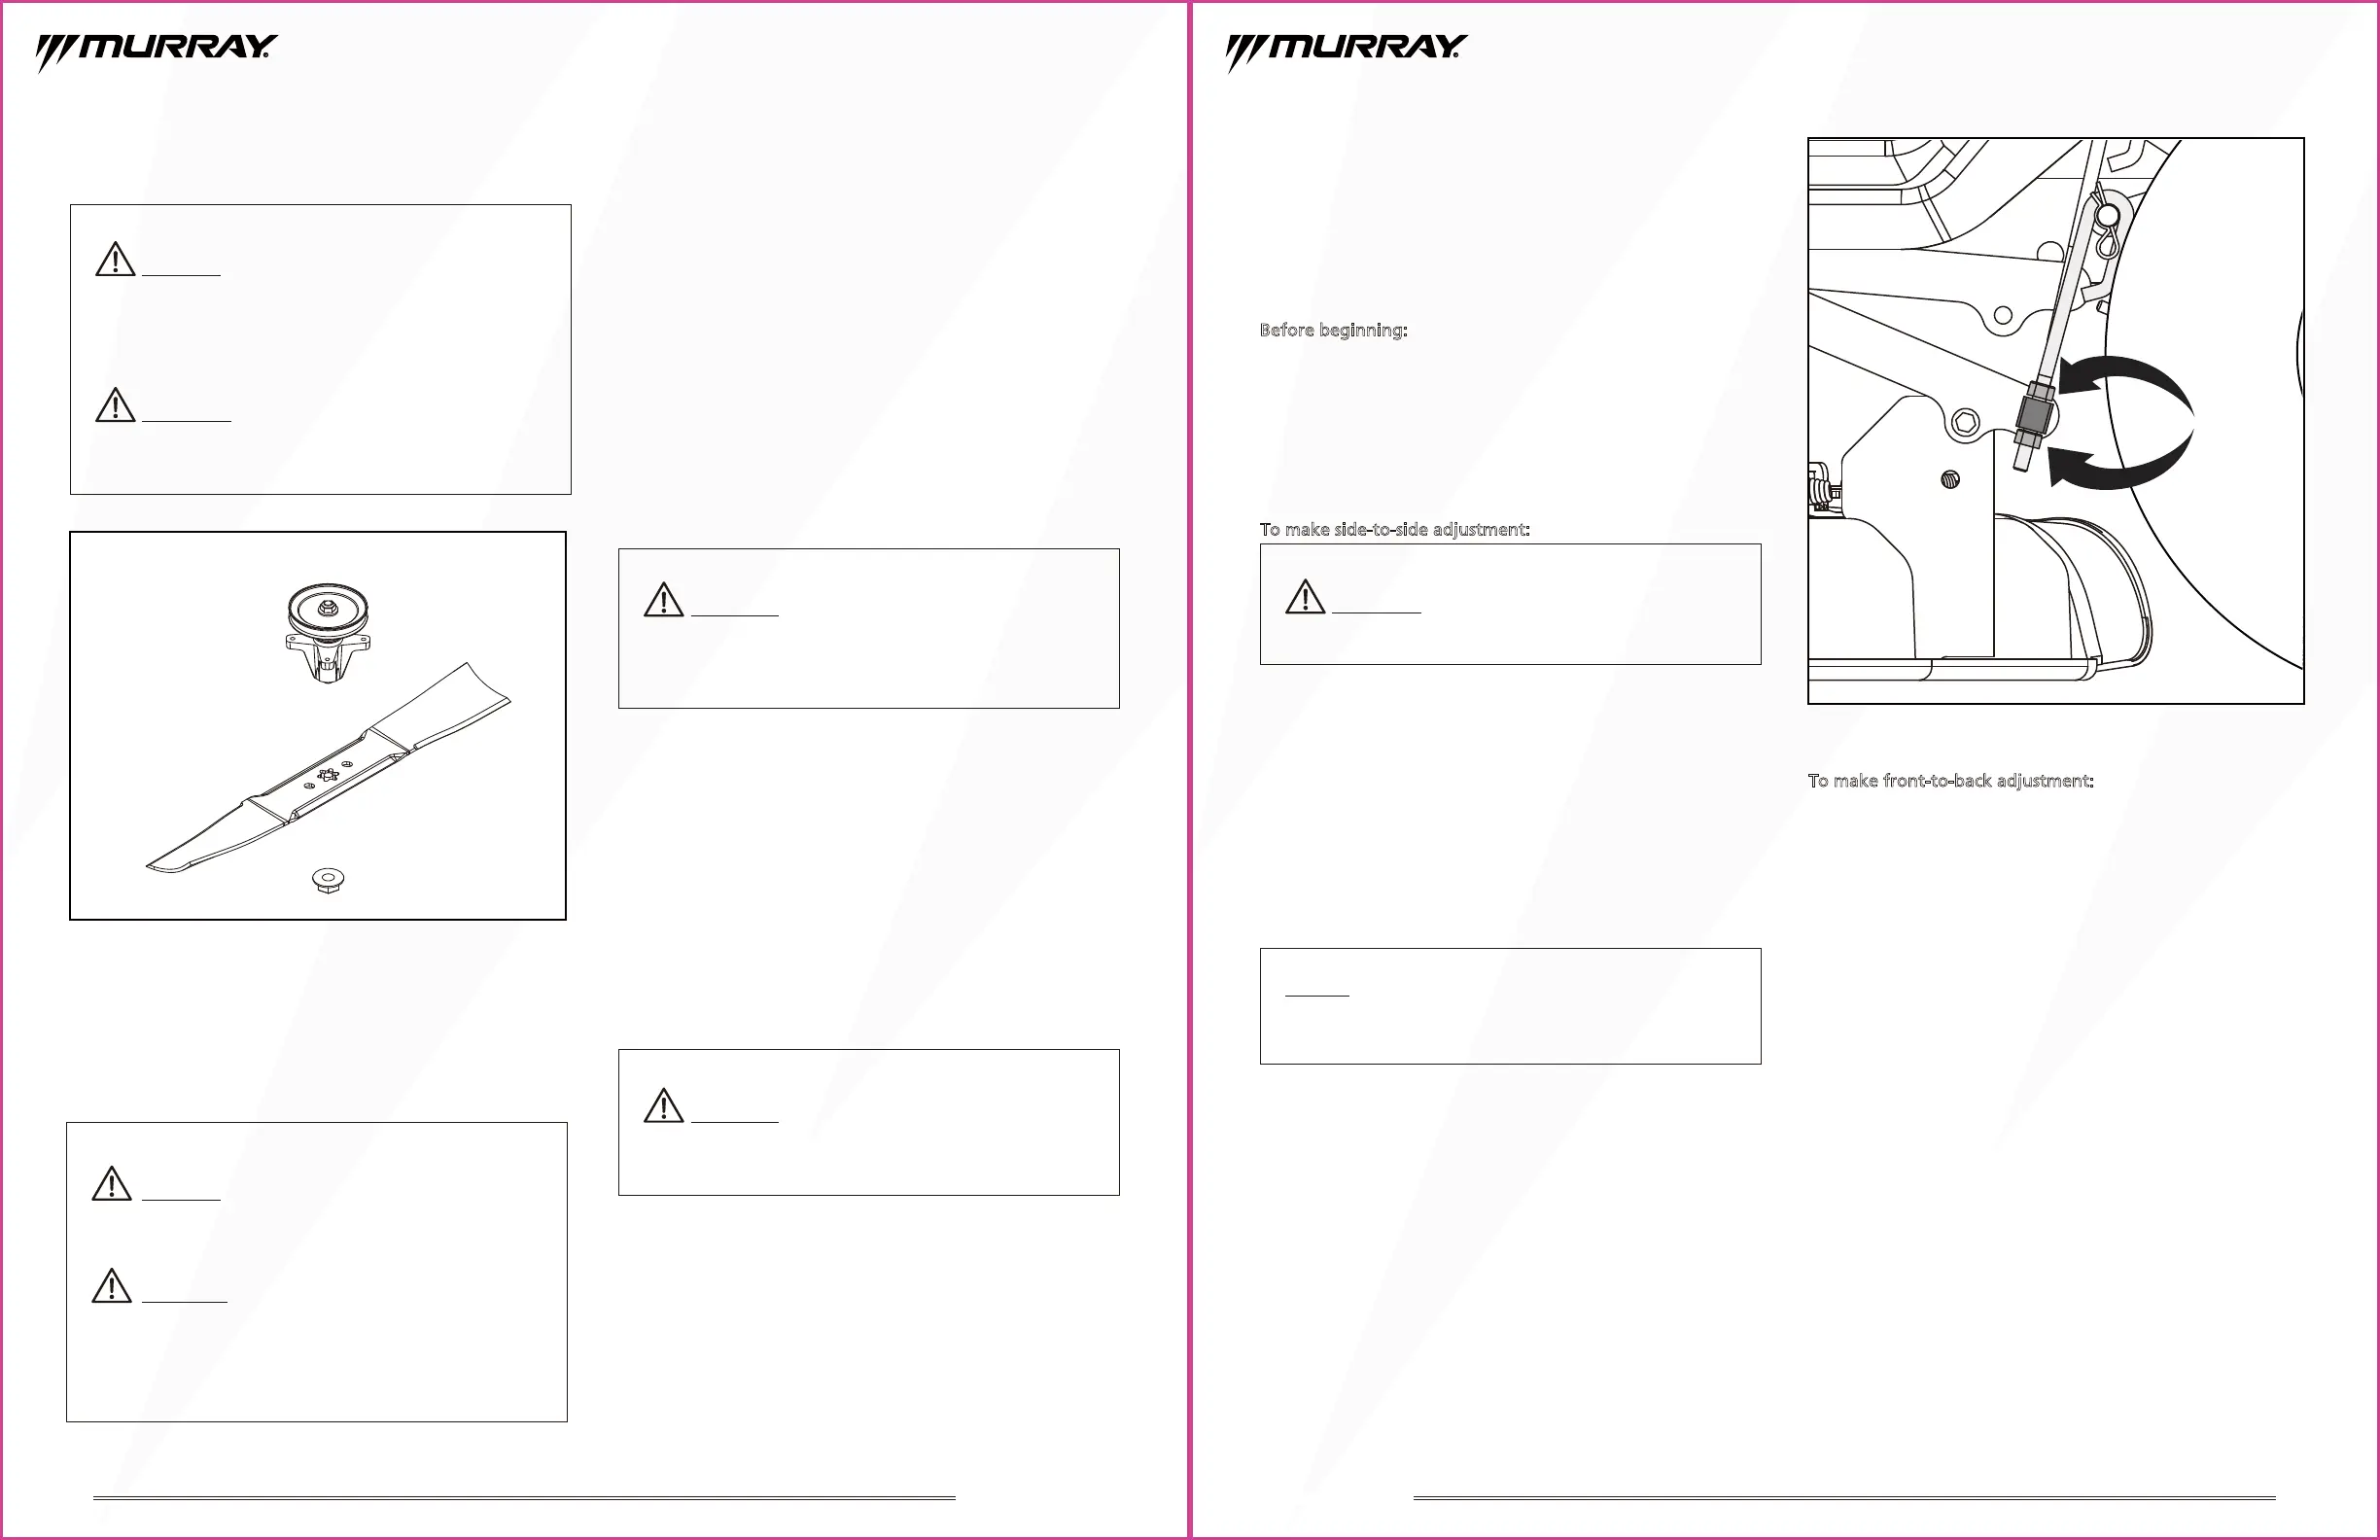
Leveling the Cutting Deck
If your lawn appears unevenly cut after using the tractor,
the cutting deck may need adjusting. Before deciding that
leveling the cutting deck is necessary, make sure the tires
are properly inflated to the recommended PSI when
mowing.
Before beginning:
1. Make sure the tractor is in neutral.
2. Stop the engine, engage the parking brake, and remove
the key.
3. Raise the height of the cutting deck to its highest
position.
To make side-to-side adjustment:
1. Position the blades so that the ends point toward the
sides of the mower.
2. Measure the distance from the bottom, outside tip
(cutting tip) of the blade to the ground. Measure the left
blade's cutting tip to the ground and the right blade's
cutting tip to the ground. If the measurements are more
than 3/16" off, proceed to the next step.
3. Turn the adjustment nuts up to raise or down to lower
the left side of the cutting deck. (a, Fig. 29)
4. Measure again. The deck is properly balanced when both
blade tip measurements taken earlier are equal.
Fig. 29
To make front-to-back adjustment:
1. Position the right blade so that the ends now point
toward the front and back ofthe tractor.
2. Measure the distance from the tip of the blade to the
ground. For optimal cutting results, the front tip of the
blade should be from 1/4 in. to 3/8 in. lower than the rear
tip.
3. If front-to-back adjustment is needed, after loosing the
outer jam nut, turn the inner adjustment nut clockwise to
raise or counterclockwise to lower the front of the
cutting deck. (Fig. 30)
4.
Measure again to verify the front tip is now 1/4 in. to 3/8 in.
lower than the rear tip. If not, continue to adjust and
measure until they are.
5. Without moving the inner adjustment nut, re-tighten the
outer jam nut to secure the inner adjustment nut in
place. (Fig. 30)
NOTICE: If raising the side, you will need to turn the top
adjustment nut first. If lowering, turn the bottom nut
first.
WARNING:
Tractor blades are sharp. Wrap the blade
or wear gloves, and use extra caution when servicing them.
WARNING:Ensure blade is properly seated and the
blade nut is tightened to the torque specifications above.
Failure to properly attach the blade could cause it to
come loose and result in possible serious personal injury.
WARNING: A poorly balanced blade will cause
excessive vibration, may damage the tractor, and
result in personal injury.
CAUTION:
WARNING:
If raising the mower to access the blades,
make sure the mower is properly secured and the parking
brake is set before proceeding. Failure to properly secure
the mower could cause it to fall, resulting in death or
possible serious personal injury.
If necessary, raise the mower by placing
it on a lift or using a jack and jack stands.
CAUTION:
Only use replacement blades authorized
by the manufacturer of your tractor. Use of blades not
authorized is hazardous and may damage your riding
mower.
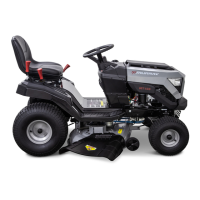
Replacing the Cutting Blades
Fig. 28
1. Shut off the engine, remove the key, and engage the
parking brake
2. Raise the height of the cutting deck to its highest
position to allow access to blades.
3. Use a blade removal tool (not provided) to prevent the
blade from turning.
4. Loosen the blade nut by turning it counterclockwise (as
viewed from bottom of the mower) using a 24 mm
wrench or socket (not provided).
5. Remove the blade nut and blade. (Fig. 28)
6. When replacing or re-installing the blade, be sure to
install the blade with the side with a part number
stamped in it facing the ground
7. Thread the blade nut on the shaft and finger tighten.
8. Torque the blade nut down clockwise using a torque
wrench (not provided) to ensure the bolt is properly
tightened. The recommended torque for the blade nut is
70-85 ft lbs.
9. Repeat with the second blade.
Sharping the Blade
1. To properly sharpen the cutting blades, remove equal
amounts of metal from both ends of the blades along the
cutting edges. Always grind each cutting blade edge
equally to maintain proper blade balance.
2. Test the blade’s balance using a blade balancer
(not provided). Grind metal from the heavy side until it
balances evenly.
WARNING:
Tractor blades are sharp. Wrap the blade
or wear gloves, and use extra caution when servicing them.
a
Using the Throttle/Choke Lever
The throttle / choke lever is located on the left side of the
mower’s dash panel. When starting the engine that is cold,
push the throttle fully forward into the "CHOKE"
position. (Fig. 15)
The purpose of the choke is to restrict the flow of air so that
the fuel-air mixture is made richer (more fuel, less air) which
aids in starting the engine. After starting the engine, move
the throttle downwards to the FAST position.
Fig. 15
Stop the Engine
• Do not choke the carburetor to stop the engine.
1. If the blades are engaged, disengage the blades.
2. Shift into neutral.
3. Move the throttle to the SLOW position.
4. Turn the ignition key to the OFF position. Remove the
key.
5. Engage the parking brake.